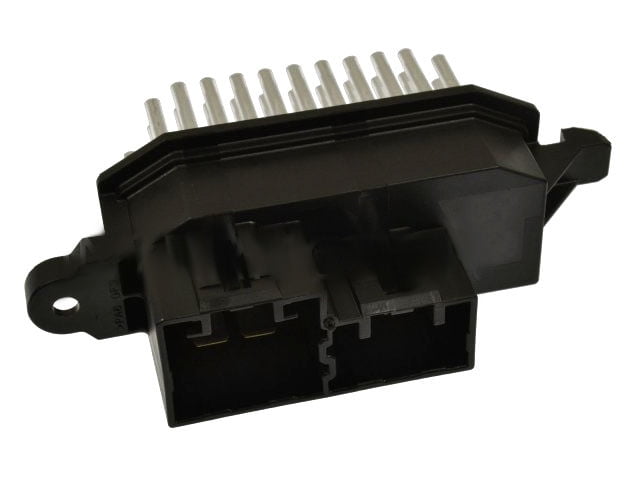
2017 Nissan Rogue Blower Motor Resistor
The 2017 Nissan Rogue, a popular compact SUV, utilizes a sophisticated climate control system to ensure passenger comfort. At the heart of this system lies the blower motor, responsible for circulating air throughout the cabin. Controlling the speed of this motor – and thus, the intensity of the airflow – is the blower motor resistor. When this component fails, it can manifest in various frustrating ways, ranging from a blower motor that operates only on a single speed to one that doesn't work at all. This article delves into the inner workings of the 2017 Nissan Rogue's blower motor resistor, exploring its function, common failure modes, diagnostic procedures, and basic replacement strategies. While this guide provides technical insights, always consult a qualified technician for complex repairs or when unsure about a procedure.
Understanding the Blower Motor Resistor's Role
The blower motor resistor's primary function is to regulate the voltage supplied to the blower motor. The blower motor is a DC electric motor; its speed is directly proportional to the voltage it receives. A higher voltage equates to a faster speed, and a lower voltage results in a slower speed. The climate control system, through the dashboard controls, allows the driver to select different blower speeds. The blower motor resistor acts as a voltage divider, effectively dropping the voltage to the motor in predetermined steps, thus creating the different speed settings.
Essentially, it's a series of resistors connected in a circuit. Each resistor is designed to drop a specific amount of voltage. When a particular speed setting is selected on the dashboard, the climate control module activates a specific circuit within the resistor pack. This directs the current through the appropriate resistor (or combination of resistors) before it reaches the blower motor. For example, the lowest speed setting will route the current through a larger resistance, dropping more voltage and resulting in a slow fan speed. Conversely, the highest speed setting often bypasses the resistors entirely, delivering full battery voltage directly to the motor for maximum airflow. The resistor pack is typically located in the HVAC box, near the blower motor, and is cooled by the airflow produced by the blower.
Typical Failure Modes
The blower motor resistor operates under demanding conditions, subject to heat generated by the resistors themselves and variations in ambient temperature and humidity. As a result, it's a relatively common failure point in automotive HVAC systems. Common failure modes include:
- Open Circuit in Resistor(s): This is perhaps the most frequent failure mode. A resistor can develop a break in its conductive path due to overheating, vibration, or corrosion. This results in that particular speed setting failing to operate. Often, the lower speed settings are the first to go, as they utilize the highest resistance values and generate the most heat.
- Thermal Fuse Failure: Many blower motor resistors incorporate a thermal fuse as a safety mechanism. This fuse is designed to blow (open the circuit) if the resistor pack overheats, preventing damage to the wiring harness or other components. Overheating can occur due to a restricted airflow (e.g., a clogged cabin air filter) or a failing blower motor drawing excessive current.
- Corrosion: Moisture ingress can lead to corrosion of the resistor terminals and connections, increasing resistance and causing intermittent operation or complete failure.
- Short Circuit: Although less common than open circuits, a short circuit can occur within the resistor pack. This can result in the blower motor operating at full speed regardless of the selected setting.
Diagnosing a Faulty Blower Motor Resistor
Diagnosing a faulty blower motor resistor typically involves a process of elimination and careful testing. Here's a step-by-step guide:
- Symptom Verification: Begin by confirming the symptoms. Does the blower motor only work on certain speeds? Does it not work at all? Does it work intermittently? Note the specific symptoms as they will guide the diagnostic process.
- Check the Fuses: Before suspecting the resistor, check the fuses related to the blower motor circuit. Refer to the vehicle's owner's manual for the fuse locations. A blown fuse indicates an overload in the circuit, which could be caused by a faulty blower motor or a short circuit in the wiring. Replace the fuse and test the system. If the fuse blows again immediately, investigate further for a short circuit or a failing blower motor.
- Inspect the Blower Motor Resistor Connector: Visually inspect the connector that plugs into the blower motor resistor. Look for signs of corrosion, melted terminals, or loose wires. Clean corroded terminals with electrical contact cleaner. Repair or replace damaged connectors as needed.
- Test for Voltage at the Blower Motor Resistor Connector: With the ignition on and the blower motor switch set to various speeds, use a multimeter to check for voltage at the blower motor resistor connector. Refer to the vehicle's wiring diagram to identify the correct terminals. You should see varying voltages corresponding to the different speed settings. If there is no voltage at the connector, the problem may lie upstream, such as with the climate control switch or the wiring harness.
- Resistance Testing (Blower Motor Resistor): If voltage is present at the connector, disconnect the blower motor resistor and use a multimeter to measure the resistance between the different terminals. Compare your readings to the specifications in the vehicle's service manual. An open circuit (infinite resistance) indicates a faulty resistor. Note: The exact resistance values will vary depending on the specific resistor design.
- Blower Motor Test: Before replacing the resistor, it's good practice to test the blower motor itself. A failing blower motor can draw excessive current, causing the resistor to overheat and fail prematurely. You can test the blower motor by applying direct voltage to its terminals (disconnecting it from the resistor first). If the motor runs erratically or not at all, it likely needs to be replaced.
Replacement Procedures (General Guidance)
Replacing the blower motor resistor is a relatively straightforward task, but it requires careful attention to detail. Always disconnect the negative battery cable before working on any electrical component.
- Location: The blower motor resistor is typically located in the HVAC box, often behind the glove compartment or under the dashboard on the passenger side. Consult the vehicle's service manual for the exact location.
- Access: Remove any necessary trim panels or components to gain access to the resistor. This may involve removing screws, clips, or bolts.
- Disconnect the Connector: Carefully disconnect the electrical connector from the resistor. Pay attention to any locking mechanisms or retaining clips.
- Remove the Resistor: Remove the screws or bolts that secure the resistor to the HVAC box. Gently pull the resistor out of its housing.
- Install the New Resistor: Install the new resistor in the reverse order of removal. Ensure that the resistor is properly seated and secured.
- Reconnect the Connector: Reconnect the electrical connector to the resistor, ensuring that it is fully engaged and locked in place.
- Reassemble: Reinstall any trim panels or components that were removed to access the resistor.
- Test: Reconnect the negative battery cable and test the blower motor at all speeds to verify that the repair was successful.
Important Considerations
- Use Quality Replacement Parts: When replacing the blower motor resistor, use a high-quality replacement part from a reputable supplier. Using a cheap or inferior part can lead to premature failure and other problems.
- Inspect the Blower Motor: As mentioned earlier, a failing blower motor can contribute to resistor failure. Consider replacing the blower motor at the same time as the resistor, especially if the blower motor is showing signs of wear or age.
- Cabin Air Filter: A clogged cabin air filter restricts airflow, which can cause the blower motor resistor to overheat. Replace the cabin air filter regularly to ensure proper airflow and prolong the life of the resistor and blower motor. The 2017 Rogue's filter location is behind the glove box and is simple to replace.
- Consult a Service Manual: Always consult the vehicle's service manual for specific instructions and torque specifications.
By understanding the function, failure modes, and diagnostic procedures associated with the 2017 Nissan Rogue's blower motor resistor, you can effectively troubleshoot and resolve common HVAC system problems. Remember, safety is paramount. If you're not comfortable performing these procedures, consult a qualified automotive technician.