2017 Nissan Rogue Windshield Replacement
Replacing a windshield might seem like a straightforward task, but behind the seemingly simple act lies a process steeped in engineering considerations and meticulous procedures. This article will delve into the intricate details of replacing a windshield on a 2017 Nissan Rogue, focusing not only on the 'how' but also the 'why' behind each step. We'll explore the materials, tools, and techniques involved, aiming to provide a comprehensive understanding for the curious reader and amateur engineer.
Understanding the Windshield's Role
Before diving into the replacement process, it's crucial to appreciate the windshield's multifaceted role in vehicle safety and structural integrity. Beyond merely protecting occupants from the elements, the windshield contributes significantly to the vehicle's overall rigidity. In the event of a rollover, it provides crucial roof support. It also acts as a backstop for deployed airbags, ensuring they inflate properly and protect occupants effectively. Furthermore, advanced driver-assistance systems (ADAS) often rely on sensors and cameras mounted on or near the windshield, making proper installation and calibration paramount.
Tools and Materials Required
Successful windshield replacement hinges on having the right tools and materials. Here’s a detailed list:
- Windshield Removal Tools: These include a cold knife, wire-cutting tool (e.g., Equalizer Express), and glass removal suction cups. The choice depends on the adhesive used and personal preference. A cold knife, while requiring more physical effort, offers precise control. Wire-cutting tools, on the other hand, are faster but demand careful handling to avoid damaging the pinch weld.
- Adhesive Removal Tools: Razor blades, scrapers, and specialized adhesive removal pads are essential for cleaning the pinch weld. Power tools like rotary brushes can expedite the process, but caution is required to avoid removing the paint and exposing the metal to rust.
- Windshield Primer: This is a crucial step often overlooked. Primer promotes adhesion between the adhesive and both the windshield and the pinch weld. Using the correct primer and applying it according to the manufacturer's instructions is critical for a strong, long-lasting bond.
- Urethane Adhesive: The type of adhesive used significantly impacts the structural integrity of the installation. High-modulus, fast-curing urethanes are generally preferred, offering superior strength and allowing for quicker drive-away times. Check the adhesive's expiration date; expired adhesive will not bond properly.
- Caulking Gun: A high-quality caulking gun is necessary for applying the urethane adhesive evenly and consistently. Electric or pneumatic caulking guns can provide better control and reduce fatigue, especially for larger vehicles.
- Glass Cleaner: For thoroughly cleaning the new windshield before installation.
- Suction Cups: Heavy-duty suction cups are used to lift and precisely position the new windshield.
- Safety Glasses and Gloves: Essential for protecting eyes and hands from broken glass and chemicals.
- Pinch Weld Scraper/Tool: This tool is used for properly cleaning the pinch weld where the old windshield adhesive was. The tool makes it easier to obtain a clean and even surface, so the new adhesive can create a strong bond.
- New Windshield: Ensure the replacement windshield is compatible with the 2017 Nissan Rogue, including any ADAS features. Verify the glass meets all relevant safety standards (e.g., DOT certification).
Step-by-Step Windshield Replacement
The replacement process can be broken down into several key stages:
1. Preparation and Protection
The first step is to prepare the vehicle and protect surrounding areas. Cover the hood, fenders, and dashboard with protective cloths or plastic sheeting to prevent scratches or damage. Disconnect the negative battery terminal to prevent accidental activation of electrical components. Remove any interior trim pieces that may obstruct the windshield removal, such as the rearview mirror and sun visors.
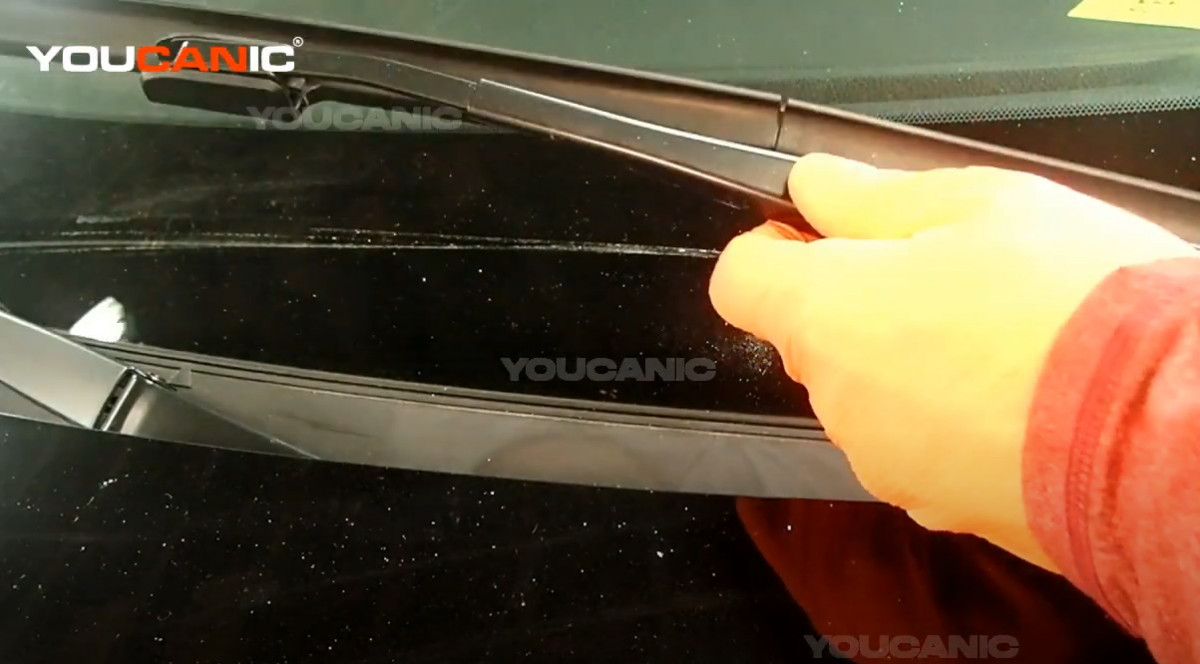
2. Windshield Removal
This is arguably the most critical step, requiring patience and precision. Using your chosen removal tool (cold knife or wire-cutting tool), carefully separate the windshield from the vehicle frame. Start at one corner and work your way around the entire perimeter, ensuring the tool remains flush against the glass to avoid damaging the pinch weld. Apply even pressure and avoid jerky movements. Once the windshield is free, use suction cups to lift it out of the frame.
3. Pinch Weld Preparation
This stage is paramount for ensuring a proper bond. The pinch weld is the metal flange that the windshield adheres to. Thoroughly remove all traces of old adhesive using razor blades, scrapers, and adhesive removal pads. Pay close attention to detail, as any remaining adhesive can compromise the new bond. Inspect the pinch weld for rust or corrosion. If present, treat it with a rust converter and apply a protective coating before proceeding.
Important: Avoid grinding down the pinch weld excessively, as this can weaken its structural integrity. The goal is to create a clean, smooth surface for the new adhesive to adhere to.
4. Priming
Apply windshield primer to both the perimeter of the new windshield and the cleaned pinch weld, following the manufacturer's instructions. The primer acts as a bonding agent, promoting adhesion between the adhesive and the glass and metal. Allow the primer to dry completely before proceeding to the next step. Primer is crucial for long term adhesion.
5. Adhesive Application
Using a high-quality caulking gun, apply a uniform bead of urethane adhesive around the perimeter of the pinch weld. The bead should be of the correct height and width, as specified by the adhesive manufacturer. Avoid gaps or inconsistencies in the bead, as these can create weak points in the bond. Uneven application can cause leaks.
6. Windshield Installation
Carefully lift the new windshield using suction cups and align it with the frame. Gently lower the windshield into place, ensuring it is centered and properly seated against the adhesive. Apply even pressure around the perimeter to ensure a complete and uniform bond. Use masking tape to secure the windshield in place while the adhesive cures. The curing time will vary depending on the adhesive used, but it is generally recommended to allow at least a few hours before driving the vehicle. Be sure to use proper suction cups to avoid damaging the windshield.
7. Final Touches and Calibration
Once the adhesive has cured, remove the masking tape and reinstall any interior trim pieces that were removed earlier. Clean the windshield thoroughly with glass cleaner. If the vehicle is equipped with ADAS, it is essential to recalibrate the sensors and cameras according to the manufacturer's specifications. Failure to do so can compromise the functionality of these systems and potentially lead to safety issues.
Common Mistakes and How to Avoid Them
Several common mistakes can compromise the quality of a windshield replacement. Here's how to avoid them:
- Using the Wrong Adhesive: Always use a high-quality urethane adhesive specifically designed for windshield installation. Avoid using silicone or other generic adhesives, as they will not provide the necessary strength and durability.
- Skipping the Priming Step: Priming is essential for promoting adhesion between the adhesive and the glass and metal. Skipping this step can significantly reduce the lifespan of the bond.
- Improper Pinch Weld Preparation: Thoroughly remove all traces of old adhesive and treat any rust or corrosion before applying the new adhesive. A clean, smooth surface is crucial for a strong bond.
- Applying the Adhesive Unevenly: Ensure the adhesive bead is uniform in height and width, with no gaps or inconsistencies. Uneven application can create weak points in the bond.
- Driving the Vehicle Too Soon: Allow the adhesive to cure completely before driving the vehicle. Driving too soon can compromise the bond and potentially lead to leaks or even windshield detachment.
- Neglecting ADAS Calibration: If the vehicle is equipped with ADAS, recalibrate the sensors and cameras after windshield replacement. Failure to do so can compromise the functionality of these systems.
Conclusion
Replacing a windshield on a 2017 Nissan Rogue is a complex process that requires careful attention to detail and a thorough understanding of the materials and techniques involved. By following the steps outlined in this guide and avoiding common mistakes, you can ensure a successful and long-lasting installation. While this article provides a detailed overview, it's crucial to consult the manufacturer's instructions for your specific vehicle and adhesive. Consider seeking professional assistance if you lack the necessary experience or confidence. A properly installed windshield is crucial for vehicle safety and structural integrity, making it a worthwhile investment in your vehicle's longevity and your personal well-being. Remember, safety is always the priority.