2017 Nissan Titan Tailgate Replacement
The 2017 Nissan Titan, a robust and capable pickup truck, boasts a tailgate designed for both utility and convenience. While generally durable, tailgates can suffer damage from accidents, heavy loads, or simple wear and tear. This guide provides a detailed look at the process of replacing a 2017 Nissan Titan tailgate, outlining the tools required, the steps involved, and potential challenges you might encounter. It's intended for informational purposes; professional repair is always recommended if you're uncomfortable with any of the steps.
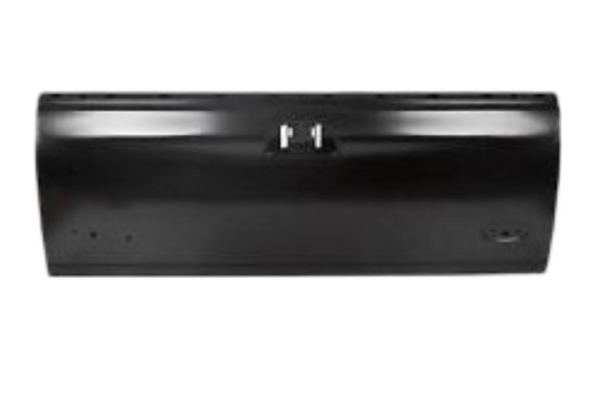
Understanding the 2017 Titan Tailgate Assembly
Before diving into the replacement procedure, it's helpful to understand the components that comprise the tailgate assembly. This model typically features a dampened tailgate, meaning it uses a torsion bar or gas strut system to control the speed at which it opens, preventing it from slamming down. Understanding these components helps in a smooth disassembling process.
- Tailgate Shell: The main body of the tailgate, usually constructed from stamped steel or aluminum.
- Hinges: Located at the bottom of the tailgate, these allow it to pivot open and closed.
- Latch Mechanism: Secures the tailgate in the closed position. This often includes internal rods and levers connected to the exterior handle.
- Handle and Lock Cylinder: Used to open the tailgate and, optionally, lock it.
- Dampening System: A torsion bar or gas strut that provides controlled descent.
- Wiring Harness (if equipped): Some models have a backup camera, tailgate lock actuator, or bed lights integrated into the tailgate.
- Support Cables or Straps: These limit the opening angle and prevent the tailgate from overextending.
Tools and Materials Required
Having the right tools readily available is crucial for efficient and safe tailgate replacement. Here's a comprehensive list:
- Socket Set: Metric sockets are a must, especially sizes around 10mm, 13mm, and 15mm. A deep socket set can also be useful.
- Wrench Set: Similar to the socket set, metric wrenches are needed for certain bolts and nuts.
- Screwdrivers: Both Phillips head and flathead screwdrivers will be necessary.
- Torque Wrench: Essential for tightening bolts to the manufacturer's specified torque settings. Improper torque can lead to loosening or damage.
- Panel Removal Tool: Helps to remove interior trim panels without causing damage.
- Pliers: For gripping and manipulating small parts.
- Wire Cutters/Strippers: Needed if the tailgate has electrical connections that need to be disconnected.
- Multimeter (optional): To test electrical connections if troubleshooting is required.
- Penetrating Oil: To loosen rusted or corroded bolts.
- Safety Glasses: To protect your eyes from debris.
- Gloves: To protect your hands.
- Work Light: To provide adequate illumination.
- New Tailgate Assembly: Ensure it's the correct part number for your 2017 Nissan Titan model and trim level.
- Helper (recommended): Tailgates can be heavy and awkward to handle. Having someone assist you is highly recommended.
- Protective Blanket or Padding: To prevent scratching the truck's bed or bumper.
Step-by-Step Tailgate Replacement Procedure
This section outlines the detailed steps for removing the old tailgate and installing the new one. Always prioritize safety and disconnect the negative battery terminal before working on any electrical components.
1. Preparation and Safety
Park the truck on a level surface and engage the parking brake. Place the protective blanket or padding on the bumper and bed to prevent scratches. Disconnect the negative battery terminal to prevent accidental electrical shorts.
2. Disconnecting the Wiring Harness (If Equipped)
If your Titan's tailgate has a backup camera, lock actuator, or bed lights, you'll need to disconnect the wiring harness. Locate the connector, typically found near the hinge on the inside of the bed. Carefully disconnect the connector, ensuring you don't damage the pins or wires. Some connectors have locking tabs that need to be depressed before pulling them apart. Document how the connector is routed to make re-installation easier. Do not force the connector apart.
3. Detaching the Support Cables/Straps
The support cables or straps are usually attached to the tailgate and the bed with hooks or clips. Carefully detach these, noting their orientation for reassembly. Some cables may have adjustable tension; take note of the current setting before removing them.
4. Removing the Tailgate
This is the most crucial step and often requires a helper. There are typically two hinges connecting the tailgate to the truck bed. The hinges may utilize a simple lift-off design, or they may have retaining clips or bolts that need to be removed. Here's how to proceed depending on the hinge type:
Lift-Off Hinge (Most Common): With your helper supporting the tailgate, gently lift the tailgate upwards and slightly outwards at a 45-degree angle. This action should disengage the tailgate from the hinge pivots. Be prepared for the weight of the tailgate.
Hinges with Retaining Clips: Locate the retaining clips (usually small metal clips) on the hinges. Use a flathead screwdriver or pliers to carefully remove these clips. With the clips removed, lift the tailgate upwards and outwards as described above.
Hinges with Bolts: Use the appropriate socket or wrench to remove the bolts securing the hinges to the truck bed. With the bolts removed, lift the tailgate outwards and away from the truck. Ensure your helper provides adequate support to prevent the tailgate from falling.
5. Transferring Components (If Necessary)
In some cases, you may need to transfer components from the old tailgate to the new one, such as the lock cylinder, handle, or dampening strut. Carefully remove these components from the old tailgate, paying close attention to how they are assembled. Take photos for reference. Install the components on the new tailgate, ensuring they are properly aligned and secured.
6. Installing the New Tailgate
With your helper assisting, carefully align the new tailgate with the hinges on the truck bed. Reverse the removal process to secure the tailgate. Make sure the tailgate seats fully.
Lift-Off Hinge: Align the hinge pivots on the tailgate with the corresponding receivers on the truck bed. Lower the tailgate straight down, ensuring the pivots engage properly.
Hinges with Retaining Clips: Align the hinges and insert the hinge pivots into the receivers. Secure the hinges with the retaining clips.
Hinges with Bolts: Align the hinges and install the bolts. Tighten the bolts to the manufacturer's specified torque settings using a torque wrench. This is very important to avoid the tailgate coming loose at a later time.
7. Reattaching the Support Cables/Straps
Reattach the support cables or straps, ensuring they are properly secured and adjusted. If the cables have adjustable tension, set them to the same setting as before.
8. Reconnecting the Wiring Harness (If Equipped)
Reconnect the wiring harness to the tailgate. Ensure the connector is fully seated and the locking tab (if present) is engaged. Route the wiring harness in the same manner as before, securing it with any clips or ties.
9. Testing and Final Adjustments
Before closing the tailgate completely, test the latch mechanism to ensure it functions properly. Open and close the tailgate several times, checking for smooth operation and proper alignment. If necessary, adjust the hinges or latch mechanism to achieve the desired fit and function. If the tailgate has a dampening system, verify that it operates smoothly and prevents the tailgate from slamming down. Reconnect the negative battery terminal.
Troubleshooting Common Issues
Even with careful execution, you might encounter some challenges during the tailgate replacement process. Here are some common issues and potential solutions:
- Stuck Bolts: Use penetrating oil to loosen rusted or corroded bolts. Allow the oil to soak in for several minutes before attempting to remove the bolts. If the bolts are severely stuck, you may need to use a bolt extractor.
- Damaged Wiring Harness: If the wiring harness is damaged, you may need to repair it or replace it. Inspect the wires for cuts, breaks, or corrosion. Use wire strippers and connectors to repair damaged wires.
- Misaligned Tailgate: If the tailgate is misaligned, adjust the hinges or latch mechanism. Loosen the bolts securing the hinges and adjust the position of the tailgate until it is properly aligned. Tighten the bolts to the manufacturer's specified torque settings.
- Faulty Latch Mechanism: If the latch mechanism is faulty, it may need to be replaced. Inspect the latch mechanism for damage or wear. Replace any worn or damaged parts.
Conclusion
Replacing a 2017 Nissan Titan tailgate is a manageable task for the moderately skilled DIYer with the proper tools and a willingness to follow instructions carefully. By understanding the tailgate assembly, having the right tools, and following the step-by-step procedure outlined in this guide, you can successfully replace your tailgate and restore the functionality of your truck. Remember to prioritize safety and seek professional assistance if you encounter any difficulties. The 2017 Nissan Titan is known for its reliability, and keeping it in good repair adds value and performance.