2018 Nissan Rogue Brake Pads And Rotors
Alright, let's talk about brake pads and rotors on your 2018 Nissan Rogue. This isn't a super complicated job, but it's critical for safety, so paying attention to detail is paramount. We'll cover everything from identifying when it's time for a change to the actual replacement process, assuming you're comfortable with intermediate-level DIY.
Identifying the Need for Replacement
First, how do you know your brakes need attention? There are several telltale signs:
- Squealing or Grinding Noises: This is the most common symptom. Many brake pads have a wear indicator – a small piece of metal that rubs against the rotor when the pads are nearing the end of their life. This produces a high-pitched squeal. Grinding, on the other hand, usually indicates that the pads are completely worn, and the metal backing plate is scraping against the rotor. This is bad and requires immediate attention.
- Reduced Braking Performance: If you notice you need to apply more pressure to the brake pedal to achieve the same stopping power, your brake pads might be worn or your rotors might be glazed (smooth and shiny).
- Vibration or Pulsation: This usually indicates warped rotors. Warping occurs due to excessive heat buildup and uneven cooling. You'll feel a vibration in the steering wheel or through the brake pedal when braking.
- Visual Inspection: A simple visual check can reveal a lot. You can often see the brake pads through the wheel spokes. Look for thin pads (less than 3mm of friction material remaining). Also, inspect the rotors for deep grooves, scoring, or discoloration.
- Brake Pedal Feels Spongy: This could indicate air in the brake lines or a problem with the master cylinder, not necessarily the pads/rotors themselves, but it’s worth investigating alongside the brake condition.
Keep in mind that brake pad life varies depending on driving habits, road conditions, and the type of brake pads you're using. More aggressive driving and frequent stops will wear down the pads faster.
Understanding Brake Components (Rogue Specific)
Before we dive into the replacement process, let's quickly review the brake components specific to the 2018 Nissan Rogue. While designs vary slightly year to year, the core principles remain the same:
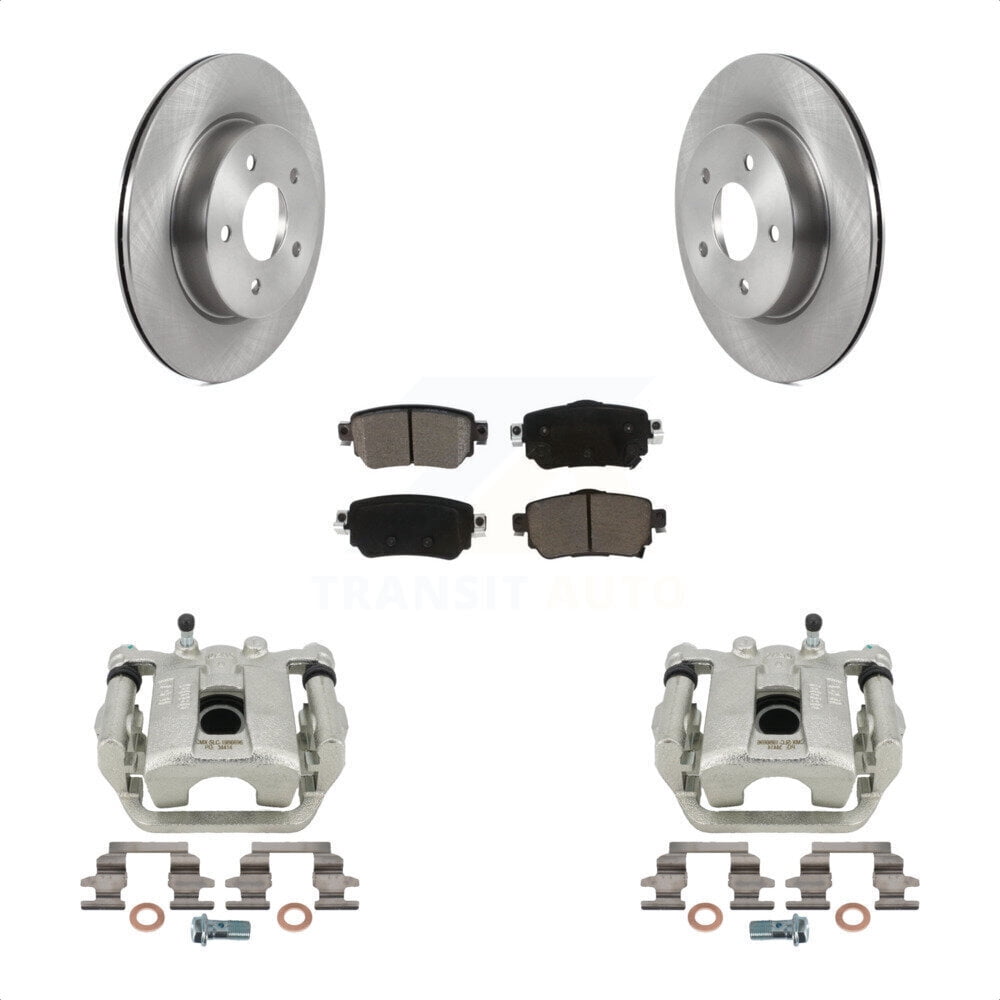
- Brake Pads: These are the friction material that presses against the rotor to slow down the vehicle. The 2018 Rogue uses disc brakes on all four wheels.
- Rotors (Discs): These are the metal discs that rotate with the wheel. The brake pads clamp onto them to create friction.
- Calipers: These house the brake pads and contain the pistons that push the pads against the rotor.
- Brake Lines: These are hydraulic lines that carry brake fluid from the master cylinder to the calipers.
- Brake Fluid: This is the hydraulic fluid that transmits the force from your foot on the brake pedal to the calipers. Use the correct DOT specification for your Rogue (usually DOT 3 or DOT 4). Check your owner's manual.
- Caliper Bracket: This is a metal frame that holds the caliper in place.
- Caliper Guide Pins/Bolts: These allow the caliper to slide smoothly as the brake pads wear. They need to be properly lubricated.
- Anti-Rattle Clips: These help to prevent the brake pads from rattling in the caliper.
Tools and Materials Needed
Here's a list of the tools and materials you'll need for the job:
- New Brake Pads: Choose a quality brand. Ceramic pads tend to be quieter and last longer, but they can be more expensive. Semi-metallic pads offer good stopping power and are more affordable. Research which type is right for your driving style.
- New Rotors (Recommended): If your rotors are worn, scored, or warped, it's best to replace them along with the pads. Sometimes, rotors can be resurfaced (turned), but this reduces their thickness and can make them more prone to warping in the future. I generally advise replacement for cost effectiveness and reliability.
- Brake Cleaner: To clean the rotors and calipers.
- Caliper Grease (Synthetic): For lubricating the caliper slide pins.
- Torque Wrench: Essential for tightening bolts to the correct specifications.
- Socket Set: Including sockets for the caliper bolts, wheel lug nuts, and any other necessary fasteners.
- Wrench Set: For holding the caliper guide pins while loosening the bolts.
- Brake Caliper Compressor Tool: To push the caliper piston back into the caliper. This is essential, especially for the front calipers, which have the parking brake mechanism built in.
- Jack and Jack Stands: To safely lift and support the vehicle. Never work under a vehicle supported only by a jack!
- Wheel Chocks: To prevent the vehicle from rolling.
- Gloves: To protect your hands.
- Safety Glasses: To protect your eyes.
- Old Rags or Paper Towels: For cleaning.
- Brake Fluid (Optional): If you plan to bleed the brakes after the replacement.
- Penetrating Oil (Optional): To help loosen stubborn bolts.
Step-by-Step Replacement Process
Okay, let's get to the actual replacement. This procedure applies to both the front and rear brakes, although there might be slight variations. We'll focus on one wheel at a time.
- Safety First: Park the vehicle on a level surface, engage the parking brake, and chock the rear wheels (if working on the front brakes) or the front wheels (if working on the rear brakes).
- Loosen Lug Nuts: Use the lug wrench to loosen the lug nuts on the wheel you're working on. Do not remove them completely yet.
- Jack Up the Vehicle: Refer to your owner's manual for the correct jacking points. Place the jack under the designated jacking point and raise the vehicle until the wheel is off the ground.
- Secure with Jack Stands: Place jack stands under the vehicle's frame near the jacking point. Make sure the jack stands are securely positioned before lowering the vehicle onto them.
- Remove the Wheel: Finish removing the lug nuts and take off the wheel.
- Inspect the Brake Components: Take a good look at the brake pads, rotors, calipers, and brake lines. This is a good time to identify any other potential issues.
- Remove the Caliper: Locate the caliper bolts (usually two bolts on the back of the caliper). Use a wrench to hold the caliper guide pins while loosening the bolts with a socket wrench. Once the bolts are removed, carefully slide the caliper off the rotor.
- Support the Caliper: Do not let the caliper hang by the brake line! Use a bungee cord or wire to suspend it from the suspension components.
- Remove the Old Brake Pads: The old brake pads should now be accessible. They may be held in place by clips or simply slide out. Note the orientation of the pads for reassembly.
- Compress the Caliper Piston: This is where the brake caliper compressor tool comes in. Use the tool to slowly and evenly push the caliper piston back into the caliper. This is necessary to create enough space for the new, thicker brake pads. For rear calipers with integrated parking brake mechanisms, you may need to rotate the piston while compressing it. Refer to your Rogue's repair manual for the correct procedure.
- Remove the Caliper Bracket (If Replacing Rotors): If you're replacing the rotors, you'll need to remove the caliper bracket. There are usually two bolts holding the bracket to the steering knuckle or hub. Use a socket wrench to remove these bolts. These bolts can be very tight, so you may need a breaker bar.
- Remove the Old Rotor (If Replacing): The rotor may be held in place by a screw or simply be rusted to the hub. If it's stuck, try tapping it with a rubber mallet or using penetrating oil. Be careful not to damage the hub.
- Clean the Hub Surface: Before installing the new rotor, clean the hub surface with a wire brush to remove any rust or debris. This will ensure a proper fit.
- Install the New Rotor (If Replacing): Place the new rotor onto the hub. If it's held in place by a screw, install the screw.
- Install the Caliper Bracket (If Removed): Reinstall the caliper bracket and tighten the bolts to the torque specification listed in your repair manual. This is critical!
- Install the New Brake Pads: Install the new brake pads into the caliper. Make sure they are properly seated and that any anti-rattle clips are in place.
- Lubricate the Caliper Guide Pins: Clean the caliper guide pins and apply a thin layer of synthetic caliper grease. This will ensure that the caliper slides smoothly.
- Reinstall the Caliper: Slide the caliper back onto the rotor. Align the caliper with the mounting holes and reinstall the caliper bolts. Tighten the bolts to the torque specification listed in your repair manual.
- Repeat on the Other Side: Repeat the process on the other wheel on the same axle. It's always best to replace brake pads and rotors in pairs.
- Reinstall the Wheels: Reinstall the wheels and tighten the lug nuts by hand.
- Lower the Vehicle: Carefully lower the vehicle back to the ground.
- Torque the Lug Nuts: Use a torque wrench to tighten the lug nuts to the torque specification listed in your owner's manual. Tighten the lug nuts in a star pattern.
- Pump the Brakes: Before driving, pump the brake pedal several times to seat the brake pads against the rotors. The pedal may feel spongy at first, but it should firm up after a few pumps.
- Bed-in the Brakes: Follow the brake pad manufacturer's instructions for bedding in the brakes. This usually involves a series of moderate stops from different speeds to transfer a layer of friction material onto the rotors.
- Check Brake Fluid Level: After the brake pad replacement, check the brake fluid level in the master cylinder. Add brake fluid if necessary, but be careful not to overfill.
Important Considerations
- Torque Specifications: Always use a torque wrench to tighten bolts to the correct specifications. Over-tightening can damage the bolts or brake components. Under-tightening can lead to loose bolts and potential brake failure.
- Brake Fluid: If the brake fluid is old or contaminated, consider bleeding the brakes after the replacement. This will remove any air or moisture from the brake lines.
- Parking Brake: If you have rear disc brakes with an integrated parking brake, make sure the parking brake is properly adjusted after the replacement.
- ABS Sensors: Be careful not to damage the ABS sensors when working on the brakes.
- Safety: If you're not comfortable performing this work yourself, take your vehicle to a qualified mechanic. Brakes are a critical safety system, and it's essential that they are properly installed and maintained.
This guide should give you a good understanding of how to replace the brake pads and rotors on your 2018 Nissan Rogue. Remember to consult your repair manual for specific instructions and torque specifications for your vehicle. Good luck, and be safe!