2019 Nissan Armada Battery Problems
The 2019 Nissan Armada, while generally a reliable SUV, has exhibited some recurring battery-related issues that can leave owners scratching their heads. This article dives deep into these problems, offering potential causes, troubleshooting steps, and preventative measures for the experienced DIYer.
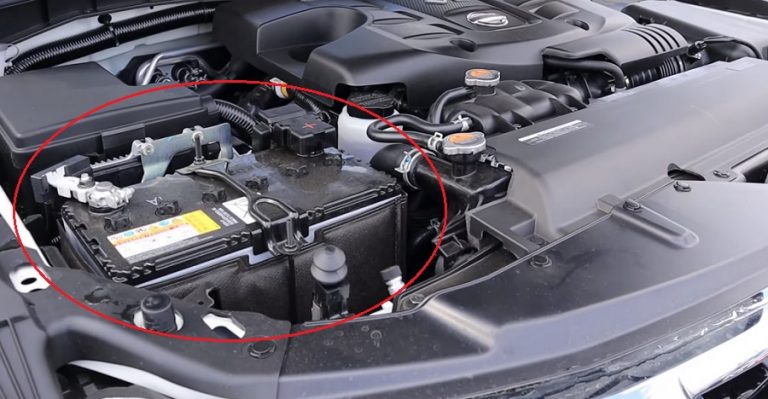
Common Battery Problems in the 2019 Nissan Armada
Several battery issues are reported more frequently in the 2019 Armada compared to other vehicles of similar vintage. These can be broadly categorized as follows:
1. Premature Battery Failure
This is perhaps the most common complaint. Owners report batteries failing well before their expected lifespan of 3-5 years. This could manifest as the battery struggling to crank the engine, requiring jump starts, or failing completely.
Possible Causes:
- Parasitic Drain: A parasitic drain is when the vehicle's electrical system continues to draw power even when the ignition is off. This can be caused by faulty modules, aftermarket accessories improperly installed, or even a glove box light staying on. Over time, this drain can deplete the battery, shortening its life.
- Short Trips: Frequent short trips may not allow the alternator enough time to fully recharge the battery after starting. The Armada, with its large engine and electrical demands, is particularly susceptible to this.
- Excessive Heat: High under-hood temperatures can significantly reduce battery lifespan. The Armada's engine compartment, while spacious, can still become quite hot, especially in warmer climates.
- Poor Battery Quality: While less likely, it's possible that some 2019 Armadas were fitted with batteries that didn't meet the expected quality standards.
- Faulty Alternator: The alternator is responsible for recharging the battery while the engine is running. If the alternator isn't functioning correctly (undercharging or overcharging), it can damage the battery.
2. Battery Light Illumination
The battery light on the dashboard (usually a symbol of a battery) illuminating while driving is a clear indication of an issue with the charging system. It doesn't necessarily mean the battery itself is bad, but it warrants immediate investigation.
Possible Causes:
- Loose or Corroded Battery Terminals: Dirty or loose connections can impede the flow of electricity, preventing the battery from charging properly.
- Worn or Slipping Serpentine Belt: The serpentine belt drives the alternator. If it's worn, cracked, or slipping, it won't spin the alternator at the correct speed, leading to undercharging.
- Faulty Voltage Regulator: The voltage regulator, often integrated within the alternator, controls the voltage output to protect the electrical system. A malfunctioning regulator can lead to overcharging (damaging the battery) or undercharging.
- Alternator Failure: Complete or partial alternator failure will trigger the battery light.
3. Difficulty Starting in Cold Weather
While cold weather impacts all batteries, some 2019 Armada owners report experiencing more pronounced starting difficulties in cold temperatures compared to other vehicles they've owned. This can be exacerbated by a battery that's already weakened.
Possible Causes:
- Reduced Battery Capacity in Cold: Battery capacity is significantly reduced in cold weather. A borderline battery may not have enough cranking amps to start the engine when it's cold.
- Increased Oil Viscosity: Cold temperatures increase the viscosity of engine oil, making it harder for the starter motor to turn the engine.
- Weak Starter Motor: Although less common, a weakening starter motor can struggle to turn the engine over, especially when combined with a cold battery and thick oil.
Troubleshooting and Diagnostics
Before replacing the battery, it's crucial to perform some basic troubleshooting to pinpoint the root cause of the problem.
1. Visual Inspection
Start with a thorough visual inspection:
- Battery Terminals: Check for corrosion (white or blue powdery substance) around the terminals. Clean them with a battery terminal cleaner and a wire brush if necessary. Ensure the terminals are securely fastened.
- Battery Cables: Inspect the battery cables for any signs of damage, such as cuts, fraying, or exposed wires. Replace damaged cables.
- Serpentine Belt: Check the serpentine belt for cracks, wear, or glazing. If the belt shows signs of damage, replace it. Also, ensure the belt tension is correct. A loose belt will slip.
- Battery Case: Look for any signs of swelling or cracking in the battery case. These are indicators of a damaged battery.
2. Battery Load Test
A battery load test measures the battery's ability to deliver current under load. This test provides a much more accurate assessment of battery health than a simple voltage test. You can perform a load test with a dedicated battery load tester or have it done at most auto parts stores.
Procedure:
- Fully charge the battery.
- Connect the load tester to the battery terminals.
- Apply the load specified by the tester (usually half the battery's cold cranking amps - CCA rating) for 15 seconds.
- Observe the voltage reading. A healthy battery should maintain a voltage above 9.6 volts during the test.
If the battery fails the load test, it needs to be replaced.
3. Alternator Output Test
An alternator output test checks the alternator's ability to generate the correct voltage and current. This can be performed with a multimeter.
Procedure:
- Start the engine and let it idle.
- Set the multimeter to DC voltage.
- Connect the multimeter leads to the battery terminals (red to positive, black to negative).
- The voltage reading should be between 13.5 and 14.5 volts.
- Turn on several electrical accessories (headlights, air conditioning, etc.) and observe the voltage. The voltage should remain within the specified range.
If the voltage is outside the specified range, the alternator or voltage regulator may be faulty.
4. Parasitic Drain Test
A parasitic drain test identifies if any circuits are drawing excessive current when the ignition is off.
Procedure:
- Ensure all accessories are turned off (lights, radio, etc.).
- Disconnect the negative battery cable.
- Set the multimeter to amperage (current) mode.
- Connect the multimeter leads between the negative battery cable and the negative battery terminal.
- Allow the vehicle's electrical system to "go to sleep" (this may take 20-30 minutes).
- A normal parasitic draw should be less than 50 milliamps (0.05 amps).
- If the draw is higher than 50 milliamps, start pulling fuses one at a time to identify the circuit causing the drain. Once you pull a fuse and the draw drops, you've found the culprit.
Identifying the source of a parasitic drain can be time-consuming, but it's essential to prevent future battery problems.
Preventative Measures
Even with a new battery, proactive maintenance can extend its lifespan and prevent future issues.
- Regular Battery Terminal Cleaning: Clean the battery terminals every 6 months to prevent corrosion.
- Minimize Short Trips: If possible, combine short trips into longer drives to allow the alternator to fully recharge the battery.
- Use a Battery Tender: If you frequently take short trips or the vehicle sits for extended periods, use a battery tender to keep the battery fully charged.
- Avoid Leaving Accessories On: Ensure all lights, radios, and other accessories are turned off when the engine is off.
- Consider a Heat Shield: Installing a heat shield around the battery can help reduce its exposure to high under-hood temperatures.
- Regular Charging System Check: Have the charging system (battery and alternator) checked periodically, especially before winter.
Conclusion
While the 2019 Nissan Armada can be prone to battery problems, understanding the potential causes and employing proper troubleshooting techniques can help you diagnose and resolve these issues. By implementing preventative maintenance measures, you can significantly extend the life of your battery and avoid being stranded with a dead battery. Remember, if you're not comfortable performing these tests or repairs yourself, it's always best to consult a qualified mechanic.