2019 Nissan Rogue Windshield Replacement
Replacing a windshield, even on a relatively common vehicle like the 2019 Nissan Rogue, is a task that requires patience, precision, and the right tools. While it's a job many professionals handle daily, a mechanically inclined DIYer with some experience can tackle it. This article will guide you through the process, covering the necessary steps and highlighting crucial considerations to ensure a safe and effective windshield replacement.
Preparation: Tools, Materials, and Safety
Before you even think about touching the old windshield, proper preparation is key. This includes gathering the necessary tools and materials, as well as prioritizing your safety.
Tools and Materials:
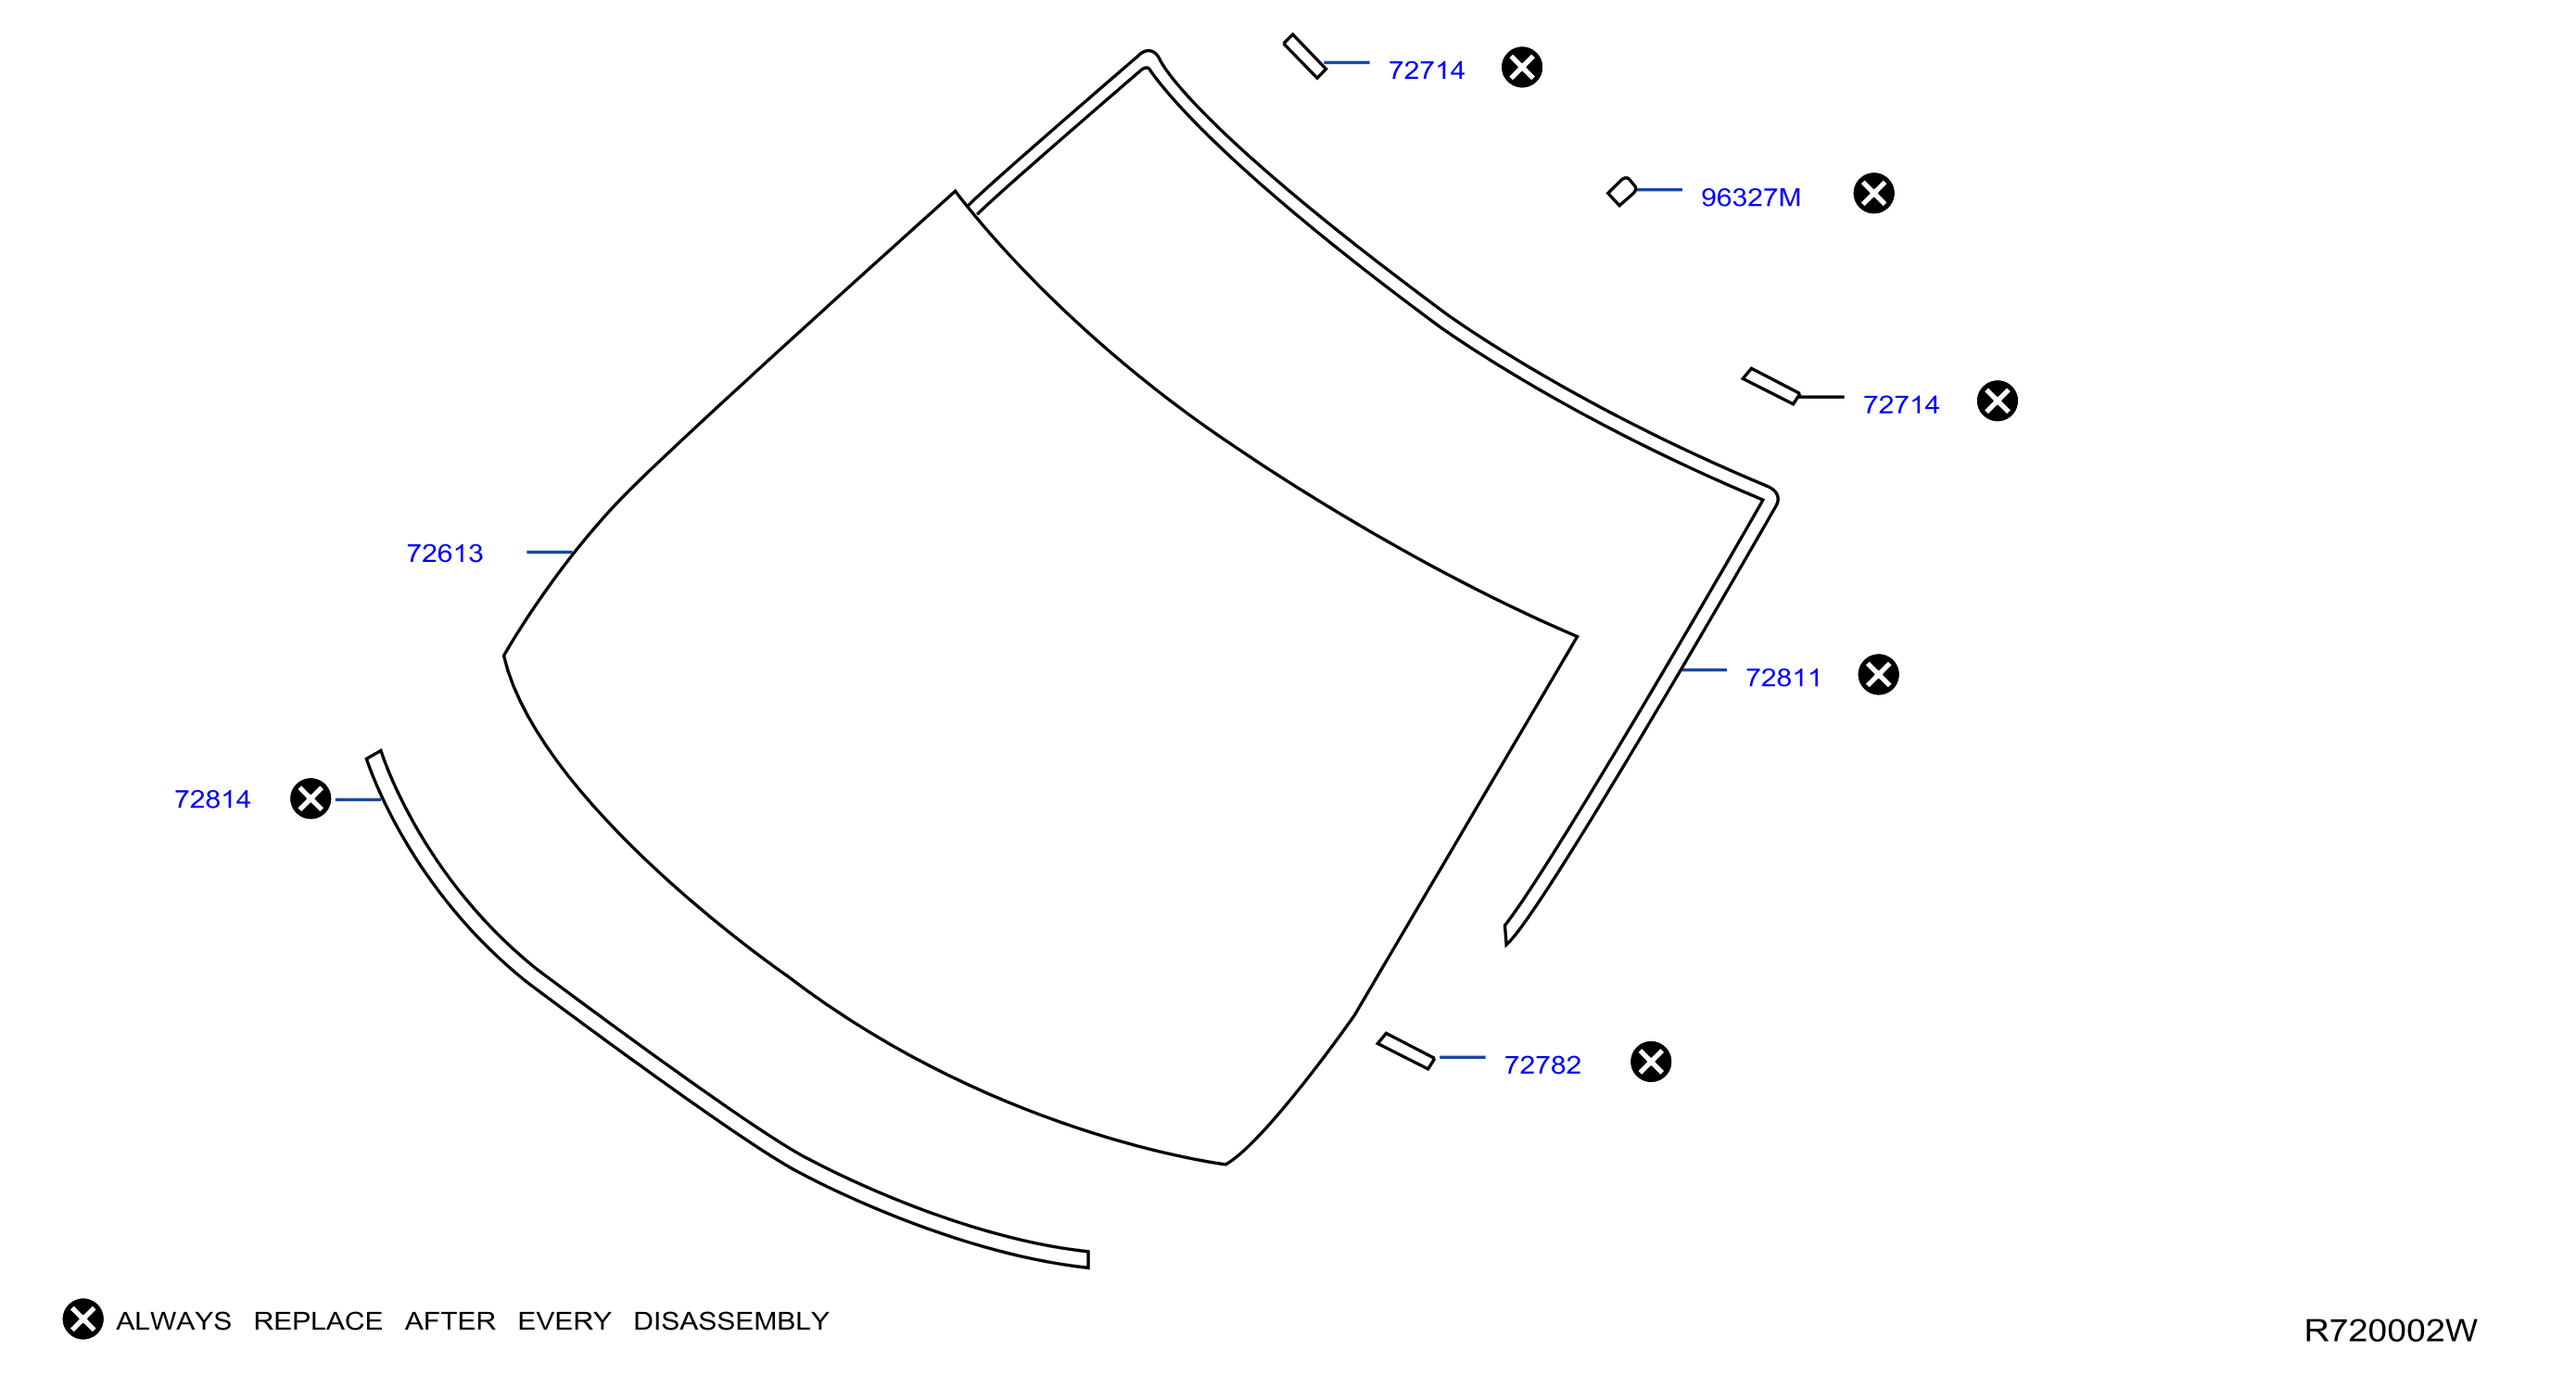
- New Windshield: Make sure it's specifically designed for a 2019 Nissan Rogue, taking into account any options like lane departure warning or rain sensors. Verify the part number before you even open the box.
- Windshield Removal Tool: This is crucial. Options include:
- Cold Knife: A hand-operated knife with a long, thin blade used to cut through the adhesive. Requires significant physical effort.
- Power Cut-Out Tool (Reciprocating or Oscillating): A powered tool that uses blades to cut through the adhesive. More efficient and less strenuous than a cold knife.
- Wire Cut-Out Tool: Uses a strong wire and handles to slice through the adhesive.
- Urethane Adhesive: This is the specialized glue that bonds the windshield to the vehicle. Choose a high-quality automotive urethane adhesive with a quick cure time if desired. Make sure it meets OEM specifications.
- Urethane Primer: Essential for proper urethane adhesion to both the glass and the vehicle's frame. Using the correct primer is often overlooked, but critical for a leak-free and structurally sound installation. There are different primers for the glass and the body.
- Glass Cleaner: Automotive-specific glass cleaner is best.
- Razor Blades and Scrapers: For cleaning the pinch weld (the metal frame where the windshield sits).
- Caulking Gun: A heavy-duty caulking gun is required to dispense the urethane adhesive.
- Suction Cups: Two or more suction cups with handles to safely lift and maneuver the windshield.
- Gloves and Safety Glasses: Mandatory. Urethane and primers are chemicals that can irritate skin and eyes. Broken glass is a hazard.
- Dust Mask or Respirator: Protect yourself from dust and fumes.
- Trim Removal Tools: Plastic pry tools to remove interior trim pieces without damage.
- Heat Gun (Optional): Can be helpful for softening old or stubborn adhesive. Use with caution!
- Pinch Weld Scraper/Conditioner: Tools designed to prepare the pinch weld for urethane application.
- Clean Rags: For cleaning surfaces and wiping up spills.
- Measuring Tape: For verifying windshield placement.
- Windshield Setting Blocks/Spacers: Small pieces of rubber or plastic that help maintain the correct spacing and positioning of the windshield during curing.
Safety Precautions:
This is not just a suggestion; it's crucial. Windshield replacement involves working with glass, sharp tools, and potentially harmful chemicals. Always wear:
- Safety Glasses: To protect your eyes from flying debris and chemical splashes.
- Gloves: To protect your hands from cuts, chemicals, and sharp edges.
- Appropriate Clothing: Long sleeves and pants are recommended.
- Dust Mask or Respirator: When sanding or working with primers.
Work in a well-ventilated area, and dispose of used urethane and primer properly according to local regulations.
Step-by-Step Windshield Replacement
Now, let's get into the actual replacement process. This is a detailed guide, so take your time and follow each step carefully.
1. Removing Interior Trim:
Begin by carefully removing any interior trim pieces that overlap or secure the windshield. This typically includes the A-pillars (the trim pieces running along the sides of the windshield), the rearview mirror (if attached to the windshield), and any upper trim along the roofline. Use plastic trim removal tools to avoid scratching or damaging the trim. Note the location of any clips or fasteners to make reinstallation easier. Store the removed trim in a safe place.
2. Preparing the Exterior:
Protect the surrounding paintwork with masking tape or painter's tape. This will help prevent scratches and damage during the removal process. Remove the windshield wipers and any cowl panels that obstruct access to the base of the windshield.
3. Cutting Out the Old Windshield:
This is the most challenging part. Choose your preferred windshield removal tool and carefully cut through the urethane adhesive around the perimeter of the windshield.
Important: Whether using a cold knife, power tool, or wire, maintain a consistent depth and angle to avoid damaging the pinch weld. The pinch weld is the metal flange that the windshield sits on, and damage to it can lead to leaks or structural problems. If using a power tool, be extremely careful not to cut into the surrounding paint or metal.
Start from an upper corner and work your way around the windshield, gradually cutting through the adhesive. If using a wire tool, feed the wire through the adhesive and use a sawing motion to cut through it. If using a cold knife, apply steady pressure and maintain a sharp blade.
4. Removing the Old Windshield:
Once you've cut through the adhesive completely, carefully use suction cups to lift the old windshield out of the frame. Have a helper assist you if possible. Dispose of the old windshield properly.
5. Preparing the Pinch Weld:
This is a crucial step for proper adhesion. Thoroughly clean the pinch weld, removing all traces of old urethane adhesive, rust, and debris. Use razor blades, scrapers, and a wire brush to achieve a clean, smooth surface. If there is any surface rust, treat it with a rust converter or inhibitor. Ideally, you should use a pinch weld scraper/conditioner to ensure a smooth, clean surface.
Important: Any rust or contamination on the pinch weld will compromise the bond between the urethane and the vehicle, leading to leaks or structural weakness.
6. Applying Primer:
Using the correct primer is absolutely critical. Apply the designated body primer to the pinch weld and the glass primer to the frit band (the black border around the inside of the windshield). Allow the primer to dry completely according to the manufacturer's instructions. This typically takes 10-20 minutes.
Why Primer is Important: Primer acts as a bonding agent, ensuring a strong and durable connection between the urethane adhesive and both the glass and the vehicle's frame. It also helps to prevent rust and corrosion on the pinch weld.
7. Applying the Urethane Adhesive:
Load the urethane adhesive cartridge into the caulking gun. Cut the nozzle at a 45-degree angle to achieve the desired bead width. Apply a uniform bead of urethane adhesive around the perimeter of the pinch weld. Make sure the bead is continuous and consistent in height and width. The height and width are critical for structural integrity. Use the nozzle to smooth out any uneven spots.
Tip: Practice on a piece of cardboard first to get a feel for the caulking gun and the adhesive flow.
8. Installing the New Windshield:
Carefully lift the new windshield using suction cups and position it over the pinch weld. Align the windshield with the frame, ensuring it's centered and flush. Gently press the windshield into the urethane adhesive, applying even pressure around the perimeter. Use windshield setting blocks (spacers) to maintain the correct height and spacing between the windshield and the frame. These spacers are usually small pieces of rubber or plastic. Apply masking tape to hold the windshield in place while the urethane cures.
9. Reinstalling Trim and Components:
Once the urethane adhesive has cured according to the manufacturer's instructions (typically 1-3 hours, depending on the adhesive type and temperature), carefully remove the masking tape and reinstall the interior trim pieces, rearview mirror (if applicable), windshield wipers, and cowl panels. Ensure all clips and fasteners are properly secured.
10. Leak Testing:
After reassembling everything, test for leaks by spraying water around the perimeter of the windshield with a hose. Check the interior for any signs of water intrusion. If you find a leak, address it immediately by applying more urethane adhesive to the affected area.
Final Checks and Considerations
After completing the windshield replacement, perform a final inspection to ensure everything is properly installed and functioning correctly. Check the operation of the windshield wipers, the rearview mirror, and any other components that were removed or adjusted during the process. If your 2019 Rogue has advanced driver-assistance systems (ADAS) that rely on the windshield, such as lane departure warning or automatic emergency braking, you may need to have the system recalibrated by a qualified technician after the windshield replacement.
Replacing a windshield is a significant undertaking, but with careful preparation, the right tools, and a meticulous approach, it's a task that can be accomplished by a determined DIYer. However, if you're uncomfortable with any aspect of the process, it's always best to consult a professional auto glass technician.