240sx Carbon Fiber Mirrors: Installation Guide
So, you've decided to upgrade your 240SX with a set of sleek, carbon fiber mirrors. Great choice! They not only look fantastic but can also reduce weight and improve aerodynamics, even if it's just a little bit. However, installing them can sometimes be a bit trickier than you might expect. This guide will walk you through the process, highlighting common problems and offering solutions to ensure a smooth installation.
Common Issues & Solutions
Before we dive into the installation steps, let's address some of the common headaches people run into when installing aftermarket carbon fiber mirrors on their 240SX:
Issue 1: Mirror Fitment
Problem: The most frequent issue is poor fitment. Aftermarket parts, especially carbon fiber ones, aren't always made to the same exacting tolerances as OEM parts. This can result in gaps, misaligned mounting holes, or the mirror not sitting flush against the door.
Solution:
a. Test Fit Before Painting or Final Installation: Always test fit the mirrors before doing any permanent modifications like painting. This allows you to identify and address any fitment issues without damaging the finish.
b. Enlarging Mounting Holes: If the mounting holes are slightly off, you may need to carefully enlarge them using a small round file or a Dremel tool with a sanding drum. Be extremely cautious not to remove too much material or damage the surrounding carbon fiber. Work slowly and test fit frequently.
c. Shimming: If the mirror doesn't sit flush against the door, you might need to use shims. You can create shims from thin pieces of rubber, plastic, or even metal. Place the shims between the mirror base and the door to fill the gap. Experiment with different thicknesses to achieve a proper fit.
d. Heat Gun (Use with extreme caution): In some cases, very gently heating the carbon fiber with a heat gun can allow you to slightly mold the mirror to better conform to the door's curvature. Exercise extreme caution here, as excessive heat can damage the carbon fiber or the clear coat. Use low heat and move the heat gun constantly. This is a last resort.
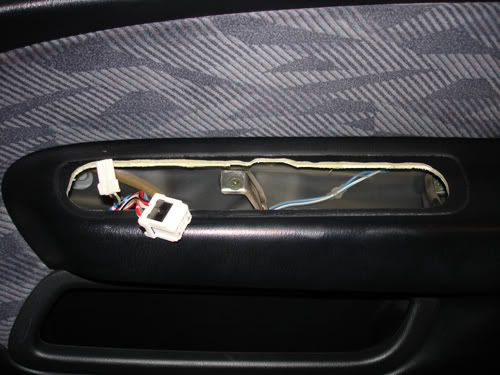
Issue 2: Wiring Issues (For Power Mirrors)
Problem: If your 240SX originally came with power mirrors, you'll need to wire the new mirrors correctly. This can be tricky if the wiring harnesses are different or if the new mirrors use a different wiring configuration.
Solution:
a. Wiring Diagram: The most crucial thing is to have a wiring diagram for both the original mirrors and the new carbon fiber mirrors. If the new mirrors didn't come with one, try to find it online or contact the manufacturer.
b. Multimeter: Use a multimeter to identify the function of each wire in both harnesses. This will help you match them up correctly. Look for voltage readings when you move the mirror adjustment switch.
c. Adapters: If possible, try to find or create wiring adapters that will plug directly into the factory harness. This will avoid the need to cut and splice wires, making the installation cleaner and easier.
d. Soldering and Heat Shrink Tubing: If you do need to cut and splice wires, always solder the connections and use heat shrink tubing to insulate them. This will ensure a secure and reliable connection and prevent corrosion. Crimp connectors are generally not recommended for automotive wiring, as they can loosen over time.
Issue 3: Mirror Vibration
Problem: After installation, some carbon fiber mirrors can vibrate excessively at higher speeds, making it difficult to see clearly.
Solution:
a. Tighten Mounting Hardware: Ensure that all mounting screws are properly tightened. Loose screws can contribute to vibration.
b. Add Dampening Material: Adding some dampening material, such as foam or rubber, between the mirror base and the door can help absorb vibrations.
c. Check Mirror Glass Attachment: Make sure the mirror glass itself is securely attached to the mirror housing. Loose glass can vibrate independently and cause distortion.
d. Reinforce the Mounting Point: If the door sheet metal around the mounting point is thin or flexible, you may need to reinforce it. You can do this by adding a metal plate behind the door skin to provide a more solid mounting surface.
Issue 4: Water Leaks
Problem: Improperly sealed mirror bases can allow water to leak into the door panel, potentially causing rust or electrical problems.
Solution:
a. Weatherstripping: Use new weatherstripping or a bead of silicone sealant around the mirror base to create a watertight seal. Be sure to clean the surfaces thoroughly before applying the sealant.
b. Check Drain Holes: Ensure that the drain holes in the bottom of the door are not blocked. These holes allow water that does get inside the door to drain out.
c. Inspect Existing Seals: Check the condition of the existing weatherstripping around the door frame. Damaged or deteriorated weatherstripping can also contribute to water leaks.
Installation Steps
Now, let's get to the actual installation. Here's a general guide, but always refer to the specific instructions provided by the mirror manufacturer.
Tools Needed:
- Screwdrivers (Phillips and flathead)
- Socket set
- Wrench set
- Pliers
- Wire strippers and crimpers (if wiring is involved)
- Soldering iron and solder (if wiring is involved)
- Heat shrink tubing (if wiring is involved)
- Multimeter (if wiring is involved)
- Trim removal tools
- Round file or Dremel tool (for enlarging mounting holes, if needed)
- Shims (if needed)
- Silicone sealant or weatherstripping
Step-by-Step Guide:
- Remove the Door Panel: Use trim removal tools to carefully remove the door panel. Start by removing any screws or clips that hold it in place. Disconnect any wiring harnesses connected to the door panel, such as the power window switch and door lock switch.
- Disconnect the Old Mirror: If your 240SX has power mirrors, disconnect the wiring harness connected to the old mirror. Unscrew the mounting bolts that hold the old mirror in place.
- Test Fit the New Mirror: As mentioned earlier, test fit the new carbon fiber mirror before proceeding. Check for proper fitment and alignment. Address any issues with the mounting holes or gaps.
- Wiring (If Applicable): If the new mirrors have power functions, connect the wiring harness to the factory harness. Use the wiring diagram and multimeter to ensure that the wires are connected correctly. Solder and heat shrink any splices.
- Install the Mirror: Secure the new mirror to the door using the mounting bolts. Tighten the bolts to the proper torque specification.
- Seal the Mirror Base: Apply weatherstripping or silicone sealant around the mirror base to create a watertight seal.
- Reinstall the Door Panel: Reconnect all wiring harnesses to the door panel and reinstall the panel. Secure it with screws or clips.
- Test the Mirror: Test the mirror's functions, such as the power adjustment (if applicable). Check for vibration at different speeds.
Estimated Cost
The cost of installing carbon fiber mirrors on your 240SX can vary depending on several factors, including:
- The price of the mirrors themselves (expect to pay anywhere from $100 to $500+ for a decent set).
- Whether you do the installation yourself or hire a professional mechanic.
- The complexity of the wiring (if applicable).
- The need for any additional parts or materials, such as shims, weatherstripping, or wiring adapters.
If you do the installation yourself, you'll primarily be paying for the mirrors and any necessary materials. If you hire a professional, expect to pay an additional $100 to $300 for labor, depending on the shop's hourly rate.
By following these steps and addressing potential problems proactively, you can successfully install carbon fiber mirrors on your 240SX and enjoy the enhanced appearance and performance they provide. Good luck!