240sx Frame Rail Repair Kit: Installation Guide
The Nissan 240SX, a darling of the drift scene and a budget-friendly sports car icon, suffers from a common ailment: rusted and damaged frame rails. Years of exposure to road salt, moisture, and the stresses of spirited driving can weaken these critical structural components, compromising handling and safety. Fortunately, a robust aftermarket has stepped in to offer frame rail repair kits, providing a viable solution for extending the life of these beloved machines. This guide delves into the installation process of a typical 240SX frame rail repair kit, offering a technical overview for the curious reader and aspiring automotive engineer.
Understanding the Frame Rail Issue
Before diving into the installation, it's crucial to understand the severity of the problem. The 240SX uses a unibody construction, meaning the frame rails are integrated into the chassis. They run longitudinally along the bottom of the car, providing essential rigidity and serving as mounting points for suspension components and other critical systems. Rust, often originating from the inside out, weakens the metal. This weakening can lead to:
- Compromised handling: Flexing and twisting under load degrade handling precision.
- Suspension instability: Worn mounting points lead to alignment issues and unpredictable behavior.
- Safety risks: In a collision, weakened frame rails offer reduced protection.
A thorough inspection is the first step. Look for rust, cracking, and deformation. A small hammer can be used to gently tap suspect areas; a dull thud often indicates hidden rust damage. Pay close attention to areas around suspension mounts, drain holes, and welded seams. Always use proper personal protective equipment (PPE) during inspection and repair, including safety glasses, gloves, and a respirator if grinding or welding.
Frame Rail Repair Kit Anatomy
A typical 240SX frame rail repair kit consists of several key components. These typically include:
- Outer Frame Rail Section: This is the main replacement piece, often fabricated from thicker gauge steel than the original. It's designed to be welded over or in place of the damaged section.
- Inner Reinforcement Plate (Optional): Some kits include an inner plate that welds inside the existing frame rail for added strength. This is particularly useful for heavily damaged areas.
- Suspension Mount Reinforcements (Optional): These are small plates or gussets designed to reinforce the suspension mounting points.
- Hardware (Occasionally): Some kits may include bolts, nuts, and washers, although often the existing hardware is reused.
The quality of the kit is paramount. Look for kits made from high-strength steel (e.g., 10-gauge or thicker) and precise fabrication. Poorly fitting or flimsy kits will create more problems than they solve.
Installation Process: A Step-by-Step Guide
The following outlines a general installation process. Always consult the specific instructions provided with your chosen frame rail repair kit, as variations may exist. This is a complex procedure best left to experienced individuals. Improper welding or incorrect installation can have serious consequences.
1. Preparation and Disassembly
a. Vehicle Preparation: Secure the vehicle on jack stands, ensuring it's level and stable. Disconnect the battery. Remove any components obstructing access to the frame rail, such as exhaust components, fuel lines, brake lines, and potentially the fuel tank, depending on the location of the damage and the specific repair kit design. Protect any remaining nearby components from heat and sparks during welding.
b. Damage Assessment and Marking: Precisely mark the area to be cut away. It's better to err on the side of removing too little material than too much. Carefully consider the weld lines; they should land on solid, un-rusted metal.
2. Cutting and Removal
a. Cutting the Damaged Section: Using a cutting wheel, carefully cut along the marked lines. Take your time and make clean, precise cuts. Avoid cutting into any underlying components. Wear appropriate eye and face protection during cutting.
b. Removing the Cut Section: Use a hammer and chisel or a pry bar to carefully remove the cut section. Be mindful of any spot welds that may need to be drilled out.
c. Surface Preparation: This is a critical step. Thoroughly clean the exposed metal, removing all rust, paint, and contaminants. Use a wire wheel, grinder, or abrasive blast to achieve a bright, clean surface. This is essential for proper weld penetration and long-term corrosion resistance.
3. Fitting and Alignment
a. Test Fitting: Carefully test fit the new frame rail section. It should align properly with the existing frame rail and any adjacent components. Trim or modify the repair section as needed to achieve a precise fit.
b. Clamping and Securing: Use clamps and/or self-tapping screws to hold the repair section in place. Ensure proper alignment and minimal gaps between the new and existing metal. Double-check all measurements and clearances.
4. Welding
a. Welding Technique: MIG welding is generally preferred for frame rail repairs. Use appropriate welding settings for the thickness of the steel being used. Proper weld penetration is crucial for strength. Stitch welding is often used to minimize heat buildup and distortion.
b. Welding Sequence: Start by tack welding the repair section in several locations to secure it. Then, proceed with a series of short, overlapping welds, allowing the metal to cool between passes. This helps prevent warping and distortion.
c. Inner Reinforcement (If Applicable): If your kit includes an inner reinforcement plate, weld it in place before welding the outer frame rail section. This adds significant strength to the repair.
d. Suspension Mount Reinforcement (If Applicable): Weld any suspension mount reinforcements in place, ensuring proper alignment and weld penetration.
Welding should be performed by a qualified welder. Improper welding can lead to weak spots and structural failure.
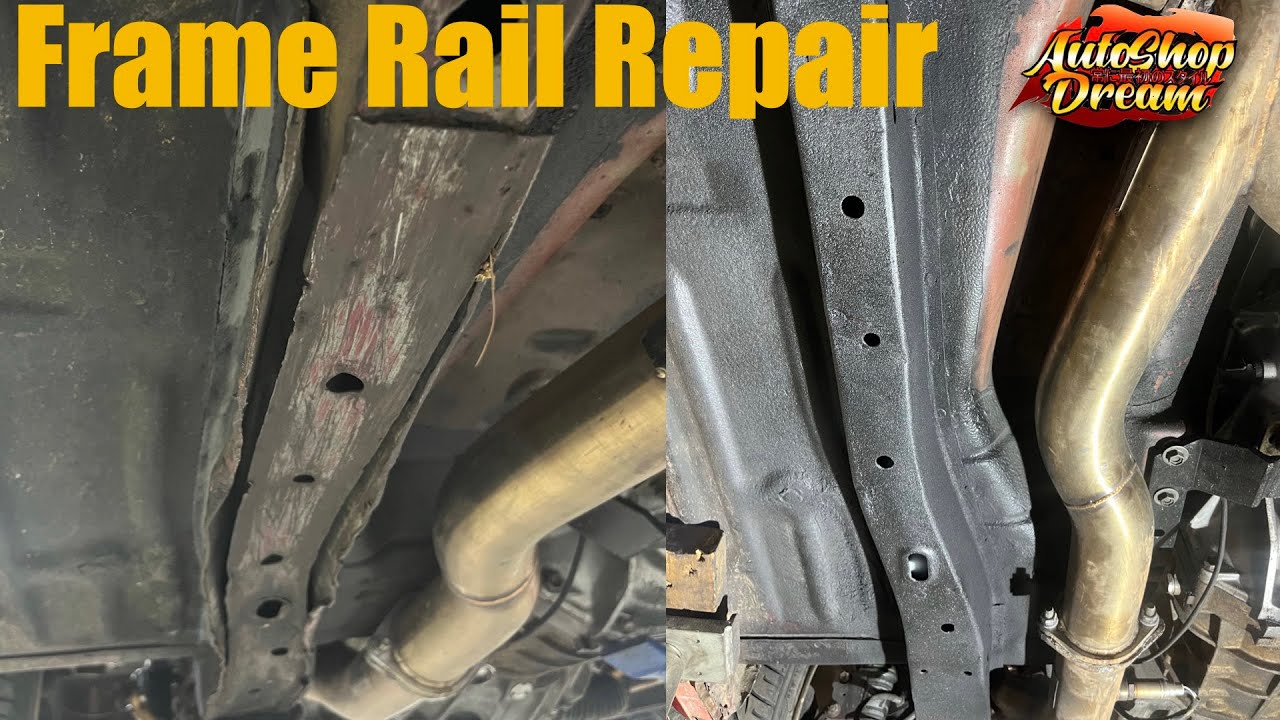
5. Finishing and Protection
a. Grinding and Smoothing: Grind down any rough welds and sharp edges. Smooth the welds to blend them seamlessly with the existing frame rail.
b. Corrosion Protection: Apply a high-quality rust preventative coating to all exposed metal surfaces. This is crucial to prevent future rust and corrosion. Consider using a weld-through primer on mating surfaces before welding to provide additional protection.
c. Seam Sealing: Apply seam sealer to any joints or gaps to prevent water intrusion.
d. Painting: Apply a top coat of paint to match the original finish and provide further protection.
6. Reassembly
a. Reinstallation: Reinstall all components that were removed during disassembly, such as exhaust components, fuel lines, brake lines, and the fuel tank.
b. Inspection: Thoroughly inspect the repair to ensure everything is properly installed and secured.
c. Alignment: After completing the repair, it is essential to have the vehicle professionally aligned. The frame repair can alter the vehicle's geometry, and a proper alignment is necessary for safe and predictable handling.
Important Considerations
- Welding Experience: This project requires proficient welding skills. If you lack experience, seek professional assistance.
- Safety: Welding involves inherent risks. Follow all safety precautions and use appropriate PPE.
- Kit Quality: Invest in a high-quality frame rail repair kit from a reputable manufacturer.
- Proper Tools: Ensure you have the necessary tools, including a welder, grinder, cutting wheel, and various hand tools.
- Professional Alignment: After the repair, a professional wheel alignment is mandatory.
Legal Considerations: Before undertaking such a repair, consult local regulations regarding modifications to vehicle structures. Some jurisdictions may require inspections or certifications.
Alternatives: While frame rail repair kits offer a cost-effective solution, complete frame replacement is an option for severely damaged vehicles, albeit a significantly more complex and expensive undertaking.
By understanding the principles behind frame rail repair and meticulously following the installation process, you can restore the structural integrity of your 240SX and enjoy many more years of reliable performance. However, remember that safety and quality should always be prioritized. If in doubt, consult a qualified professional.