240sx Radiator Core Support: Repair And Replacement
The Nissan 240SX, a darling of the drift and import tuner scenes, is renowned for its robust engineering and potential for modification. However, like any vehicle of its age, rust and impact damage can take their toll. A particularly vulnerable area is the radiator core support, a critical structural component that provides a mounting point for the radiator, headlights, and other front-end components. A damaged core support can compromise vehicle safety, cooling system efficiency, and even alignment. This guide delves into the inspection, repair, and replacement of the 240SX radiator core support, providing insights into the underlying engineering and practical considerations involved.
Understanding the Radiator Core Support
The radiator core support is more than just a mounting bracket; it's an integral part of the vehicle's unibody structure. It's typically constructed from stamped steel and spot-welded to the inner fenders and front frame rails. Its primary functions include:
- Supporting the Radiator: As the name suggests, it securely holds the radiator in place, ensuring proper airflow and preventing vibration-related damage.
- Mounting Headlights and Other Front-End Components: It provides attachment points for headlights, turn signals, hood latch mechanisms, and sometimes even the air conditioning condenser.
- Reinforcing the Front Structure: It adds rigidity to the front of the vehicle, contributing to overall structural integrity and crashworthiness.
- Maintaining Front-End Alignment: A straight and undamaged core support is crucial for proper front-end alignment. Distortion can lead to uneven tire wear and handling issues.
Because of its location and functions, the core support is susceptible to damage from front-end collisions. Even minor impacts can bend or distort the metal, weakening the structure and potentially affecting the cooling system. Additionally, the core support is exposed to road spray and moisture, making it prone to rust, especially in regions with harsh winters.
Inspection: Identifying Damage and Assessing the Severity
A thorough inspection is the first step in determining the appropriate course of action. Begin with a visual examination, paying close attention to the following areas:
Visual Inspection Points:
- Rust: Look for surface rust, bubbling paint, and perforation, especially in areas prone to moisture accumulation, such as the lower sections and around mounting points.
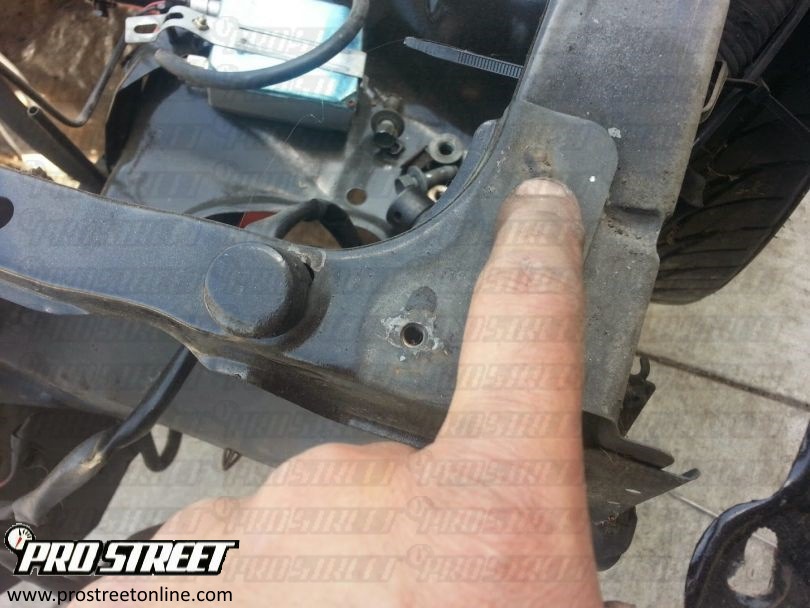
- Dents and Bends: Check for any visible dents or bends in the metal. Even slight distortions can indicate underlying damage. Pay particular attention to the area around the radiator mounts and headlight buckets.
- Cracks: Examine the welds and surrounding metal for cracks. These can compromise the structural integrity of the core support.
- Misalignment: Look for any signs of misalignment, such as uneven gaps between the hood and fenders, or headlights that point in different directions.
- Damaged Mounting Points: Inspect the mounting points for the radiator, headlights, and other components. Ensure they are not bent, broken, or stripped.
After the visual inspection, use a straight edge and a level to check for any warping or twisting. Compare measurements from side to side to identify any discrepancies. A feeler gauge can be helpful in measuring the gap between the straight edge and the core support surface.
"A severely damaged core support can compromise the vehicle's ability to absorb impact energy in a collision, potentially increasing the risk of injury."
If you suspect underlying damage, consider consulting a professional body shop for a more detailed assessment. They have specialized equipment, such as frame machines, to accurately measure and diagnose structural issues.
Repair vs. Replacement: Making the Right Choice
The decision to repair or replace the core support depends on the extent of the damage. Minor rust or dents may be repairable, while severe damage necessitates replacement.
Repair:
- Suitable for: Minor rust, small dents, and superficial damage.
- Process:
- Rust Removal: Sandblasting, wire brushing, or chemical rust removers can be used to eliminate rust.
- Metal Straightening: Dents can be carefully hammered out or pulled using specialized tools.
- Welding: Small cracks can be repaired by welding.Ensure proper welding techniques and penetration to restore structural integrity.
- Surface Preparation: The repaired area should be thoroughly cleaned and primed to prevent future rust.
- Painting: Apply a topcoat of automotive paint to match the surrounding area.
- Considerations: Repairing a core support can be time-consuming and requires specialized skills. The structural integrity of the repair depends on the quality of the workmanship.
Replacement:
- Suitable for: Severe rust, significant dents or bends, cracks, and misalignment.
- Process:
- Preparation: Disconnect the battery and remove all components attached to the core support, including the radiator, headlights, and hood latch.
- Spot Weld Removal: Carefully drill out the spot welds that attach the core support to the inner fenders and frame rails. Use a spot weld drill bit to avoid damaging the underlying metal.
- Removal: Once all the spot welds are removed, the core support can be carefully pried away from the vehicle.
- Installation: Position the new core support in place and align it properly.
- Welding: Weld the new core support to the inner fenders and frame rails, replicating the original spot weld locations.Proper welding technique is crucial to ensure a strong and durable connection.
- Surface Preparation and Painting: Prepare the surface and paint the new core support to prevent rust.
- Reassembly: Reinstall all the components that were removed, ensuring proper alignment and fitment.
- Considerations: Replacing a core support is a more involved process, but it offers a more reliable and structurally sound solution.
The Replacement Process in Detail
Let's examine the replacement process in greater detail, highlighting the key steps and considerations:
- Preparation: Before beginning, disconnect the battery to prevent any electrical shorts. Drain the coolant from the radiator and remove the radiator, headlights, hood latch mechanism, and any other components attached to the core support. Label and organize all the hardware to ensure easy reassembly.
- Spot Weld Removal: This is arguably the most critical step. Using a spot weld drill bit, carefully drill through the spot welds that attach the core support to the inner fenders and frame rails. Apply penetrating oil to the spot welds to aid in their removal. Be patient and avoid drilling too deep, as this can damage the underlying metal.
- Core Support Removal: Once all the spot welds are removed, carefully pry the old core support away from the vehicle. Use a pry bar and a hammer, but be gentle to avoid damaging the surrounding sheet metal.
- Trial Fit: Before welding the new core support in place, perform a trial fit to ensure proper alignment. Check the gaps between the hood and fenders, and make sure the headlights fit properly.
- Welding: This is where the structural integrity of the repair is determined. Use a MIG welder to weld the new core support to the inner fenders and frame rails. Replicate the original spot weld locations as closely as possible. Ensure proper penetration of the weld to create a strong and durable connection. If you are not comfortable welding, seek the help of a professional welder.
- Seam Sealing: Apply seam sealer to all the welded seams to prevent moisture from entering and causing rust.
- Surface Preparation and Painting: Thoroughly clean the new core support and apply a coat of primer. Then, apply a topcoat of automotive paint to match the surrounding area.
- Reassembly: Reinstall all the components that were removed, ensuring proper alignment and fitment. Fill the radiator with coolant and reconnect the battery.
- Alignment: After replacing the core support, it is crucial to have the vehicle's front-end alignment checked and adjusted by a qualified technician.
Safety Precautions
Working on automotive repairs involves inherent risks. Always wear appropriate safety gear, including safety glasses, gloves, and a respirator. Use proper lifting techniques to avoid back injuries. Work in a well-ventilated area when welding or using chemicals. If you are unsure about any aspect of the repair process, consult a qualified professional.
Conclusion
Repairing or replacing a 240SX radiator core support is a challenging but rewarding task. By understanding the function of the core support, carefully assessing the damage, and following proper repair procedures, you can restore the structural integrity of your vehicle and ensure its safe and reliable operation. While this guide provides a comprehensive overview, remember to consult your vehicle's service manual and seek professional assistance when needed. A properly repaired or replaced core support not only enhances the aesthetic appeal of your 240SX but also contributes to its overall safety and performance, allowing you to enjoy this iconic sports car for years to come.