240sx Red/clear Tail Lights: Jdm Style Upgrade
The Nissan 240SX, especially the S13 and S14 generations, remains a popular platform for modification and personalization. One of the easiest and most visually impactful upgrades is swapping the factory tail lights for the JDM-inspired red/clear lens assemblies. While the aesthetic appeal is undeniable, there are technical aspects to consider when undertaking this swap. This article delves into the details of the 240SX red/clear tail light upgrade, covering compatibility, wiring, potential issues, and solutions.
Understanding the Red/Clear Tail Light Design
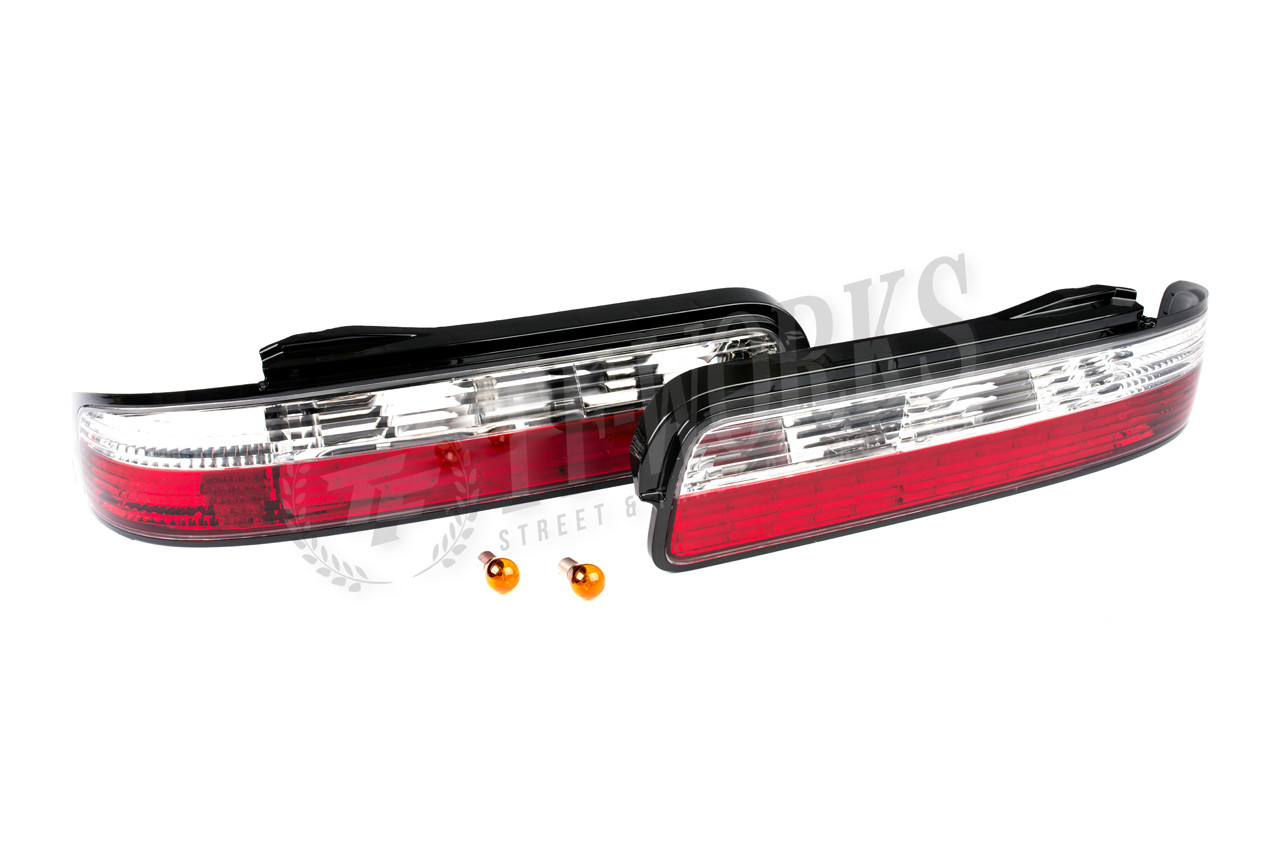
The term "red/clear tail lights" refers to tail light assemblies that feature a combination of red lenses for brake and running lights, and clear or smoked lenses for turn signals and reverse lights. This design is common in JDM (Japanese Domestic Market) vehicles and has become a popular aftermarket styling choice globally. The appeal lies in its cleaner, more modern appearance compared to the all-red factory tail lights found on many USDM (United States Domestic Market) 240SX models.
Lens Construction and Light Output
The lens material is typically either acrylic or polycarbonate plastic. Polycarbonate is generally preferred for its superior impact resistance. The red portion of the lens is either integrally molded with red pigment or painted red. The clear sections allow for the unobstructed transmission of light from the bulbs behind them. The clarity of the lens is crucial for optimal brightness and visibility, especially for the turn signals and reverse lights.
The light output is determined by a combination of factors: the lens clarity, the reflector design (if present), and the wattage and type of the bulbs used. Aftermarket tail lights may not always match the light output of the original equipment manufacturer (OEM) tail lights. It's critical to ensure that the light output is sufficient for safe operation, particularly at night or in adverse weather conditions.
Compatibility and Fitment
The primary concern is whether the aftermarket tail lights are designed specifically for your 240SX generation (S13 or S14). While some manufacturers may claim universal fitment, it's always best to verify compatibility before purchasing. S13 and S14 tail lights are not interchangeable due to significant differences in their shape and mounting points.
S13 Tail Light Variations
Within the S13 generation, there are further variations to consider:
- Hatchback vs. Coupe: The tail lights for the S13 hatchback and coupe (fastback) are completely different and not interchangeable.
- Chassis Codes: While less common, there may be minor variations depending on the specific chassis code (e.g., PS13 vs. RPS13 for right-hand drive vs. left-hand drive, respectively). Check with the manufacturer to ensure compatibility.
S14 Tail Light Variations
The S14 generation has two main body styles (Zenki and Kouki), however the tail lights are the same for both.
Ensuring Proper Fitment
Before installation, inspect the tail lights for any damage or defects. Test-fit the lights to ensure they align properly with the body panels and that all mounting points line up. Poor fitment can lead to gaps, water leaks, and an overall unprofessional appearance. Minor adjustments may be necessary, but if the fit is severely off, consider returning the lights and finding a better-quality replacement.
Wiring and Electrical Considerations
The most common issue encountered during a tail light swap is incorrect wiring. USDM 240SX models often have separate bulbs for the brake light and turn signal, while some JDM-style tail lights integrate these functions into a single bulb or LED array. This necessitates rewiring or the use of adapters.
Identifying Wire Functions
Use a multimeter to identify the function of each wire in the factory tail light harness:
- Ground: Typically a black wire.
- Running Lights (Tail Lights): Illuminates when the headlights are turned on.
- Brake Lights: Illuminates when the brake pedal is pressed.
- Turn Signals: Flashes when the turn signal is activated.
- Reverse Lights: Illuminates when the car is in reverse.
Wiring Methods
There are several approaches to wiring the new tail lights:
- Direct Wiring: This involves cutting and splicing the wires directly. While effective, it's less reversible and can be prone to errors if not done carefully. Use proper crimping techniques and heat-shrink tubing to ensure a secure and weather-resistant connection.
- Adapter Harnesses: Pre-made adapter harnesses are available from some manufacturers and retailers. These harnesses plug into the factory tail light connector and provide the correct wiring for the aftermarket lights, simplifying the installation process.
- Custom Wiring: For complex installations or when adapter harnesses are not available, you may need to create a custom wiring harness. This requires a good understanding of electrical circuits and the ability to read wiring diagrams.
Resistors and LED Tail Lights
If the new tail lights use LED bulbs, you may need to install load resistors in parallel with the turn signal wires. LEDs draw significantly less current than incandescent bulbs, which can cause the turn signals to blink rapidly (hyperflashing). Load resistors mimic the current draw of incandescent bulbs, preventing this issue. Calculate the appropriate resistance value before installation.
Important Safety Note: When working with electrical systems, always disconnect the negative battery terminal to prevent accidental shorts and electrical shocks.
Potential Issues and Troubleshooting
Even with careful planning and execution, problems can arise during or after the tail light swap. Here are some common issues and their solutions:
Hyperflashing Turn Signals
Cause: Insufficient load on the turn signal circuit due to LED bulbs.
Solution: Install load resistors in parallel with the turn signal wires.
Dim or Flickering Lights
Cause: Poor wiring connections, insufficient voltage, or faulty bulbs.
Solution: Check all wiring connections for corrosion or loose connections. Verify that the bulbs are the correct type and wattage. Use a multimeter to check the voltage at the tail light connector.
Blown Fuses
Cause: Short circuit in the wiring.
Solution: Inspect the wiring for any damage or exposed wires. Use a multimeter to check for continuity between the wires and ground. Replace the blown fuse with the correct amperage rating.
Water Leaks
Cause: Poor fitment or damaged seals.
Solution: Ensure that the tail lights are properly seated against the body panels. Inspect the seals for any cracks or damage. Apply a thin bead of silicone sealant around the edges of the tail lights to create a watertight seal.
Legal Considerations
Before installing aftermarket tail lights, it's essential to check your local laws and regulations regarding vehicle lighting. Some jurisdictions may have restrictions on the color or intensity of tail lights, or may require that all lights meet certain safety standards. Failure to comply with these regulations can result in fines or the failure of a vehicle inspection.
Conclusion
Upgrading to red/clear tail lights is a relatively straightforward way to enhance the appearance of your 240SX. By understanding the technical aspects involved, carefully planning the installation, and taking the necessary precautions, you can achieve a professional-looking result that improves both the aesthetics and safety of your vehicle. Remember to prioritize safety and legality when making any modifications to your car's lighting system.