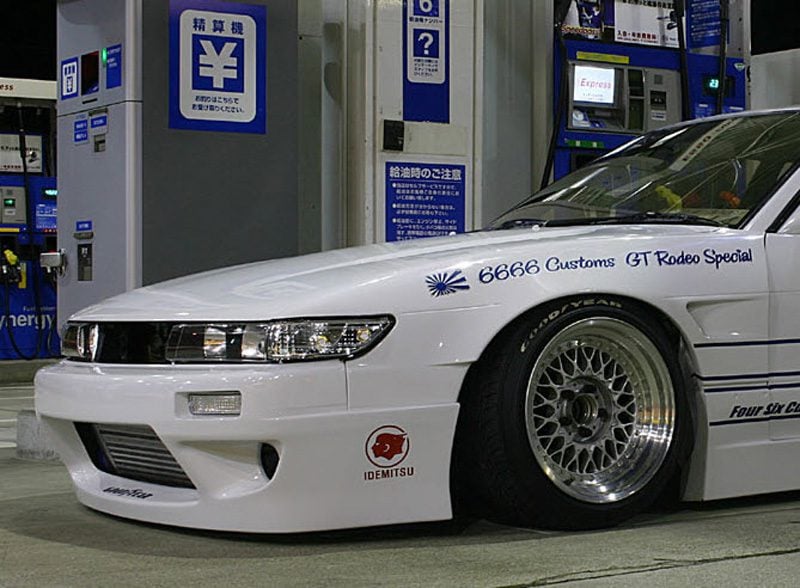
240sx Rocket Bunny Front Bumper
So, you've got a Rocket Bunny front bumper on your 240SX – fantastic choice! They look amazing, right? But let's be honest, fitting aftermarket body kits, especially something as aggressive as the Rocket Bunny, isn't always a walk in the park. I've seen it all in the shop, and I'm here to help you troubleshoot some common problems you might encounter during installation or down the road.
Problem #1: Bumper Doesn't Fit Flush (Gap Issues)
This is probably the most frequent complaint I hear. You've got your Rocket Bunny bumper, you're excited to bolt it on, and... huge gaps! This can happen for a few reasons, so let's break it down.
Possible Causes:
- Poor Initial Fitment: Let's face it, not all fiberglass parts are created equal. Manufacturing tolerances can vary, even with reputable brands. Sometimes, the bumper just isn't perfectly molded to match the contours of your 240SX.
- Damaged Mounting Points: Your 240SX might have existing damage from previous accidents. Even minor bends in the frame horns or fender mounting points can throw off the alignment.
- Incorrect Installation: Double-check everything! Are you using the correct hardware? Are all the bolts tightened properly, but not over-tightened? Sometimes a seemingly small oversight can cause major fitment issues.
- Missing or Damaged Hardware: Rocket Bunny kits, and even replacement hardware, can be missing pieces. Confirm you have everything before you begin.
- Aftermarket Fender Issues: Many times the front fenders have been replaced with non-OEM replacements or have had aggressive fender rolling/pulling. These changes can directly impact the mating surfaces and alignment of the Rocket Bunny bumper.
Solutions:
- Pre-Fit and Assess: Before you even think about paint, do a thorough pre-fit. Hold the bumper up to the car, and carefully examine where the gaps are occurring. Use masking tape to mark the areas that need attention. This will save you a lot of headache later.
- Heat Gun Manipulation: Fiberglass can be manipulated with heat. A heat gun (carefully!) can soften the material, allowing you to gently bend it into shape. **Important:** Don't overheat! You risk damaging the fiberglass. Work in small sections and test the fit frequently. Always wear gloves and eye protection.
- Shimming: Small gaps can often be addressed with shims. Use washers or rubber spacers to fill the gaps and create a flush fit. You can get creative here – even strips of rubber weather stripping can work. Focus on the mounting points closest to the gaps.
- Body Filler/Fiberglass Repair: For larger gaps or imperfections, you might need to use body filler or fiberglass repair techniques. This is where things get more involved, and if you're not comfortable with bodywork, it's best to take it to a professional. This will give you the opportunity to reinforce mounting points as well.
- Frame Straightening: If you suspect frame damage is the culprit, take your 240SX to a reputable body shop for an evaluation. They have the tools and expertise to straighten the frame and ensure proper alignment. This could be the most expensive solution, but it's crucial for the overall integrity of your car.
- Hardware Verification and Replacement: Verify all included hardware matches the parts diagram and replaces any missing or damaged hardware. It can be helpful to source stainless steel replacements.
Tools Needed: Heat gun, masking tape, shims (washers, rubber spacers), body filler (optional), fiberglass repair kit (optional), sandpaper, sockets, wrenches, drill (for minor adjustments), safety glasses, gloves.
Approximate Cost: DIY solutions can range from $20 (shims) to $100 (heat gun, body filler). Professional bodywork can range from $300 to $1000+, depending on the extent of the damage and the shop's hourly rate. Frame straightening can easily exceed $1000.
Problem #2: Difficulty Aligning the Bumper with the Fenders
Sometimes the bumper just doesn't line up properly with the fenders. The edges might be off, or the bumper might sit too high or too low.
Possible Causes:
- Improper Mounting Bracket Installation: Rocket Bunny kits often come with custom mounting brackets. Make sure you've installed them correctly and that they're securely fastened to both the bumper and the car.
- Fender Modifications: If you've previously rolled or pulled your fenders, it can affect the alignment with the bumper. The same applies to aftermarket fenders, especially those that are replicas or not high-quality.
- Bumper Sagging: Over time, the bumper can start to sag, especially if it's made of fiberglass. This is more common if the bumper is exposed to extreme temperatures or UV rays.
- Damaged Bumper: Cracks or warping in the bumper itself can cause alignment issues.
Solutions:
- Loosen and Adjust: Start by loosening all the bolts and mounting hardware. This will give you some wiggle room to adjust the bumper's position. Use shims (as mentioned above) to fine-tune the alignment.
- Reinforce Mounting Points: If the mounting points are weak or damaged, reinforce them with fiberglass or metal brackets. This will provide a more secure and stable attachment.
- Fender Adjustment: In some cases, you might need to make minor adjustments to your fenders. This could involve gently bending them or using a fender roller. Be careful not to damage the paint!
- Bumper Support Brackets: Install additional support brackets to prevent sagging. These brackets can be attached to the frame or other structural components of the car. There are many aftermarket options specifically designed for this purpose.
- Bumper Repair: If the bumper is cracked or warped, you'll need to repair it using fiberglass repair techniques. This can be a time-consuming process, but it's essential for restoring the bumper's structural integrity.
- Consider Adjustable Brackets: There are aftermarket adjustable brackets available that will allow you to fine-tune the placement of your bumper. These brackets can be extremely helpful, especially if the chassis has seen better days.
Tools Needed: Sockets, wrenches, shims, fiberglass repair kit (optional), metal brackets (optional), fender roller (optional), safety glasses, gloves.
Approximate Cost: DIY solutions can range from $20 (shims) to $100 (fiberglass repair kit). Adjustable brackets can cost $50-$200. Professional bodywork can range from $200 to $800+, depending on the extent of the damage and the shop's hourly rate.
Problem #3: Bumper Cracking or Chipping
Fiberglass bumpers are more prone to cracking and chipping than their plastic counterparts. This is especially true if the bumper is subjected to impacts or stress.
Possible Causes:
- Impacts: Even minor bumps can cause cracks or chips in the bumper.
- Stress: Flexing or twisting of the bumper can also lead to cracking, especially around mounting points.
- Poor Paint Job: A poorly applied paint job can be more susceptible to chipping and peeling.
- Sun Exposure: Prolonged exposure to sunlight can cause the fiberglass to become brittle and crack.
- Road Debris: Rocks and other road debris can chip the paint or even damage the fiberglass itself.
Solutions:
- Fiberglass Repair: For minor cracks and chips, you can use a fiberglass repair kit to patch them up. Follow the instructions carefully and sand the repaired area smooth before painting.
- Professional Bodywork: For larger cracks or more extensive damage, it's best to take the bumper to a professional body shop. They have the tools and expertise to repair the damage properly and ensure a long-lasting repair.
- Reinforce Vulnerable Areas: Consider reinforcing vulnerable areas of the bumper with additional layers of fiberglass. This will make the bumper more resistant to cracking and chipping.
- Quality Paint Job: Invest in a quality paint job to protect the bumper from the elements and prevent chipping. Use a flexible paint that can withstand the stresses of daily driving.
- Protective Film: Apply a clear protective film to the bumper to protect it from scratches and chips. This film is virtually invisible and can be easily removed if necessary.
- Mud Flaps: If you frequently drive on gravel roads, consider installing mud flaps to protect the bumper from rock chips.
Tools Needed: Fiberglass repair kit, sandpaper, primer, paint, clear coat, safety glasses, gloves.
Approximate Cost: DIY fiberglass repair can cost $50-$100. A professional paint job can range from $300 to $1000+, depending on the quality of the paint and the body shop's hourly rate. Protective film can cost $100-$300.
Problem #4: Difficulty Installing Turn Signals/Lights
Rocket Bunny kits often require you to relocate or modify your turn signals and lights. This can be a tricky process, especially if you're not familiar with wiring.
Possible Causes:
- Missing or Incompatible Parts: The kit might not include all the necessary parts for relocating the lights.
- Wiring Issues: You might need to extend or modify the existing wiring harness to reach the new light locations.
- Incorrect Installation: The lights might not be properly secured or aligned, causing them to malfunction or fall off.
Solutions:
- Verify Kit Contents: Make sure you have all the necessary parts for relocating the lights. If anything is missing, contact the seller or manufacturer.
- Wiring Diagrams: Consult a wiring diagram for your 240SX to ensure you're connecting the wires correctly. If you're not comfortable with wiring, it's best to have a professional electrician do the job.
- Secure Mounting: Use appropriate hardware to securely mount the lights to the bumper. Make sure the lights are properly aligned and aimed.
- Test Functionality: After installing the lights, test them to make sure they're working properly. Check the turn signals, headlights, and fog lights (if applicable).
- Relay Installation: Adding a relay can help protect the wiring and ensure proper functionality of the lights. This is particularly helpful if you're using aftermarket lights with different power requirements.
Tools Needed: Wire strippers, crimpers, multimeter, wiring connectors, sockets, wrenches, safety glasses.
Approximate Cost: DIY wiring solutions can cost $20-$50. Professional electrical work can range from $100 to $300+, depending on the complexity of the job.
Remember, installing a Rocket Bunny front bumper requires patience and attention to detail. Don't be afraid to ask for help from experienced friends or professionals. With the right tools and knowledge, you can achieve a perfect fit and a stunning look for your 240SX. Good luck!