240sx Zenki Clear Headlights: A Popular Jdm-style Mod
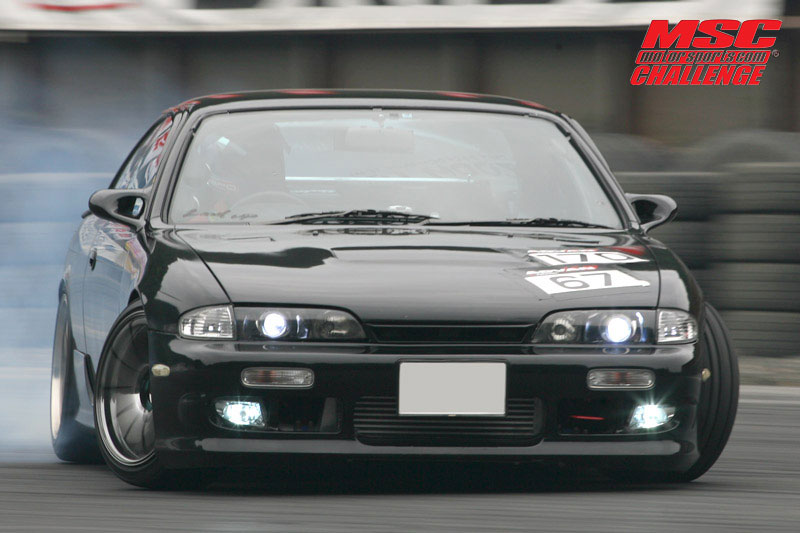
The 240SX, particularly the S13 generation, remains a beloved platform for customization, blending affordability with a responsive chassis. Among the myriad of modifications available, swapping the original headlights for Zenki (前期) clear headlights is an enduringly popular choice, leaning heavily into the JDM (Japanese Domestic Market) aesthetic. This article delves into the nuances of this upgrade, examining its benefits, potential challenges, and technical considerations for a successful installation.
Why Clear Headlights? A Look at Aesthetics and Performance
The factory headlights on a 240SX, especially after decades of exposure to the elements, often suffer from clouding and yellowing. This degradation not only detracts from the car's appearance but also diminishes headlight output, impacting nighttime visibility. Clear headlights, conversely, offer a cleaner, more modern look that complements the S13's sleek lines. The Zenki headlights, specifically those designed for the early (1989-1990) models, hold a unique appeal.
Beyond aesthetics, the improved clarity of new lenses can translate to enhanced lighting performance. While simply swapping lenses won't magically transform your car into a modern LED-equipped vehicle, it does allow for a more efficient projection of light from the bulb. This is particularly noticeable if you're replacing heavily oxidized or damaged original headlights.
It’s important to clarify that some clear headlights are sold as complete units, including the housing, while others are replacement lenses designed to be installed onto the original housing. The latter option often requires more labor but can be more cost-effective if your existing housings are in good condition.
Understanding Light Output: A Quick Primer
Before diving into the installation process, it's crucial to understand how headlight performance is measured. Key terms to consider include:
- Luminous Flux (Lumens): This measures the total amount of visible light emitted by a light source. Higher lumens generally mean a brighter light.
- Candela: This measures the luminous intensity in a specific direction. It’s important for focusing the light beam properly.
- Color Temperature (Kelvin): This describes the color of the light emitted. Lower Kelvin values (e.g., 3000K) produce a warmer, yellowish light, while higher values (e.g., 6000K) produce a cooler, bluish-white light. Many aftermarket HID and LED options lean towards higher Kelvin values.
While clear headlights allow for better light projection, the bulb type itself plays a significant role in overall output. Simply installing clear lenses with old, dim halogen bulbs won’t yield drastic improvements. Consider upgrading to brighter halogen bulbs or exploring HID (High-Intensity Discharge) or LED conversions (discussed later).
The Installation Process: A Step-by-Step Guide
The installation process will vary slightly depending on whether you're replacing the entire headlight unit or just the lens. Here’s a general guide:
- Preparation: Disconnect the negative battery terminal. This is a crucial safety step to prevent electrical shorts during the process. Gather your tools: screwdrivers (Phillips and flathead), sockets and ratchets, a heat gun (if replacing lenses only), a putty knife or plastic trim removal tool, and any necessary wiring connectors.
- Headlight Removal (Complete Unit Replacement): Typically, you'll need to remove the front grille and potentially the corner lights to access the headlight mounting bolts. These bolts are usually located around the perimeter of the headlight housing. Carefully disconnect the electrical connectors attached to the headlight bulb and any other accessories like parking lights.
- Lens Replacement (If Applicable): This is the more labor-intensive option.
- First, you need to separate the old lens from the housing. This usually involves heating the sealant around the lens edge with a heat gun to soften it. Be careful not to overheat the plastic housing, as this can cause warping. Work slowly and evenly around the perimeter.
- Use a putty knife or plastic trim removal tool to carefully pry the lens away from the housing. Be patient and avoid using excessive force, which could crack the housing.
- Once the old lens is removed, thoroughly clean the housing to remove any residual sealant.
- Apply a new bead of sealant (automotive-grade silicone sealant is recommended) to the housing where the new lens will sit.
- Carefully position the new lens onto the housing and clamp it securely in place. Allow the sealant to cure completely according to the manufacturer's instructions.
- Wiring and Bulb Installation: If you're using the original wiring harness, simply reconnect the electrical connectors to the new headlight assembly. If you're upgrading to HID or LED bulbs, you may need to install a wiring harness adapter or perform some minor wiring modifications. HID kits, in particular, typically require a ballast, which needs to be mounted securely in the engine bay.
- Headlight Alignment: After installation, it's essential to properly align your headlights to ensure optimal visibility and avoid blinding oncoming traffic. This can be done using a headlight aiming machine at a professional shop or by following DIY instructions using a wall and a measuring tape. Proper headlight alignment is crucial for safe nighttime driving.
- Testing: Before reassembling everything, test the headlights (low beam, high beam, and any other lighting functions) to ensure they are working correctly.
Potential Pitfalls and Troubleshooting
While the clear headlight conversion is generally straightforward, here are some common issues you might encounter:
- Condensation: This is a common problem, especially after lens replacement. It's caused by moisture entering the headlight housing. Ensure that the sealant is applied properly and that all vents and drain holes are clear. Some people also use silica gel packets inside the housing to absorb moisture.
- Fitment Issues: Aftermarket headlights, particularly inexpensive ones, may not always fit perfectly. Be prepared to make minor adjustments or modifications to ensure proper fitment. Compare the new unit side-by-side with the old one to identify any discrepancies before installation.
- Wiring Problems: If your headlights don't work after installation, double-check all wiring connections. Ensure that the connectors are securely plugged in and that there are no damaged wires. Use a multimeter to test for voltage and continuity.
- HID/LED Compatibility: Installing HID or LED bulbs in a headlight housing designed for halogen bulbs can sometimes result in poor light output or glare. Some housings are designed with reflector optics that are optimized for specific bulb types. Consider projector headlights designed specifically for HID or LED bulbs for optimal performance. Also, ensure that your HID or LED kit is DOT (Department of Transportation) approved for street use.
HID and LED Conversions: A More Advanced Upgrade
As mentioned earlier, upgrading to HID or LED bulbs can significantly improve headlight output. However, these conversions require careful consideration. Here's a brief overview:
HID Conversions
HID kits produce a brighter, more intense light than halogen bulbs. They require a ballast to regulate the voltage to the bulb. Common HID bulb types include H1, H3, H4, H7, 9005, and 9006. When selecting an HID kit, pay attention to the Kelvin rating (color temperature). A Kelvin value of 4300K is generally considered to be the closest to natural daylight and provides the best visibility. Higher Kelvin values (e.g., 6000K or 8000K) may look cool but can actually reduce visibility in certain conditions.
LED Conversions
LED bulbs are becoming increasingly popular as a replacement for halogen bulbs. They offer several advantages, including long lifespan, low power consumption, and instant-on illumination. LED technology has improved dramatically in recent years, and many LED bulbs now offer comparable or even superior performance to HID bulbs. When selecting LED bulbs, look for bulbs that are designed to mimic the filament position of halogen bulbs. This helps to ensure proper focus and beam pattern. Also, consider LED bulbs with integrated cooling fans or heat sinks to prevent overheating.
Important Legal Note: Before installing HID or LED bulbs, check your local laws and regulations. Some jurisdictions prohibit the use of HID or LED bulbs in headlight housings that were not originally designed for them. It is your responsibility to ensure that your modifications comply with all applicable laws.
Conclusion
Swapping your 240SX's headlights for Zenki clear headlights is a relatively straightforward and rewarding modification that can significantly improve the car's appearance and potentially enhance lighting performance. By understanding the technical aspects of the installation process, carefully selecting your components, and addressing potential pitfalls, you can achieve a successful and aesthetically pleasing upgrade. Remember to prioritize safety and ensure that your modifications comply with all applicable laws and regulations. The JDM aesthetic, combined with improved visibility, makes this mod a classic choice for 240SX enthusiasts.