370z Carbon Fiber Door Handles
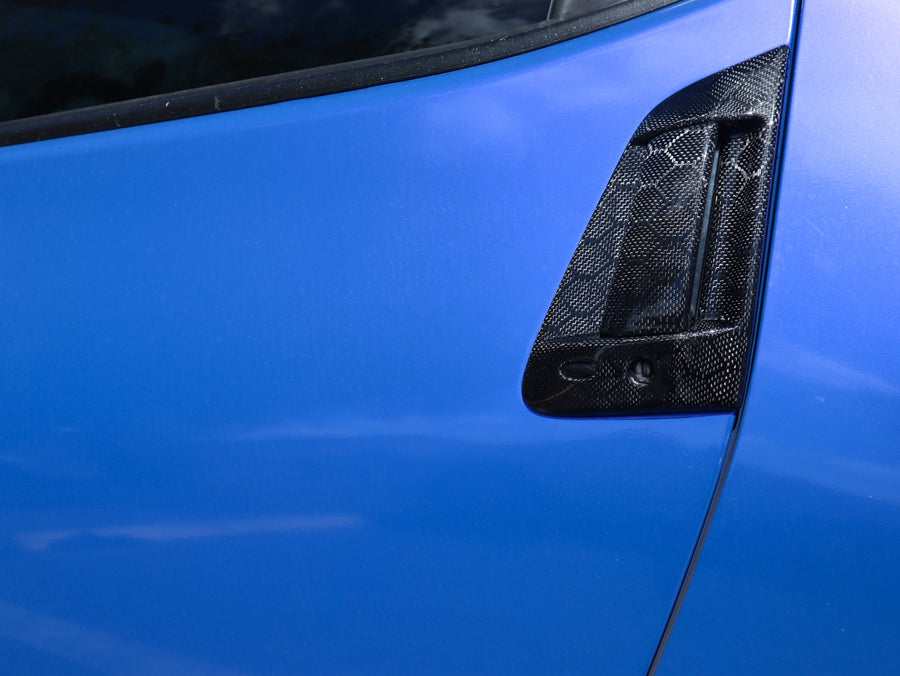
So, you're thinking about or maybe you've already taken the plunge and installed some sweet carbon fiber door handles on your 370Z. They look fantastic, right? That sleek, lightweight material adds a touch of aggressive style that really sets your Z apart. But sometimes, things don't always go as smoothly as planned. We've seen it all here at the shop, and we're here to help you troubleshoot some common issues that 370Z owners face when upgrading to carbon fiber door handles.
Problem: Fitment Issues - "They Just Don't Seem to Line Up!"
This is probably the most common complaint we hear. Carbon fiber, while strong, can sometimes have slight variations in manufacturing, especially with aftermarket parts. This can lead to fitment issues, making it difficult to get the handles to sit flush against the door panel or to latch properly.
Solution: Precision and Patience is Key!
First, double-check that you ordered the correct handles for your specific year and model 370Z. There can be subtle differences that affect fitment. Once you've confirmed you have the right parts, let's get to work:
- Inspection is Paramount: Before you even attempt installation, carefully compare the carbon fiber handles to your original OEM handles. Look for any obvious discrepancies in size, shape, or mounting points. Pay close attention to the location of the latch mechanism and the bolt holes.
- Gentle Persuasion (and Maybe Some Sanding): Sometimes, a little bit of finesse is all it takes. Try gently maneuvering the handle into place, applying even pressure. If you encounter resistance, do not force it! This can damage the carbon fiber. Instead, identify the areas where the handle is binding. It's often the contact points with the door panel or the latch mechanism.
A very small amount of sanding (using very fine-grit sandpaper, like 400 or 600 grit) might be necessary to remove a tiny amount of material in the binding area. Be extremely cautious and remove material incrementally, constantly checking the fit. Wrap the sandpaper around a small, flat block for even sanding.
- Adjusting the Latch Mechanism: The latch mechanism itself might need slight adjustment. On the 370Z, the latch is often adjustable, providing a little wiggle room. Loosen the mounting bolts for the latch (usually accessible from inside the door) and try repositioning it slightly to align with the new handle. Remember to tighten the bolts securely after adjustment.
- Utilizing Shims: In some cases, you might need to use shims to create a proper fit. Thin washers or even small pieces of plastic can be used to fill gaps and ensure the handle sits flush. Experiment with different thicknesses of shims until you achieve the desired fit. Secure the shims with a small amount of adhesive to prevent them from shifting.
- Professional Installation: If you're still struggling after trying these steps, don't hesitate to seek professional help. A body shop or a mechanic experienced in aftermarket modifications can properly assess the situation and make the necessary adjustments. They'll have the right tools and expertise to ensure a perfect fit without damaging your car or the new handles.
Tools Needed: Socket set, wrenches, fine-grit sandpaper (400-600 grit), small flat block for sanding, shims (washers or plastic), adhesive (optional), screwdriver set.
Approximate Cost for Professional Installation: $100 - $300 (depending on the complexity of the fitment issues and the shop's hourly rate).
Problem: The Door Doesn't Open Properly - "It Feels Stiff or Gets Stuck"
Even if the handle *looks* like it's installed correctly, the door might not open smoothly. This usually points to an issue with the latch mechanism not engaging or disengaging properly.
Solution: Lubrication and Cable Adjustment
This is often related to the installation process affecting the latch cable. Here's how to tackle it:
- Lubrication is Your Friend: The first step is to lubricate all moving parts of the latch mechanism. Use a high-quality lubricant specifically designed for automotive use. Spray the lubricant into the latch itself, the hinges, and any points where the handle connects to the latch mechanism. Work the handle back and forth several times to distribute the lubricant evenly.
- Cable Adjustment (The Most Likely Culprit): The cable that connects the door handle to the latch mechanism might need adjustment. During the handle replacement, the cable could have been stretched or become misaligned. Locate the cable adjuster (usually near the latch mechanism inside the door). It's typically a small barrel adjuster that can be turned to increase or decrease the cable tension.
Carefully adjust the cable tension until the door opens smoothly and closes securely. Be careful not to overtighten the cable, as this can prevent the door from latching properly. A little bit goes a long way!
- Check for Obstructions: While you're inside the door panel, inspect the area around the latch mechanism and the door handle. Make sure nothing is obstructing the movement of the latch or the cable. Sometimes, a stray wire or a piece of trim can interfere with the mechanism.
- Re-Check the Handle Installation: It sounds obvious, but double-check that the door handle is properly secured and isn't binding against the door panel. A loose or improperly installed handle can put extra strain on the latch mechanism.
Tools Needed: Lubricant (automotive grade), screwdriver set, pliers (optional for adjusting the cable adjuster).
Approximate Cost for Professional Adjustment: $80 - $150 (labor cost for diagnosis and adjustment).
Problem: Carbon Fiber Damage - "I Chipped or Cracked the Handle!"
Carbon fiber is strong, but it's also brittle. It can be susceptible to chipping or cracking, especially if mishandled during installation or if exposed to excessive force.
Solution: Repair or Replacement – Depending on the Severity
The course of action depends on the damage:
- Minor Chips: Small chips can often be repaired using a carbon fiber repair kit. These kits typically include epoxy resin and carbon fiber filler. Clean the chipped area thoroughly, apply the epoxy resin and filler, and then sand it smooth once it has cured. You might need to apply a clear coat to match the surrounding finish.
- Cracks: Cracks are more serious and can compromise the structural integrity of the handle. Depending on the severity and location of the crack, a professional carbon fiber repair might be possible. However, in many cases, replacement is the best option. A professional can assess the crack and advise you on the most appropriate course of action.
- Prevention is Key: Handle the carbon fiber handles with care during installation. Avoid dropping them or subjecting them to excessive force. Use the proper tools and techniques, and take your time. It is also highly recommended to use protective tape on the edges during installation to avoid chipping.
- Protect from UV Damage: Over time, exposure to sunlight can cause carbon fiber to fade or yellow. Apply a UV-resistant clear coat to protect the handles from the sun's harmful rays. Regularly clean and wax the handles to maintain their appearance.
Tools Needed: Carbon fiber repair kit (for minor chips), fine-grit sandpaper, clear coat (UV resistant), cleaning supplies.
Approximate Cost for Repair: $50 - $200 (for DIY repair kit) or $150 - $400 (for professional carbon fiber repair). Replacement cost depends on the brand and style of the handles.
Problem: Handle Looseness
After some time, you might find that the door handle becomes loose. This could be due to vibration or wear and tear on the mounting hardware.
Solution: Tighten or Replace Hardware
This is usually a simple fix, but it's important to address it promptly to prevent further damage.
- Inspect the Mounting Points: First, carefully inspect the mounting points for the door handle. Look for any signs of damage, such as stripped threads or broken clips.
- Tighten the Bolts: Use the appropriate sized wrench or socket to tighten the mounting bolts. Be careful not to overtighten, as this could strip the threads. Tighten until snug.
- Use Thread Locker: To prevent the bolts from loosening again, apply a small amount of thread locker (such as Loctite) to the threads before tightening.
- Replace Worn Hardware: If the bolts or clips are damaged, replace them with new ones. You can usually find replacement hardware at your local auto parts store or online. Be sure to use hardware that is compatible with your 370Z.
- Check the Handle Itself: Ensure that the handle itself is not damaged. A cracked or warped handle can also contribute to looseness.
Tools Needed: Socket set, wrench set, thread locker (such as Loctite), screwdriver set.
Approximate Cost for Hardware Replacement: $10 - $50 (depending on the type of hardware needed). Labor costs will depend on the shop's hourly rate, but this is typically a quick and easy fix.
Remember, taking your time, being patient, and approaching these issues methodically will greatly increase your chances of successfully installing and maintaining your carbon fiber door handles. If you're ever unsure, don't hesitate to seek professional assistance. We're here to help you keep your 370Z looking and performing its best!