Aerodynamic Body Kit Options For The 1992 Nissan 240sx
So, you're looking to spruce up your 1992 Nissan 240SX with an aerodynamic body kit? Excellent choice! The 240SX, especially the S13 chassis, is a fantastic platform for customization, and a well-chosen body kit can dramatically improve its looks and potentially even its performance. However, navigating the world of aftermarket aero can be tricky. This article will break down your options, highlight some common issues, and provide practical advice to help you make the right decisions.
Understanding Your Aero Options for the S13
The first step is understanding the different types of kits and what they offer. Broadly speaking, you'll find kits categorized by their function and styling:
Full Body Kits: The Comprehensive Approach
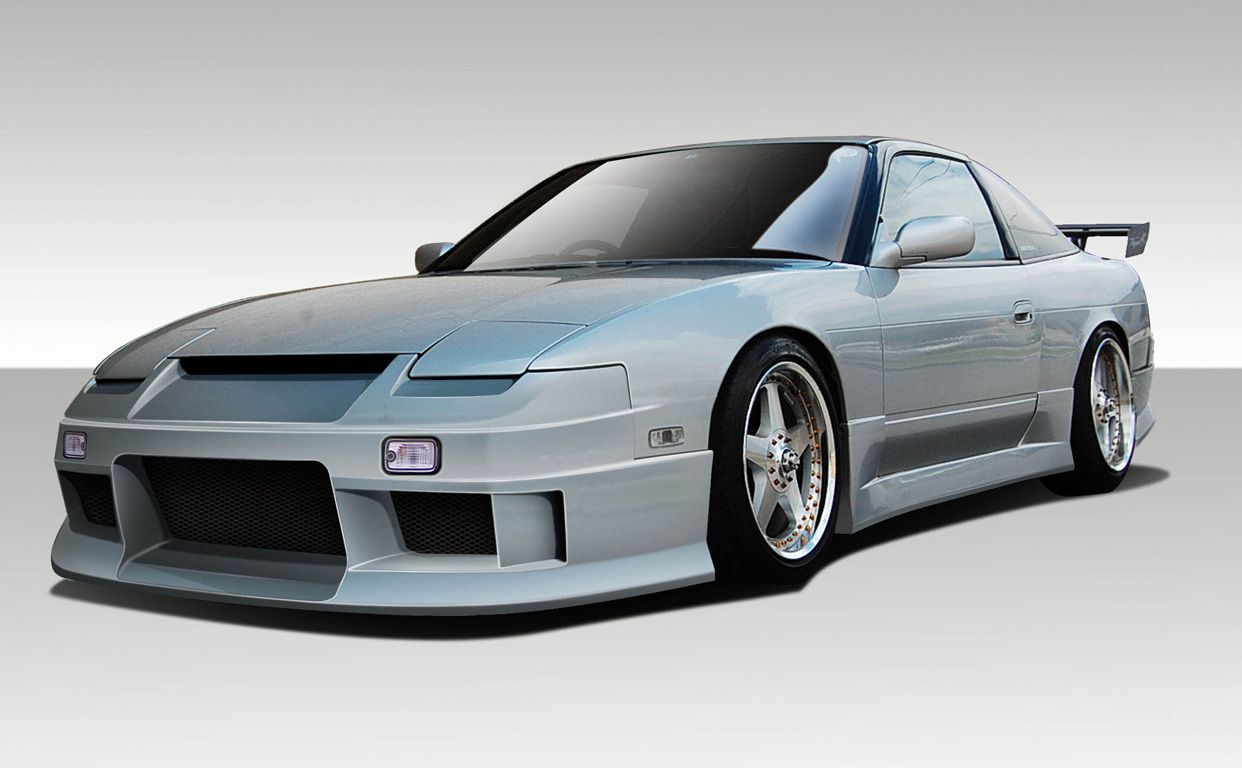
A full body kit typically includes a front bumper, side skirts, and a rear bumper. These are designed to work together, providing a cohesive and often aggressive aesthetic. Popular styles for the 240SX include:
- JDM Style: Think Type X or Kouki conversions. These kits aim to replicate factory options that were available in Japan but not always in other markets.
- Drift Style: Often wider and more aggressive, with pronounced splitters, diffusers, and extended side skirts for improved downforce and a more menacing look.
- Aggressive Street: A blend of form and function, offering a stylish upgrade without going overboard. These often feature subtle changes to the factory lines, enhancing the existing design.
Pros: Unified look, often improves aerodynamics (depending on the design), makes a significant visual statement.
Cons: Higher cost, more involved installation, potential fitment issues depending on the manufacturer.
Lip Kits: Subtlety and Simplicity
Lip kits are a more subtle option, typically consisting of a lip spoiler that attaches to the bottom of the existing front bumper, and sometimes similar additions to the sides and rear. They offer a more understated aesthetic and are often easier to install.
Pros: More affordable, easier to install, subtle aesthetic upgrade.
Cons: Less dramatic visual impact, may not significantly improve aerodynamics.
Add-Ons: A La Carte Customization
Individual pieces like wings, canards, diffusers, and splitters allow for a more customized approach. You can mix and match these components to create a unique look and fine-tune the aerodynamic properties of your car.
Pros: Highly customizable, allows for targeted aerodynamic improvements, can be more cost-effective if you only need certain elements.
Cons: Requires more research and planning to ensure parts work well together aesthetically and aerodynamically, can be easy to overdo it and create a visually cluttered look.
Addressing Common Issues and Concerns
Before you dive in, let's tackle some common problems 240SX owners face when installing body kits:
Fitment Issues: The Bane of Aftermarket Parts
This is the biggest challenge. Not all body kits are created equal. Cheaper kits, especially those made from fiberglass, often suffer from poor fitment. Gaps, misalignment, and the need for extensive modification are common. Always research the manufacturer and read reviews before buying. Look for kits made from more durable and flexible materials like polyurethane or high-quality fiberglass reinforced plastic (FRP).
Solution: Invest in a reputable brand. Be prepared for minor modifications, even with high-quality kits. Test-fit the kit *before* painting. Use heat guns to gently mold the parts if needed. Consider professional installation if you're not comfortable with modifications.
Material Quality: Fiberglass vs. Polyurethane vs. Carbon Fiber
The material of your body kit significantly impacts its durability and longevity. Here's a breakdown:
- Fiberglass: Affordable but brittle. Prone to cracking and damage from impacts. Requires careful handling.
- Polyurethane: More flexible and durable than fiberglass. Can withstand minor impacts without cracking. Generally a good choice for street cars.
- Carbon Fiber: Lightweight and strong, but expensive. Primarily used for performance applications where weight savings are critical. Can be prone to UV damage if not properly protected.
Solution: Choose the material that best suits your needs and budget. For a daily driver, polyurethane is often the best balance of durability and affordability. If you're on a tight budget, fiberglass can work, but be prepared for potential repairs.
Paint Matching: Getting the Perfect Shade
Matching the paint on your body kit to the existing paint on your 240SX can be tricky, especially on older cars where the paint may have faded. The factory paint code is a good starting point, but it's not always enough.
Solution: Take your car to a reputable auto body shop. They can use a paint scanner to analyze the existing paint and create a custom match. Always have the entire kit painted at the same time to ensure a consistent finish. Avoid cutting corners on paint quality; a good clear coat will protect your investment.
Installation Challenges: DIY or Professional?
Installing a body kit can range from relatively simple to extremely complex, depending on the kit and your experience level. At a minimum you need to:
- Remove the old bumper, sideskirts etc.
- Test fit the new parts.
- Drill holes or modify mounting points if necessary.
- Prep parts for paint (sanding, priming).
- Install hardware (screws, bolts, clips).
You may also need to cut or modify the inner fender liners to accomodate the new parts.
Solution: Honestly assess your skills and tools. Basic hand tools (wrenches, sockets, screwdrivers), a drill, a jack and jack stands, and potentially a heat gun are essential. If you're unsure, don't hesitate to seek professional help. A botched installation can damage your car and the body kit.
Practical Tips and Considerations
- Budget Wisely: Don't just factor in the cost of the kit itself. Include paint, installation (if applicable), and any necessary hardware or modifications.
- Research Thoroughly: Read reviews, watch installation videos, and talk to other 240SX owners.
- Inspect the Kit Upon Arrival: Check for any damage during shipping. Report any issues to the seller immediately.
- Prepare the Surface: Clean and degrease the surfaces where the body kit will be attached. This will ensure proper adhesion.
- Use the Right Adhesives: High-quality automotive adhesive or sealant is crucial for a secure and long-lasting bond.
- Don't Overlook Lighting: If the new bumper doesn't accomodate the old lights you may have to also install new lights.
Estimated Costs
Here's a rough breakdown of estimated costs. Keep in mind that these are just averages and can vary significantly based on the brand, quality, and location:
- Body Kit (Fiberglass): $300 - $800
- Body Kit (Polyurethane): $600 - $1500
- Body Kit (Carbon Fiber): $1500+
- Paint (Single Color): $500 - $1500
- Installation (DIY): $50 - $200 (for materials and tools)
- Installation (Professional): $500 - $2000+ (depending on complexity and modifications)
Important Note: These are just *estimates*. Always get a quote from a reputable shop before committing to any work. And remember, quality is an investment. Spending a little more upfront on a better-quality kit and professional installation can save you money and headaches in the long run.
Conclusion
Adding a body kit to your 1992 Nissan 240SX is a rewarding project that can transform the look of your car. By understanding the different options, addressing common issues, and following these practical tips, you can ensure a successful installation and enjoy your enhanced 240SX for years to come. Good luck!