Aerodynamic Body Kit Options For The 1993 Nissan 240sx (s13)
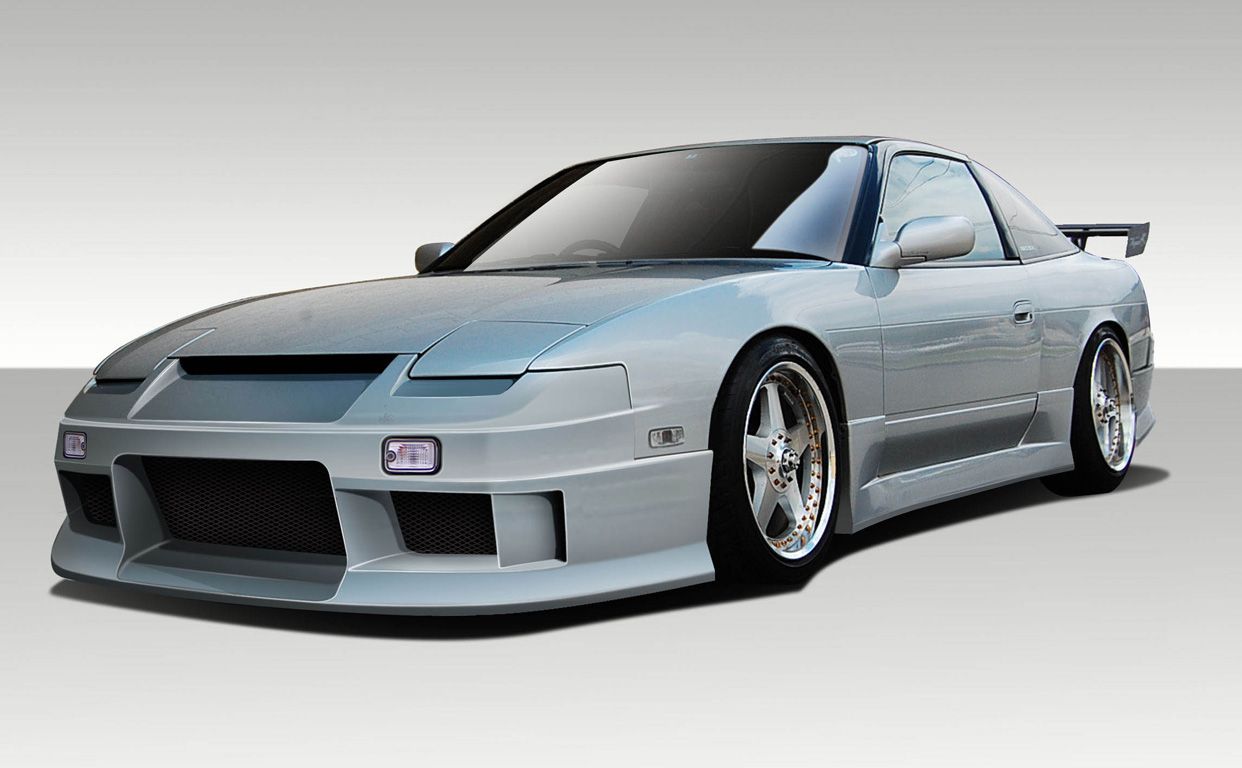
The Nissan 240SX S13, a darling of the drift and tuning communities, offers a fantastic platform for aerodynamic modification. A well-chosen body kit can dramatically alter the car's appearance and, more importantly, its performance. This article will delve into the various body kit options available for the 1993 240SX (S13), focusing on their design, materials, and impact on aerodynamics.
Understanding Aerodynamics Basics
Before diving into specific kits, let's cover some fundamental aerodynamic principles. Aerodynamics is the study of how air flows around objects. In automotive terms, it's about minimizing drag (resistance to motion) and maximizing downforce (vertical force pushing the car towards the ground).
Key concepts to understand are:
- Drag Coefficient (Cd): A dimensionless number representing how easily an object moves through the air. A lower Cd indicates less drag.
- Downforce: The vertical force generated by aerodynamic elements that pushes the car downwards, increasing tire grip and stability, especially at high speeds.
- Lift: The opposite of downforce, an upward force that reduces tire grip. Ideally, we want to minimize lift.
- Boundary Layer: The thin layer of air directly adjacent to the car's surface. Turbulent boundary layers increase drag.
- Vortex Generators: Small fins or ridges designed to create vortices (spinning air currents) that energize the boundary layer and delay flow separation.
Aerodynamic body kits aim to manipulate these factors to improve the car's handling and performance. A badly designed kit can actually *increase* drag and reduce stability, so careful consideration is crucial.
Body Kit Components and Options
A typical body kit for the S13 consists of several components, each designed to contribute to the overall aerodynamic effect:
Front Bumper
The front bumper is the first point of contact with the oncoming air. Its design significantly impacts the Cd and downforce. Common options include:
- Lip Spoilers: These are the simplest and often most affordable option. They extend slightly below the stock bumper and create a small amount of downforce by reducing airflow underneath the car. Examples include the popular Zenki lip or aftermarket polyurethane lips.
- Full Front Bumpers: These replace the entire stock bumper. They offer the most design flexibility and can incorporate features like larger air intakes for cooling, integrated splitters, and canards. Common styles range from aggressive, widebody-style bumpers to more subtle, OEM-inspired designs.
- Splitters: A flat, horizontal extension at the bottom of the front bumper. Splitters are designed to separate high-pressure air above the splitter from low-pressure air below, generating significant downforce. They are often made from materials like aluminum, carbon fiber, or plywood, and are a common DIY modification. A well-designed splitter requires support rods to prevent it from flexing or breaking at high speeds.
- Canards: Small vertical vanes mounted on the front bumper. Canards create vortices that help to control airflow around the front wheels, reducing turbulence and improving downforce. They are most effective when paired with a splitter.
Side Skirts
Side skirts run along the sides of the car, connecting the front and rear bumpers. Their primary function is to reduce airflow under the car and create a smoother transition between the front and rear, minimizing turbulence and drag. Options range from simple, subtle extensions to wider, more aggressive designs that complement widebody kits. Material choices are similar to front bumpers.
Rear Bumper
The rear bumper affects airflow leaving the car. Options include:
- Lip Spoilers: Similar to front lip spoilers, they extend the rear bumper downwards, reducing lift and potentially creating a small amount of downforce.
- Full Rear Bumpers: These can incorporate features like diffusers.
- Diffusers: An angled section on the underside of the rear bumper designed to accelerate airflow exiting from under the car. This creates a low-pressure area that helps to 'suck' the car downwards, generating downforce. A properly designed diffuser requires careful consideration of its angle and the number of strakes (vertical fins) it incorporates.
Rear Wings
Rear wings (also known as spoilers) are a crucial element for generating downforce at the rear of the car. They are available in a wide variety of styles, each with different aerodynamic properties:
- Lip Spoilers (Ducktails): A subtle, integrated spoiler on the trunk lid. These provide a small amount of downforce with minimal drag.
- GT Wings: Larger, adjustable wings mounted on struts. These are designed to generate significant downforce, but also increase drag. The angle of attack (the angle of the wing relative to the airflow) can be adjusted to fine-tune the downforce and drag balance. Higher angles of attack increase downforce but also increase drag.
- Adjustable Wings: The ability to adjust the wing's angle of attack allows for fine-tuning of downforce levels based on track conditions or driver preference.
Hoods
While not strictly part of a "body kit", aftermarket hoods often play a role in aerodynamics and cooling. Hoods with vents or louvers can help to extract hot air from the engine bay, reducing underhood temperatures and potentially improving aerodynamic efficiency by reducing pressure buildup under the hood.
Materials
Body kits are typically made from one of the following materials:
- Fiberglass (FRP): The most common and affordable material. It's relatively lightweight but can be brittle and prone to cracking, especially if impact occurs. Fiberglass kits often require significant preparation (sanding, filling) before painting.
- Polyurethane (PU): More flexible and durable than fiberglass. PU is better at absorbing impacts and is less likely to crack. It's also generally easier to install and paint.
- Carbon Fiber: The lightest and strongest option, but also the most expensive. Carbon fiber offers excellent stiffness and strength, and its distinctive weave pattern is often left visible as a styling element. Carbon fiber kits require specialized painting techniques to protect the finish from UV damage.
- ABS Plastic: Similar to the material used for OEM bumpers. Durable and paintable, but less common for full body kits.
Installation Considerations
Installing a body kit is a moderately complex DIY project. Here are some key considerations:
- Fitment: Aftermarket body kits, especially fiberglass ones, can have inconsistent fitment. Expect to spend time adjusting, trimming, and possibly modifying the kit to achieve a proper fit. Dry-fitting all components before painting is crucial.
- Preparation: Proper surface preparation is essential for a good paint job. This includes sanding, filling imperfections, and applying primer.
- Painting: Painting a body kit requires specialized equipment and skills. If you're not experienced, consider having it professionally painted.
- Mounting Hardware: Ensure you have all the necessary mounting hardware, including screws, bolts, brackets, and adhesive. Using high-quality hardware is essential for a secure and reliable installation.
- Safety: Always wear appropriate safety gear, including eye protection and a respirator, when working with fiberglass or chemicals.
Choosing the Right Kit
The best body kit for your S13 depends on your goals and budget. Consider these factors:
- Aesthetics: Choose a kit that complements the overall style you're aiming for.
- Performance: If performance is a priority, research the aerodynamic properties of the kit. Look for kits that have been wind tunnel tested or proven on the track.
- Budget: Body kits range in price from a few hundred dollars to several thousand dollars. Set a budget and stick to it.
- Intended Use: A car primarily for street use may not need an aggressive, high-downforce kit that adds significant drag. Conversely, a dedicated track car will benefit from maximized downforce.
- Material: Choose a material that suits your needs and budget. Fiberglass is the most affordable, while carbon fiber is the lightest and strongest.
- Reputation: Research the manufacturer and read reviews from other owners. Choose a reputable brand known for quality and fitment.
Beyond Body Kits: Fine-Tuning Aerodynamics
Even with a well-chosen body kit, there are additional steps you can take to further optimize your S13's aerodynamics:
- Ride Height: Lowering the car reduces the amount of air flowing underneath, reducing drag and improving downforce.
- Underbody Panels: Installing flat panels underneath the car smooths out the airflow and reduces turbulence.
- Vortex Generators: As mentioned earlier, these small devices can help to delay flow separation and improve aerodynamic efficiency.
By carefully considering these factors, you can choose a body kit that not only enhances the look of your 1993 Nissan 240SX but also improves its performance on the street or track. Remember to prioritize proper installation and consider additional aerodynamic modifications to achieve the best possible results. Always prioritize safety and ensure your modifications comply with local regulations.