Air Conditioner Compressor Nissan Altima
Alright, let's talk about the heart of your Nissan Altima's air conditioning system: the compressor. This component is responsible for circulating the refrigerant throughout the system, allowing it to absorb heat from the cabin and release it outside. Understanding how it works, common issues, and how to troubleshoot them can save you a lot of money and keep you cool during those hot summer months. We'll dive into the specifics relevant to Altima models, but the underlying principles apply to most automotive AC systems.
Understanding the Altima's AC Compressor
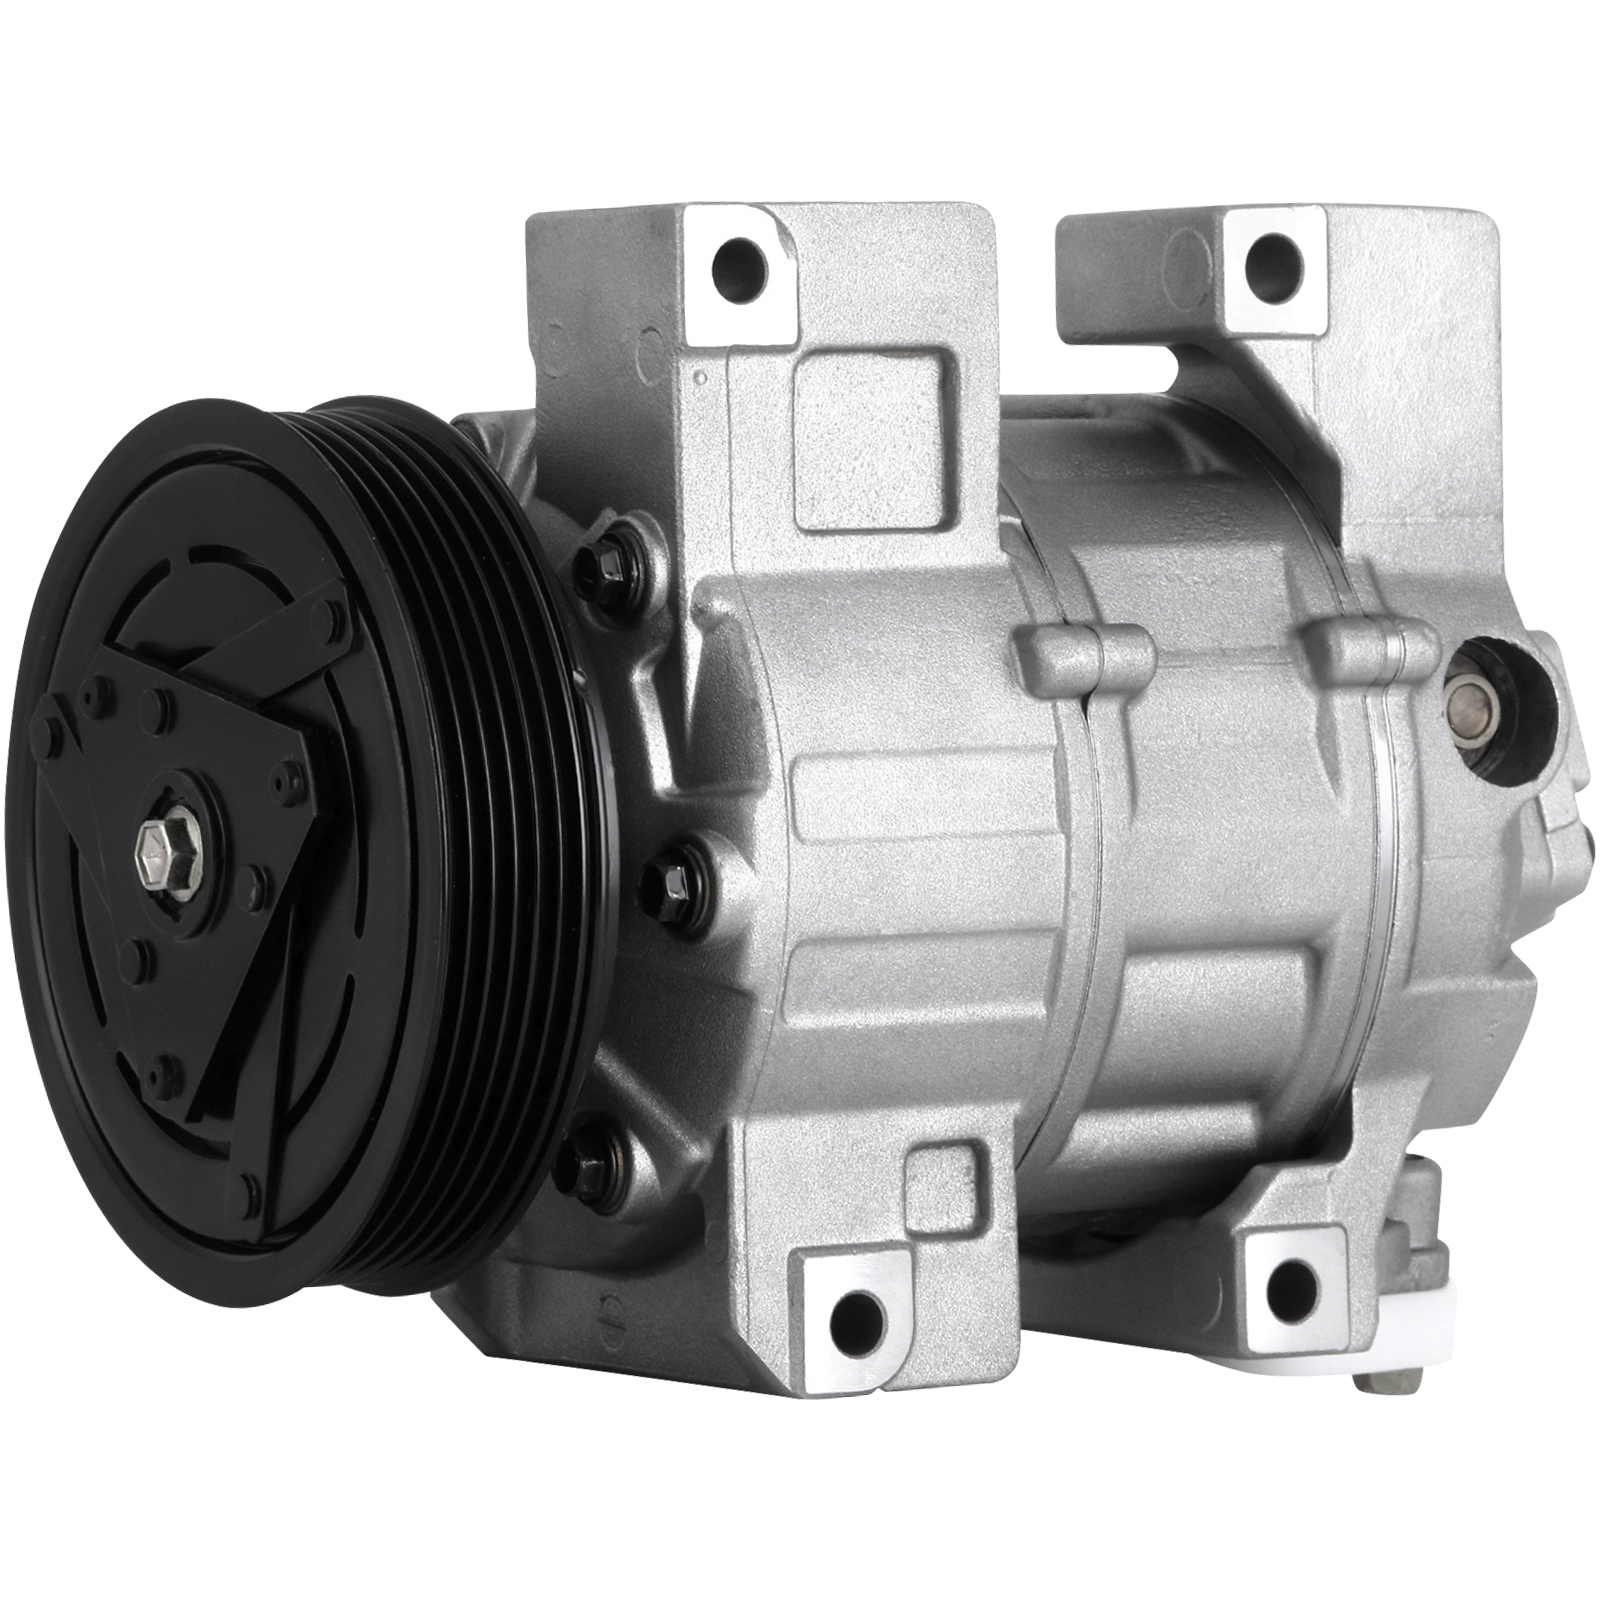
The AC compressor in your Altima, like most automotive compressors, is a positive displacement pump. This means it draws in a specific volume of refrigerant gas, compresses it, and then discharges it at a higher pressure. The Altima's compressor is typically driven by the engine's serpentine belt, through an electromagnetic clutch. Here's a breakdown of the key components and their functions:
- Compressor Body: The main housing, containing the internal components that do the actual compressing.
- Piston/Vane Mechanism: Altima AC compressors often use either a reciprocating piston design or a rotary vane design. Piston types use pistons moving back and forth to compress the refrigerant, while rotary vane compressors use rotating vanes to achieve compression. Both designs effectively increase the pressure of the refrigerant.
- Clutch Assembly: This is an electromagnetic clutch that engages and disengages the compressor from the engine's crankshaft via the serpentine belt. When the AC is turned on, an electric current energizes the clutch coil, creating a magnetic field that pulls the clutch plate against the pulley, effectively locking the compressor shaft to the pulley and causing it to spin.
- Pulley: A grooved wheel that is constantly being turned by the serpentine belt, even when the AC system is off.
- Refrigerant Ports: These are the inlet (suction) and outlet (discharge) ports where refrigerant enters and exits the compressor. They are typically threaded connections or quick-connect fittings designed to withstand the high pressures involved.
- Pressure Relief Valve: A safety mechanism designed to vent refrigerant if the pressure inside the compressor becomes dangerously high, preventing catastrophic failure. This is a critical safety component.
How the System Works
The AC system is a closed loop, and the compressor is the driver. Here's the general flow:
- Low-pressure, low-temperature refrigerant gas enters the compressor from the evaporator.
- The compressor compresses the refrigerant, increasing its pressure and temperature.
- High-pressure, high-temperature refrigerant gas is discharged to the condenser.
- The condenser, located at the front of the car, dissipates heat from the refrigerant, causing it to condense into a high-pressure, high-temperature liquid.
- The high-pressure liquid refrigerant flows to the receiver-drier (or accumulator in some systems). This component filters out contaminants and removes moisture from the refrigerant.
- The refrigerant then passes through an expansion valve or orifice tube, which restricts the flow and causes a pressure drop. This pressure drop causes the refrigerant to rapidly expand and cool.
- The cold, low-pressure refrigerant enters the evaporator, located inside the dashboard. Here, the refrigerant absorbs heat from the air passing through the evaporator core, cooling the cabin.
- The refrigerant, now a low-pressure, low-temperature gas, returns to the compressor, completing the cycle.
Common Altima AC Compressor Problems
Several issues can plague your Altima's AC compressor. Recognizing these problems early can prevent more extensive and costly repairs.
- Clutch Failure: The clutch is a common failure point. It may fail to engage, resulting in no cold air. You might hear a clicking sound when the AC is turned on, but the compressor won't spin. This can be due to a worn clutch plate, a faulty clutch coil, or an open circuit in the electrical wiring. A common test is to directly apply 12V to the clutch coil to see if it engages. If it doesn't, the coil is likely bad.
- Internal Compressor Failure: The internal components of the compressor can wear out or seize due to lack of lubrication, contamination, or simply age. This will often result in a rattling, grinding, or squealing noise coming from the compressor. You might also find metal particles in the refrigerant. This is a serious issue that usually requires compressor replacement. Never run a system with a seized compressor for long, as this can damage the serpentine belt and potentially other components.
- Refrigerant Leaks: Leaks in the system can cause the compressor to work harder and eventually fail. Common leak locations include the compressor seals, refrigerant lines, the condenser, and the evaporator. A UV dye test, where a special dye is injected into the system and then illuminated with a UV light, can help pinpoint the leak. Electronic leak detectors are also effective.
- Electrical Problems: Issues with the wiring, relays, or sensors can prevent the compressor from engaging. Check the AC relay and fuse in the fuse box. A faulty pressure switch can also prevent the compressor from running if it senses abnormally low or high refrigerant pressure.
- Contamination: Dirt, debris, or moisture in the refrigerant can damage the compressor and other components. This is why it's crucial to evacuate the system properly and use a vacuum pump before recharging. Installing a new receiver-drier/accumulator is also important when replacing the compressor to remove any remaining contaminants.
Troubleshooting Your Altima's AC Compressor
Before replacing the compressor, it's important to diagnose the problem accurately. Here are some troubleshooting steps you can take:
- Check the Basics: Start by checking the AC fuse and relay. Consult your owner's manual for their location. Also, ensure the serpentine belt is in good condition and properly tensioned.
- Clutch Engagement Test: With the engine running and the AC turned on, observe the compressor clutch. Is it engaging? If not, use a multimeter to check for voltage at the clutch connector. If there's voltage but the clutch isn't engaging, the clutch coil is likely faulty. You can also try jumping the clutch directly to the battery to see if it engages (be careful not to short anything!).
- Pressure Readings: Use a set of AC manifold gauges to check the high and low-side pressures. Abnormal pressures can indicate a problem with the compressor, expansion valve, or other components. For example, if the high-side pressure is very low and the low-side pressure is very high, the compressor may be weak or failing. Important: Always follow proper safety procedures when working with refrigerant, as it can cause frostbite.
- Listen for Noises: Pay attention to any unusual noises coming from the compressor area. Rattling, grinding, or squealing noises can indicate internal damage.
- Visual Inspection: Inspect the compressor for any signs of leaks, damage, or corrosion. Check the refrigerant lines and connections for leaks as well.
Replacing the AC Compressor (DIY Considerations)
Replacing the AC compressor is a moderately complex job that requires specialized tools and knowledge. Here's a general overview of the process. Warning: Refrigerant handling requires certification (EPA Section 609). It is illegal to vent refrigerant into the atmosphere. If you are not certified, take your vehicle to a qualified AC technician.
- Recover Refrigerant: The first and most crucial step is to safely recover the refrigerant from the system using a refrigerant recovery machine. This should only be done by a certified technician.
- Disconnect Components: Disconnect the battery's negative terminal. Then, disconnect the refrigerant lines from the compressor. Be prepared for some residual refrigerant to escape, even after recovery. Cap the lines immediately to prevent contamination. Disconnect the electrical connector from the compressor clutch.
- Remove the Serpentine Belt: Use a serpentine belt tool to release the tension and remove the belt from the compressor pulley.
- Remove the Compressor: Unbolt the compressor from its mounting brackets. It may be necessary to remove other components to gain access.
- Prepare the New Compressor: Add the correct type and amount of refrigerant oil to the new compressor. This is critical for proper lubrication and compressor life. Consult your vehicle's service manual for the correct oil type and quantity.
- Install the New Compressor: Install the new compressor in the reverse order of removal. Use new O-rings or gaskets on the refrigerant line connections. Torque the bolts to the specified torque.
- Install the Serpentine Belt: Reinstall the serpentine belt.
- Evacuate the System: Connect a vacuum pump to the system and evacuate it for at least 30-45 minutes to remove any air and moisture. This is crucial for optimal AC performance and to prevent damage to the system.
- Recharge the System: Recharge the system with the correct type and amount of refrigerant. Consult your vehicle's service manual or a refrigerant charge chart for the correct amount.
- Check for Leaks: After recharging, check for leaks at all connections using a leak detector.
- Verify Operation: Start the engine and turn on the AC. Verify that the compressor is engaging and that the system is producing cold air. Check the high and low-side pressures with a manifold gauge set to ensure they are within the normal range.
Important Considerations:
- Receiver-Drier/Accumulator: It's highly recommended to replace the receiver-drier (or accumulator) whenever you replace the AC compressor. This component absorbs moisture and filters out contaminants, and it can become saturated over time. A new receiver-drier will help protect your new compressor.
- Expansion Valve/Orifice Tube: Consider replacing the expansion valve or orifice tube, especially if the compressor failed due to internal contamination. These components can become clogged with debris and restrict refrigerant flow.
- Flushing the System: If the compressor failed internally, it's essential to flush the entire AC system to remove any metal particles or other debris. This can be done using a special AC flush solvent and a flushing machine. Never flush the compressor, receiver-drier, or expansion valve.
Replacing your Altima's AC compressor is a significant undertaking. If you're not comfortable with any of these steps, it's best to take your vehicle to a qualified AC technician. But with the right tools, knowledge, and precautions, it's a project that many experienced DIYers can successfully complete.