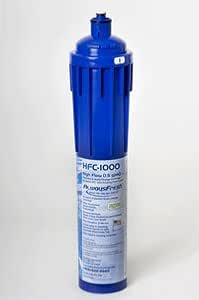
Always Fresh Hfc 1000 Replacement Filter
Is your Always Fresh HFC 1000 water filter leaving you with a less-than-fresh taste? Are you noticing a decline in water pressure, or worse, getting that dreaded "filter replacement" indicator light glaring at you? You're not alone! Replacing the filter on your Always Fresh HFC 1000 is a routine maintenance task, and this guide is here to walk you through common issues and provide clear solutions.
Understanding the HFC 1000 Filter and Its Importance
The Always Fresh HFC 1000 water filter is designed to remove contaminants like chlorine, sediment, lead, and other impurities from your drinking water. A properly functioning filter ensures that you and your family are enjoying clean, great-tasting water. However, over time, these filters become saturated with the contaminants they're meant to remove, leading to reduced effectiveness and potential issues. That's why regular replacement is crucial.
Common Issues Indicating a Filter Replacement is Needed
Here are the most common signs that it's time to replace your HFC 1000 filter:
- Reduced Water Flow/Pressure: This is often the first sign. As the filter becomes clogged, the water flow slows down significantly.
- Poor Water Taste or Odor: If your water starts to taste or smell differently (e.g., chlorine taste returning), the filter is likely no longer effectively removing impurities.
- Filter Replacement Indicator Light: Many refrigerators with the HFC 1000 filter have an indicator light that will illuminate when it's time for a replacement. Don't ignore this!
- Visible Sediment or Discoloration: If you notice sediment or discoloration in your water, even after the filter is supposed to be working, it's definitely time for a new one.
- Manufacturer's Recommended Replacement Schedule: Even if you don't notice any of the above issues, it's generally recommended to replace the filter every 6 months, or as specified by the manufacturer. This ensures optimal performance and water quality.
Troubleshooting Common Problems During Filter Replacement
While replacing the HFC 1000 filter is generally a straightforward process, some common problems can arise. Let's address them:
Problem 1: Difficulty Removing the Old Filter
Sometimes, the old filter can be difficult to remove, especially if it hasn't been changed in a while. This can be due to mineral buildup or the filter being stuck in place.
Solution:
- Make sure you're turning it in the correct direction. The filter housing will usually have arrows indicating the direction to turn for removal. It's usually counter-clockwise.
- Apply more force. Sometimes, a little extra pressure is needed. Use a firm grip and try again.
- Use a filter wrench (optional). If you're still struggling, a filter wrench can provide extra leverage. These are readily available at most hardware stores. A rubber strap wrench is preferable to avoid damaging the filter housing.
- Try rocking the filter gently. Sometimes a back-and-forth rocking motion can help loosen it.
- If all else fails, try a small amount of food-grade lubricant. Spray a *very* small amount of lubricant (like silicone spray) around the edges of the filter where it meets the housing. Let it sit for a few minutes and try again. Be sure to wipe away any excess lubricant thoroughly after removing the old filter.
Approximate Cost: A filter wrench typically costs between $10 and $20.
Problem 2: Difficulty Installing the New Filter
Similar to removing the old filter, installing the new one can sometimes be tricky.
Solution:
- Ensure you have the correct filter. Double-check the model number to ensure you have the correct replacement for your refrigerator.
- Line up the filter properly. The filter needs to be aligned correctly with the housing before you can turn it into place. Look for any alignment marks or grooves.
- Push firmly while turning. You may need to apply some pressure while turning the filter to engage the threads or locking mechanism.
- Check the O-rings. Make sure the O-rings on the new filter are properly seated and lubricated. A thin coat of food-grade silicone grease can help.
Problem 3: Leaks After Filter Replacement
A common concern is leaks around the filter housing after replacing the filter.
Solution:
- Ensure the filter is fully seated and locked. Double-check that you've turned the filter until it's securely locked into place.
- Inspect the O-rings. Damaged or improperly seated O-rings are a common cause of leaks. Remove the filter and inspect the O-rings for any damage. Replace them if necessary. You can usually find replacement O-rings at hardware stores or online.
- Check the filter housing for cracks or damage. Inspect the filter housing itself for any cracks or damage. If the housing is damaged, it may need to be replaced. This is a more involved repair, and you may want to consult a qualified appliance repair technician.
- Flush the filter. After installing the new filter, follow the manufacturer's instructions for flushing the filter. This usually involves dispensing several gallons of water to remove any air or loose particles. This can also help to seat the filter properly and stop minor leaks.
Approximate Cost: Replacement O-rings are usually inexpensive, costing only a few dollars. Replacing the filter housing can be more expensive, potentially ranging from $50 to $150 depending on the refrigerator model.
Problem 4: Air in the Water Line
After replacing the filter, you might notice air bubbles in the water, or the water may sputter when dispensed.
Solution:
- Flush the filter thoroughly. As mentioned above, flushing the filter is crucial for removing air from the system. Dispense several gallons of water until the water flows smoothly and consistently.
- Allow time for the system to purge itself. It may take several hours for all the air to be completely purged from the system. Continue dispensing water periodically to help speed up the process.
Problem 5: "Filter Replacement" Light Doesn't Reset
Even after replacing the filter, the "filter replacement" light may still be illuminated.
Solution:
- Consult your refrigerator's user manual. The method for resetting the filter light varies depending on the refrigerator model. The manual will provide specific instructions.
- Common reset methods:
- Holding a button. Many refrigerators require you to hold down a specific button (e.g., "Reset Filter," "Water Filter," or "Options") for 3-5 seconds to reset the light.
- Using a combination of buttons. Some models require you to press two buttons simultaneously.
- Power cycling the refrigerator. In rare cases, you may need to unplug the refrigerator for a few minutes and then plug it back in to reset the light.
Preventive Measures for a Smooth Filter Replacement
Here are a few tips to help prevent problems during future filter replacements:
- Replace the filter regularly. Stick to the manufacturer's recommended replacement schedule (usually every 6 months).
- Keep a spare filter on hand. This way, you'll be prepared when it's time to replace the filter.
- Lubricate the O-rings (if applicable). Applying a thin coat of food-grade silicone grease to the O-rings can help prevent them from drying out and cracking.
- Check the filter housing periodically. Inspect the filter housing for any signs of damage or wear.
When to Call a Professional
While most filter replacement issues can be resolved with the steps outlined above, there are situations where it's best to call a qualified appliance repair technician:
- If you suspect damage to the water line or refrigerator's internal components.
- If you're unable to remove the old filter despite trying all the troubleshooting steps.
- If the leak persists after trying all the solutions, especially if you suspect a crack in the housing or internal components.
- If you're not comfortable working with water lines or electrical components.
Approximate Cost: A service call from an appliance repair technician can range from $75 to $150, depending on the complexity of the repair.
Replacing your Always Fresh HFC 1000 filter is an essential part of maintaining your refrigerator and ensuring clean, great-tasting water. By understanding the common issues and solutions outlined in this guide, you can confidently tackle this task and keep your water flowing smoothly. Remember, regular maintenance and timely filter replacements are key to prolonging the life of your refrigerator and enjoying the benefits of clean water!
Disclaimer: This guide provides general information and troubleshooting tips. Always consult your refrigerator's user manual for specific instructions and safety precautions. If you are unsure about any step, it's best to consult a qualified appliance repair technician.