Cambio De Aceite Nissan Pathfinder 1998
So, you're thinking about tackling an oil change on your 1998 Nissan Pathfinder? Excellent! This is a routine maintenance task that, when done properly, can significantly extend the life of your vehicle's engine. While you can certainly take it to a shop, doing it yourself can save you some money and give you a better understanding of your Pathfinder's inner workings. This guide will walk you through the process, highlighting common issues and offering solutions along the way. Think of it as advice from your friendly neighborhood mechanic!
Understanding the Importance of Regular Oil Changes
Before we dive into the nitty-gritty, let's quickly recap why regular oil changes are so crucial. Your engine oil acts as a lubricant, reducing friction between moving parts. Over time, this oil breaks down, becoming contaminated with dirt, debris, and combustion byproducts. This dirty oil can't lubricate as effectively, leading to increased wear and tear, reduced fuel economy, and potentially serious engine damage. Think of it like this: clean oil is happy oil, and a happy engine is a long-lasting engine!
Gathering Your Supplies
Okay, let's get practical. Before you even think about crawling under your Pathfinder, make sure you have all the necessary supplies on hand. This will save you a lot of frustration. Here’s a list of what you'll need:
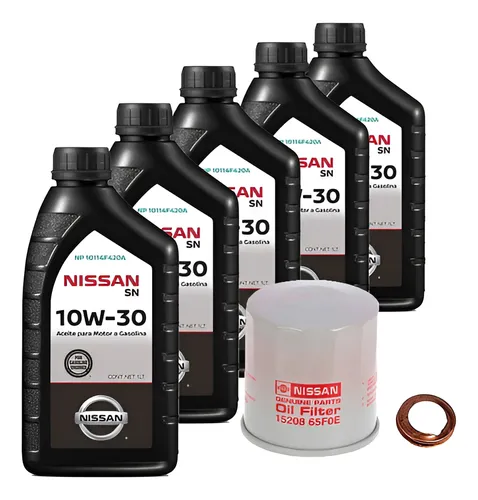
- New Oil: This is the most important part! Consult your owner's manual (or a reliable online resource) to determine the correct oil type and quantity for your 1998 Pathfinder. Typically, it will be a conventional 10W-30 or 5W-30 oil. You'll likely need around 4.5-5 quarts. Don't skimp on the quality of the oil.
- New Oil Filter: Again, refer to your owner's manual or a parts store to find the correct oil filter for your Pathfinder. Make sure it's a quality filter.
- Oil Filter Wrench: These come in various sizes and styles. Choose one that fits your new oil filter. A cap-type wrench is often easiest to use.
- Wrench for the Drain Plug: Usually a 14mm or 17mm wrench, but check your vehicle to be sure.
- Drain Pan: A container to catch the old oil. Make sure it's large enough to hold all the used oil.
- Funnel: To pour the new oil into the engine without making a mess.
- Rags or Paper Towels: For wiping up spills. Lots of them!
- Gloves: To keep your hands clean.
- Jack and Jack Stands: To safely lift the vehicle. Never work under a vehicle supported only by a jack!
- Wheel Chocks: To prevent the vehicle from rolling.
- Torque Wrench: To properly tighten the drain plug and oil filter.
Step-by-Step Oil Change Procedure
Alright, let's get to work! Here’s a step-by-step guide to changing the oil in your 1998 Nissan Pathfinder:
- Warm Up the Engine: Run the engine for a few minutes to warm up the oil. This makes it flow more easily. Don't overheat it! Just a few minutes is enough.
- Secure the Vehicle: Park the Pathfinder on a level surface. Engage the parking brake and place wheel chocks behind the rear wheels.
- Raise the Vehicle: Use the jack to lift the front of the vehicle. Place jack stands securely under the frame rails. Double-check that the vehicle is stable before proceeding.
- Locate the Oil Drain Plug: Crawl under the vehicle and locate the oil pan. The drain plug is usually a bolt at the bottom of the pan.
- Position the Drain Pan: Place the drain pan directly under the drain plug.
- Remove the Drain Plug: Use the correct wrench to carefully loosen and remove the drain plug. Be prepared for the oil to come out quickly. Be careful, the oil may be hot!
- Allow the Oil to Drain Completely: Let the oil drain completely, which may take 15-20 minutes.
- Inspect the Drain Plug: Check the drain plug for any damage. Replace the crush washer (the small washer under the drain plug) with a new one. This ensures a good seal.
- Reinstall the Drain Plug: Once the oil has finished draining, reinstall the drain plug and tighten it to the manufacturer's specified torque. Overtightening can damage the oil pan. Consult a repair manual for the correct torque specification. If you don't have a torque wrench, tighten it snugly, but don't crank it down.
- Locate the Oil Filter: The oil filter is usually located near the front of the engine. It may be a little difficult to reach.
- Prepare the New Oil Filter: Lightly lubricate the rubber gasket on the new oil filter with fresh engine oil. This helps to create a good seal.
- Remove the Old Oil Filter: Use the oil filter wrench to loosen and remove the old oil filter. Be prepared for some oil to spill.
- Install the New Oil Filter: Screw the new oil filter onto the engine by hand until the gasket makes contact with the engine. Then, tighten it another ¾ to 1 full turn, as instructed on the filter itself. Do not overtighten!
- Lower the Vehicle: Carefully lower the vehicle back to the ground.
- Add New Oil: Open the hood and locate the oil fill cap on top of the engine. Remove the cap and insert the funnel. Pour in the specified amount of new oil, consulting your owner's manual. Start with slightly less than the recommended amount.
- Check the Oil Level: Remove the dipstick, wipe it clean, reinsert it, and then remove it again to check the oil level. Add more oil as needed to bring the level to the "full" mark. Do not overfill!
- Start the Engine: Start the engine and let it run for a minute or two. Check for any leaks around the drain plug and oil filter.
- Recheck the Oil Level: After running the engine, turn it off and let it sit for a few minutes. Then, recheck the oil level and add more oil if necessary.
- Reset the Oil Change Reminder: If your Pathfinder has an oil change reminder light, reset it according to the owner's manual.
- Dispose of the Old Oil Properly: Take the used oil to a local auto parts store or recycling center for proper disposal. Do not pour it down the drain or into the ground!
Common Issues and Solutions
Even with careful planning, you might encounter some snags along the way. Here are a few common issues and how to deal with them:
Stripped Drain Plug
Problem: The drain plug is difficult to remove or feels loose, indicating stripped threads in the oil pan.
Solution: This is a common problem, especially on older vehicles. If the threads are only slightly damaged, you might be able to use a slightly larger drain plug or a self-tapping drain plug. If the threads are badly damaged, you may need to replace the oil pan, which can be a more involved repair. Alternatively, you can consider using a thread repair kit to repair the existing threads.
Stuck Oil Filter
Problem: The oil filter is extremely difficult to remove, even with an oil filter wrench.
Solution: Make sure you're using the correct size and type of oil filter wrench. If it's still stuck, try tapping the end of the wrench with a hammer to help loosen the filter. You can also try using a strap-type oil filter wrench for more leverage. As a last resort, you can carefully puncture the filter with a long screwdriver and use it to twist the filter off, but be extremely careful not to damage the engine block.
Oil Leaks After the Oil Change
Problem: You notice oil leaking from the drain plug or oil filter after completing the oil change.
Solution: Check the drain plug and oil filter to make sure they are properly tightened. Make sure the crush washer on the drain plug is in good condition. If the leak persists, try tightening the drain plug or oil filter slightly more (but don't overtighten!). If the leak is coming from the oil filter gasket, the gasket may be damaged or improperly installed. Remove the oil filter and inspect the gasket. Make sure the old gasket came off with the old filter. Reinstall the filter, making sure to lubricate the gasket with fresh oil and tighten it according to the instructions on the filter.
Difficulty Loosening the Drain Plug
Problem: The drain plug is incredibly tight and won't budge.
Solution: First, ensure you're turning the wrench in the correct direction (counter-clockwise to loosen). Try using a penetrating oil spray on the drain plug threads and let it sit for a few minutes. You can also try using a longer wrench for more leverage. If all else fails, you can try gently tapping the end of the wrench with a hammer. Be careful not to damage the drain plug or oil pan. If it still won't budge, it's best to take it to a professional mechanic.
Estimated Costs
Here's a rough estimate of the costs involved in a DIY oil change for your 1998 Nissan Pathfinder:
- Oil: $20-$40 (depending on the type and brand)
- Oil Filter: $5-$15
- Crush Washer: $1-$3
- Oil Filter Wrench (if needed): $10-$20
- Drain Pan (if needed): $10-$20
So, you're looking at a total cost of around $46-$98 if you already have the basic tools. Compared to taking it to a shop, which could cost anywhere from $75-$150, you can save a significant amount of money by doing it yourself.
Final Thoughts
Changing the oil on your 1998 Nissan Pathfinder is a straightforward task that can save you money and improve your understanding of your vehicle. By following these steps and being mindful of potential issues, you can keep your Pathfinder running smoothly for years to come. Remember to always prioritize safety and consult a professional mechanic if you encounter any problems you're not comfortable handling. Happy wrenching!