Catalytic Converter For 2000 Nissan Maxima
Alright, let's talk catalytic converters on your 2000 Nissan Maxima. These cars, while generally reliable, are getting up there in age, and the catalytic converter is a common failure point. Replacing it isn't necessarily rocket science, but you need to understand what's going on to do it right. This guide will walk you through the process, covering the technical aspects, potential issues, and best practices.
Understanding Your Maxima's Catalytic Converter
Your 2000 Maxima, depending on the specific model and emissions standards it was built to meet, likely has two catalytic converters. A primary converter is bolted directly to the exhaust manifold coming off the engine, and a secondary converter is located further downstream, often under the car. The primary converter gets hotter and works harder, making it the more common failure point.
What does a catalytic converter actually do? In simple terms, it's a pollution-control device. Inside, you'll find a ceramic honeycomb coated with precious metals like platinum, palladium, and rhodium. These metals act as catalysts, accelerating chemical reactions that convert harmful pollutants in the exhaust gas into less harmful substances. Specifically, the converter aims to reduce:
- Hydrocarbons (HC): Unburnt fuel, a major contributor to smog.
- Carbon Monoxide (CO): A poisonous gas.
- Nitrogen Oxides (NOx): Contribute to smog and acid rain.
The converter uses two main types of reactions: oxidation and reduction. Oxidation uses oxygen to burn off hydrocarbons and carbon monoxide. Reduction strips oxygen from nitrogen oxides, converting them into nitrogen and oxygen. This complex chemical process significantly reduces the harmful emissions from your engine.
Why do they fail? Catalytic converters are pretty robust, but they're not indestructible. Several factors can contribute to their failure:
- Contamination: This is the most common killer. Oil leaks, coolant leaks, and even excessive fuel getting into the exhaust system can coat the catalyst and render it useless.
- Overheating: A misfiring engine or other fuel-related issues can cause excessive heat, melting the catalyst.
- Physical Damage: Road debris can crack or damage the converter's housing, reducing its efficiency.
- Age: Like any component, the catalyst eventually degrades over time, losing its effectiveness.
Diagnosing a Bad Catalytic Converter
The most common symptom of a failing catalytic converter is the dreaded Check Engine Light (CEL). Specifically, you'll likely see codes like P0420 (Catalyst System Efficiency Below Threshold, Bank 1) or P0430 (Catalyst System Efficiency Below Threshold, Bank 2). These codes indicate that the downstream oxygen sensor is detecting higher levels of pollutants than expected, suggesting the converter isn't doing its job properly. Bank 1 typically refers to the side of the engine with cylinder #1.
However, a P0420/P0430 code doesn't always mean the converter is bad. Other potential causes include:
- Exhaust Leaks: Leaks upstream of the downstream oxygen sensor can introduce extra oxygen, skewing the sensor readings.
- Faulty Oxygen Sensors: If the downstream oxygen sensor is malfunctioning, it might be sending incorrect data to the ECU.
- Engine Problems: Issues like misfires or vacuum leaks can affect the air-fuel ratio and impact converter efficiency.
Important: Before replacing the catalytic converter, it's crucial to rule out these other possibilities. A scan tool that can display live data from the oxygen sensors is invaluable for this. You can monitor the upstream and downstream oxygen sensor readings to see how they're behaving. A healthy downstream sensor should show a relatively stable voltage, while the upstream sensor fluctuates rapidly.
You can also perform a visual inspection of the converter for physical damage. Check for cracks, dents, or rust. A "rattling" sound coming from the converter often indicates that the catalyst has broken apart internally.
Replacing the Catalytic Converter
Tools You'll Need:
- Socket set and wrenches (metric)
- Penetrating oil (essential!)
- Oxygen sensor socket (if replacing the O2 sensors)
- Jack and jack stands
- Safety glasses and gloves
- New catalytic converter (obviously!)
- New gaskets and hardware (highly recommended)
- Anti-seize compound (for the oxygen sensor threads)
Step-by-Step Procedure:
- Safety First: Always work on a cool engine. Disconnect the negative battery cable. Jack up the car and secure it with jack stands. Never work under a car supported only by a jack!
- Penetrating Oil: Generously apply penetrating oil to all the bolts and nuts connecting the catalytic converter to the exhaust manifold and exhaust pipe. Let it soak for at least 30 minutes (longer is better). These bolts are notorious for being seized.
- Remove Oxygen Sensors: Carefully disconnect the electrical connectors for the oxygen sensors. Use an oxygen sensor socket to remove them. Be extremely careful not to damage the sensors. If they're seized, you might need to apply heat (judiciously!) to the surrounding metal. Tip: Consider replacing the oxygen sensors along with the catalytic converter, especially if they're old.
- Disconnect the Converter: Loosen and remove the bolts connecting the catalytic converter to the exhaust manifold and exhaust pipe. This can be the most challenging part, as the bolts are often heavily corroded. If you break a bolt, you'll need to drill it out and re-tap the hole, which adds significant complexity. Using a breaker bar can provide extra leverage.
- Remove the Old Converter: Once all the bolts are removed, carefully wiggle the old catalytic converter free.
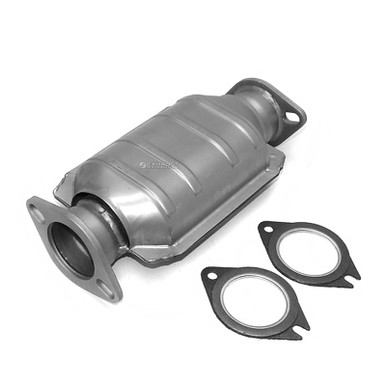
- Install the New Converter: Clean the mating surfaces on the exhaust manifold and exhaust pipe. Install new gaskets. Position the new catalytic converter and loosely install the new bolts. Important: Make sure the converter is oriented correctly.
- Torque the Bolts: Torque the bolts to the manufacturer's specifications. Refer to a repair manual for the correct torque values. Overtightening can damage the exhaust manifold or pipe.
- Install Oxygen Sensors: Apply a small amount of anti-seize compound to the threads of the oxygen sensors. Carefully install the sensors, tightening them to the specified torque. Reconnect the electrical connectors.
- Final Checks: Double-check all connections. Make sure there are no leaks. Lower the car.
- Reconnect Battery: Reconnect the negative battery cable.
- Start the Engine: Start the engine and listen for exhaust leaks. If you hear any leaks, tighten the bolts further.
- Clear the Codes: Use a scan tool to clear the Check Engine Light codes.
After the Replacement
After replacing the catalytic converter, monitor the car's performance closely. The Check Engine Light should remain off. If the light comes back on with the same P0420/P0430 code, double-check your work and consider the possibility of underlying engine problems that are affecting the converter's efficiency.
Important Considerations:
- Quality of Replacement Converter: Don't cheap out on the catalytic converter. A low-quality converter may not meet emissions standards and could fail prematurely. Look for a converter that meets or exceeds the original equipment manufacturer (OEM) specifications.
- California Emissions (CARB Compliant): If you live in California or a state that follows California emissions standards, you'll need to ensure that the replacement converter is CARB compliant. These converters are specifically designed to meet California's stringent emissions requirements.
- Professional Installation: If you're not comfortable performing this repair yourself, it's best to have a qualified mechanic do it. They have the experience and tools to do the job correctly.
Replacing the catalytic converter on your 2000 Nissan Maxima can be a challenging but rewarding DIY project. By understanding the underlying principles and following these steps carefully, you can save money and ensure that your car is running cleanly and efficiently.