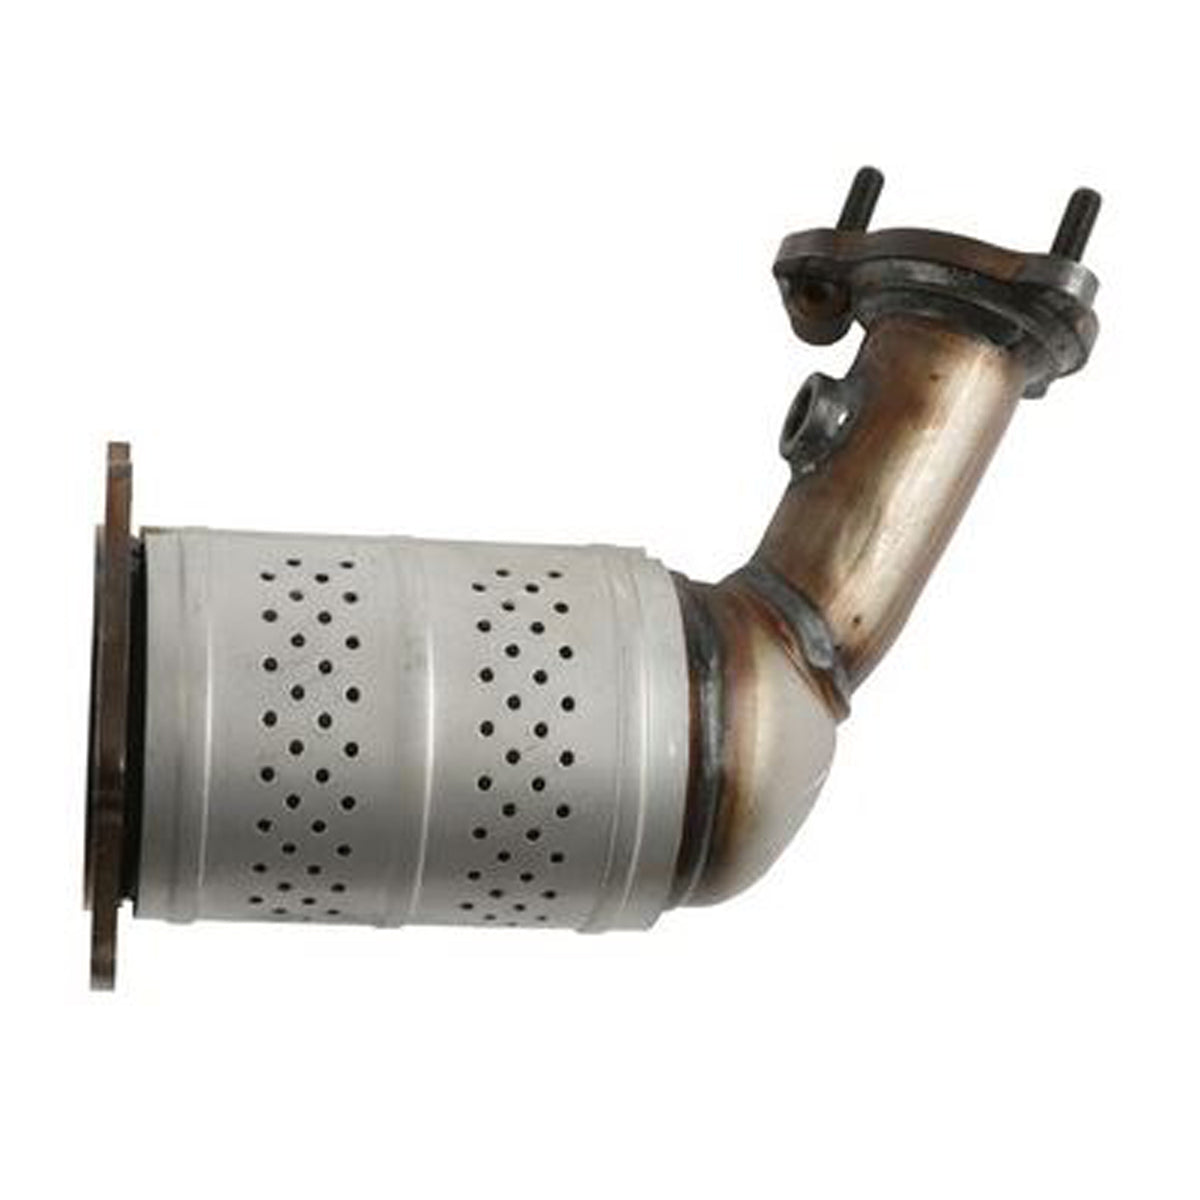
Catalytic Converter For Nissan Murano 2004
Alright, let's talk about the catalytic converter on your 2004 Nissan Murano. It's a critical part of your exhaust system, and understanding how it works, what can go wrong, and how to address issues will save you time and money in the long run. We'll cover the basics, common problems, diagnostics, and some replacement tips – all aimed at the experienced DIYer.
What a Catalytic Converter Does (And Why It Matters)
At its core, a catalytic converter is an emissions control device designed to reduce the harmful pollutants in your exhaust gases. Think of it as a chemical reactor bolted into your exhaust system. It's mandated by law because it significantly reduces the amount of harmful gases released into the atmosphere.
The key word here is catalysis. A catalyst is a substance that speeds up a chemical reaction without being consumed itself. Inside the converter, you’ll find a ceramic honeycomb structure coated with precious metals, typically platinum, palladium, and rhodium. These metals act as the catalysts.
The 2004 Murano's catalytic converter is designed to address three main pollutants:
- Hydrocarbons (HC): Unburned fuel.
- Carbon Monoxide (CO): A poisonous gas formed from incomplete combustion.
- Nitrogen Oxides (NOx): A group of gases that contribute to smog and acid rain.
The converter uses oxidation and reduction reactions to transform these pollutants into less harmful substances:
- Oxidation: CO is oxidized into CO2 (carbon dioxide), and HC is oxidized into CO2 and H2O (water).
- Reduction: NOx is reduced into N2 (nitrogen) – the harmless gas that makes up most of the air we breathe.
So, in simple terms, the catalytic converter takes the bad stuff from your engine's exhaust and turns it into less harmful stuff using some clever chemistry and expensive metals.
Location and Components
On the 2004 Murano, you typically have two catalytic converters. One is located close to the exhaust manifold on each bank of the engine (V6 configuration). These are often referred to as primary or upstream converters. There might also be a third, smaller converter, often referred to as a secondary or downstream converter, located further down the exhaust system after the first two converters merge. This one is responsible for cleaning up any additional pollutants missed by the primary converters. The exact layout might vary slightly depending on your specific model and emissions package, so always double-check your vehicle's service manual.
Besides the catalytic converter itself (the metal canister housing the catalytic core), other crucial components include:
- Oxygen Sensors (O2 Sensors): These sensors are located before (upstream) and after (downstream) the catalytic converter. They monitor the oxygen content in the exhaust stream. The upstream sensor provides feedback to the engine control unit (ECU) to adjust the air-fuel mixture. The downstream sensor monitors the efficiency of the catalytic converter by comparing the oxygen levels before and after the converter.
- Exhaust Manifold/Header: This collects the exhaust gases from the engine cylinders and directs them to the catalytic converter.
- Exhaust Piping: Connects all the components of the exhaust system, including the catalytic converter, muffler, and resonator.
- Heat Shields: These protect surrounding components from the high temperatures generated by the catalytic converter.
Common Problems and Symptoms
Catalytic converters can fail for several reasons, and recognizing the symptoms early can prevent further damage. Here are some common problems:
- Clogging: This is the most common issue. Over time, the catalytic converter can become clogged with carbon deposits, oil residue, or other contaminants. This restricts exhaust flow, leading to reduced engine performance.
- Physical Damage: Road debris, impacts, or even extreme temperature fluctuations can damage the ceramic core inside the converter.
- Melting: An excessively rich air-fuel mixture can cause the catalytic converter to overheat and melt the catalytic core. This is often caused by faulty fuel injectors, a malfunctioning O2 sensor, or other engine problems.
- Contamination: Coolant or oil leaks into the exhaust system can contaminate the catalytic converter, rendering it ineffective.
Here are some symptoms you might experience:
- Check Engine Light (CEL): This is usually the first sign. The most common codes associated with catalytic converter problems are P0420 ("Catalyst System Efficiency Below Threshold, Bank 1") and P0430 ("Catalyst System Efficiency Below Threshold, Bank 2").
- Reduced Engine Performance: A clogged converter restricts exhaust flow, making the engine feel sluggish and underpowered. You might notice a decrease in acceleration or fuel economy.
- Rattling Noise: If the ceramic core inside the converter is broken, you might hear a rattling noise coming from underneath the car.
- Overheating: A failing converter can overheat, potentially damaging surrounding components.
- Failed Emissions Test: If your converter isn't working correctly, your car will likely fail an emissions test.
- Sulfur Smell: A rotten egg or sulfur smell from the exhaust can indicate a problem with the catalytic converter. This is due to the converter's inability to properly process sulfur compounds in the fuel.
Diagnosis
Before you rush to replace the catalytic converter, it's crucial to diagnose the problem accurately. Replacing a perfectly good converter is a waste of money and doesn't address the underlying issue that caused it to fail in the first place. Here’s a breakdown of diagnostic steps:
- Read the Diagnostic Trouble Codes (DTCs): Use an OBD-II scanner to retrieve the DTCs from your car's computer. Note down all the codes, as multiple codes can point to the root cause of the problem.
- Inspect the O2 Sensors: Check the O2 sensors for damage, corrosion, or loose connections. Use a multimeter to test the sensor's output voltage. Compare the readings of the upstream and downstream sensors. A healthy downstream sensor should show a relatively stable voltage, while the upstream sensor will fluctuate more rapidly. If the downstream sensor mirrors the upstream sensor, it suggests the catalytic converter isn't functioning properly.
- Check for Exhaust Leaks: Inspect the exhaust system for any leaks, especially around the catalytic converter, O2 sensors, and exhaust manifold. Leaks can allow unmetered air to enter the exhaust stream, affecting the O2 sensor readings and the converter's efficiency.
- Visual Inspection: Carefully inspect the catalytic converter for physical damage, such as dents, cracks, or rust. Also, check for signs of overheating, like discoloration or melting.
- Backpressure Test: A backpressure test can help determine if the catalytic converter is clogged. You'll need a backpressure gauge, which is installed in place of the upstream O2 sensor. Start the engine and observe the gauge reading. Excessive backpressure indicates a clogged converter. Consult your service manual for specific pressure specifications for your vehicle.
- Live Data Analysis: Use a scan tool that can display live data to monitor the O2 sensor readings, fuel trims, and other engine parameters. This can help you identify underlying issues that are affecting the catalytic converter's performance.
Replacement Tips
If you've determined that the catalytic converter needs to be replaced, here are some tips to make the job easier:
- Safety First: Always wear safety glasses and gloves when working on the exhaust system. Let the exhaust system cool down completely before starting any work.
- Penetrating Oil: Apply penetrating oil to the nuts and bolts connecting the catalytic converter to the exhaust system. Let it soak for a while to loosen them up.
- Proper Tools: Use the correct size wrenches and sockets to avoid damaging the fasteners. An oxygen sensor socket is essential for removing and installing the O2 sensors.
- O2 Sensor Removal: Be careful when removing the O2 sensors. They can be easily damaged. If they're stuck, use an O2 sensor socket and apply penetrating oil.
- Gaskets and Hardware: Always replace the gaskets and hardware when replacing the catalytic converter. This ensures a proper seal and prevents exhaust leaks.
- Torque Specifications: Tighten all the fasteners to the manufacturer's specified torque. This prevents leaks and ensures the components are securely fastened.
- Aftermarket vs. OEM: You'll have to decide whether to go with an aftermarket or an OEM (Original Equipment Manufacturer) catalytic converter. OEM converters are generally more expensive but offer better performance and longevity. Aftermarket converters can be a more budget-friendly option, but their quality can vary. Be aware that some aftermarket converters might not meet emissions standards in your area. Check your local regulations before making a purchase.
- Break-In Period: Some new catalytic converters have a break-in period. Follow the manufacturer's instructions for proper break-in.
- Address the Root Cause: Remember, replacing the catalytic converter is only a temporary fix if you don't address the underlying cause of the failure. Make sure to diagnose and repair any engine problems that are contributing to the issue.
Replacing a catalytic converter is a manageable task for an experienced DIYer. However, if you're not comfortable working on exhaust systems or have doubts about your diagnostic skills, it's best to consult a qualified mechanic.
Important Note: Tampering with or removing emissions control devices is illegal in many jurisdictions. Make sure you are in compliance with all applicable laws and regulations before performing any modifications to your vehicle's exhaust system.