Coilover Suspension Selection And Installation For A 1989 Nissan 240sx
So, you're thinking about upgrading the suspension on your '89 Nissan 240SX? Excellent choice! Coilovers can dramatically improve handling, give you adjustable ride height, and just make the whole driving experience a lot more fun. However, choosing the right set and installing them correctly can be a bit daunting. Let's walk through some common issues and how to solve them.
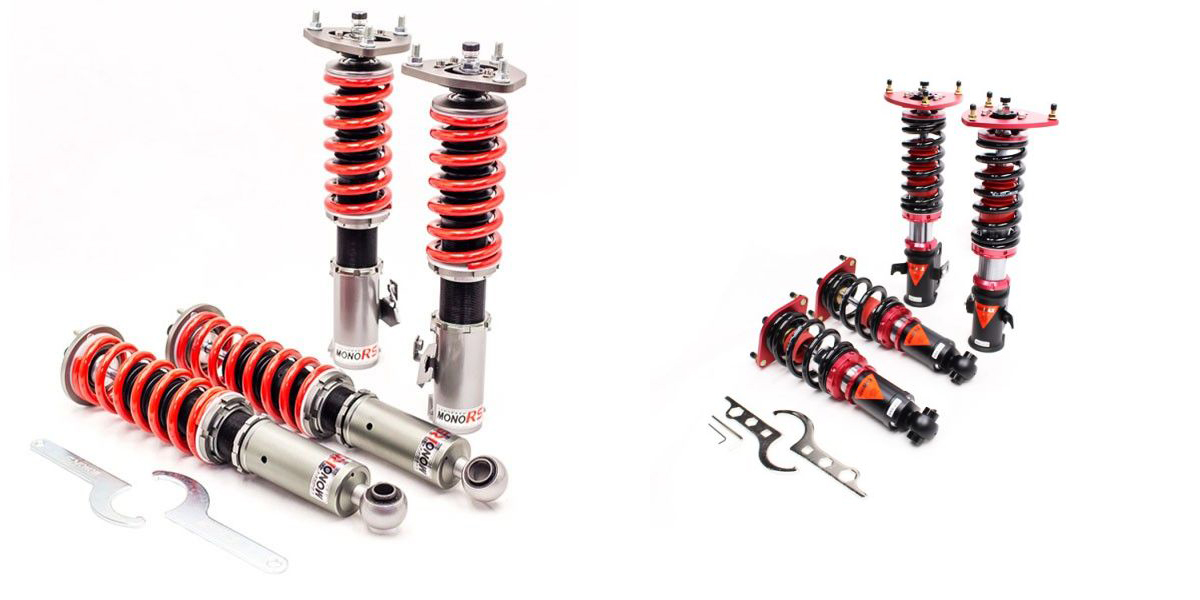
Problem: Overwhelmed by Coilover Options
The market is flooded with coilovers, ranging from budget-friendly to track-ready expensive. How do you choose what's right for your needs and budget?
Solution: Define Your Needs and Budget
First, honestly assess how you'll be using your 240SX. Is it a daily driver, a weekend warrior at the track, or a dedicated drift machine? This will heavily influence your coilover choice.
- Daily Driver: Look for coilovers with adjustable dampening (rebound at a minimum). Ride height adjustability is a given. Comfort is key, so consider coilovers with a softer spring rate. Avoid excessively stiff springs, which will make daily commutes miserable.
- Weekend Track/Autocross: Dampening adjustability is crucial (rebound and compression). Stiffer spring rates are desirable for less body roll and more precise handling. Consider models with independent height and preload adjustment for optimal setup.
- Drift Car: Spring rates depend on driving style and track layout. Dampening adjustability is still important, especially for dialing in grip levels. Ensure the coilovers can handle the aggressive driving demands of drifting.
Next, set a realistic budget. Coilover prices can range from $500 to over $3000. Don't cheap out too much, as quality directly impacts performance and longevity. A $500 set of coilovers might fail prematurely or offer poor performance compared to a more reputable brand in the $800-$1200 range.
Tip: Read reviews, watch comparison videos, and ask for recommendations from other 240SX owners. Forums and social media groups dedicated to the S13 chassis are invaluable resources.
Example Coilover Brands (Disclaimer: This is not an exhaustive list and does not endorse any particular brand):
- Budget-Friendly: Function and Form Type 1/Type 2, Megan Racing EZ Street/Street Series
- Mid-Range: Tein Flex Z, BC Racing BR Series, Fortune Auto 500 Series
- High-End: KW Variant 3, Öhlins Road & Track, Feal Suspension 441
Problem: Coilover Installation Difficulty
Installing coilovers isn't inherently difficult, but it can be frustrating without the right tools and knowledge. Stripped bolts, incorrect ride height settings, and other issues can quickly turn a simple job into a major headache.
Solution: Preparation and Proper Tools
Before you even touch your car, gather the necessary tools:
- Jack and jack stands (ensure they are sturdy and rated for your car's weight)
- Wheel chocks
- Socket set (metric)
- Wrench set (metric)
- Torque wrench
- Spring compressor (optional, but highly recommended for removing the OEM suspension safely)
- Penetrating oil (PB Blaster, Liquid Wrench)
- Hammer
- Pry bar
- Alignment tools (camber plates often require alignment after installation)
- Rust penetrant
Step-by-step installation process:
- Safety First: Park the car on a level surface, engage the parking brake, and chock the rear wheels.
- Loosen Lug Nuts: Loosen the lug nuts on the wheels you'll be working on.
- Jack Up the Car: Jack up the car and securely place it on jack stands. Never work under a car supported only by a jack!
- Remove Wheels: Remove the wheels.
- Spray Penetrating Oil: Generously spray penetrating oil on all suspension bolts and nuts, especially those that look rusty. Let it soak for at least 30 minutes.
- Disconnect Brake Lines and ABS Sensors (if applicable): Carefully disconnect brake lines and ABS sensors from the struts. Be very careful not to damage the brake lines.
- Remove Old Struts/Shocks: Unbolt the lower strut mounting bolts and the upper strut mounting nuts/bolts in the engine bay/trunk. Be prepared for the strut assembly to drop when you remove the last bolt.
- Install New Coilovers: Install the new coilovers in the reverse order of removal. Ensure all bolts are properly aligned and seated.
- Torque Specifications: Tighten all bolts and nuts to the manufacturer's specified torque settings. This is crucial for safety! Look up the correct torque specs for your 240SX model year.
- Reconnect Brake Lines and ABS Sensors: Reconnect the brake lines and ABS sensors. Double-check that they are securely fastened.
- Install Wheels: Install the wheels and tighten the lug nuts hand-tight.
- Lower the Car: Carefully lower the car to the ground.
- Torque Lug Nuts: Torque the lug nuts to the manufacturer's specified torque settings using a torque wrench.
- Repeat for Other Corners: Repeat the process for the other three corners of the car.
- Set Ride Height: Adjust the ride height to your desired setting. Measure from a consistent point on the chassis to the ground for accurate adjustments.
- Alignment: Get a professional wheel alignment. Installing coilovers will almost certainly throw off your alignment. A proper alignment is essential for safe handling and tire wear.
Tip: Take pictures before and during the disassembly process. This can be helpful if you get stuck or forget how something goes back together. Labeling parts and hardware is also a good idea.
Problem: Incorrect Ride Height Adjustment
Setting the ride height incorrectly can lead to poor handling, rubbing tires, and an undesirable appearance.
Solution: Measure and Adjust Accurately
Most coilovers have a threaded body for ride height adjustment. Here's how to get it right:
- Determine Your Desired Ride Height: Decide on the ride height you want. Consider the overall look you're going for and the type of driving you'll be doing. Lowering the car too much can negatively impact handling and ground clearance.
- Measure: Measure from a consistent point on the chassis (e.g., the fender lip) to the ground on all four corners. Record these measurements.
- Adjust Coilovers: Use the provided spanner wrenches to adjust the coilover bodies. Lengthening the body raises the car; shortening it lowers the car.
- Adjust Evenly: Aim for even ride height on both sides of the car to maintain proper weight distribution.
- Check and Re-Adjust: After making adjustments, lower the car to the ground and bounce the suspension a few times to allow it to settle. Re-measure the ride height and make further adjustments as needed.
Tip: Don't be afraid to experiment with different ride heights to find what works best for you. However, always prioritize safe handling over aesthetics.
Problem: Coilover Noise
Squeaking, clunking, or popping noises after installing coilovers can be caused by loose hardware, incorrect installation, or worn-out components.
Solution: Inspect and Troubleshoot
- Check All Hardware: Double-check that all bolts and nuts are properly torqued. Pay particular attention to the upper strut mounts and the lower strut mounting bolts.
- Inspect Bushings: Check the condition of the coilover bushings. Worn or damaged bushings can cause noise.
- Check for Coil Bind: Coil bind occurs when the coils of the spring compress fully, causing them to rub against each other. This can cause a popping or creaking noise. Ensure that the spring rate is appropriate for your car and driving style.
- Check Preload: If your coilovers have preload adjustment, ensure that it is set correctly. Too much or too little preload can cause noise.
- Check Sway Bar End Links: Worn or loose sway bar end links can also cause noise. Inspect them and replace them if necessary.
- Grease: Apply a small amount of grease to the contact points of the coilover springs and bushings.
Approximate Costs:
- Coilovers: $500 - $3000+ (depending on brand and features)
- Alignment: $75 - $200
- Installation (if you hire a shop): $300 - $800 (depending on the shop's labor rate)
Installing coilovers on your 240SX can be a rewarding experience. By understanding the common problems and solutions, you can ensure a smooth installation and enjoy the benefits of improved handling and a customized ride height. Remember to always prioritize safety and consult with a professional if you're unsure about any aspect of the installation process. Happy motoring!