Configuration Of The 'white Bunny' Clutch Setup For Nissan 240sx
Hey there, 240SX enthusiasts! If you're wrestling with clutch issues, especially after installing the 'White Bunny' clutch setup, you're not alone. This specific clutch and flywheel combo, known for its aggressive engagement and high-performance potential, can sometimes present challenges during and after installation. Let's dive into some common problems and, more importantly, provide practical solutions to get your 240SX shifting smoothly again.
Problem 1: Difficulty Engaging/Disengaging Clutch
This is perhaps the most frequent complaint. You might find it difficult to shift into gear, or the clutch pedal feels stiff and unresponsive. Sometimes, you might even hear grinding noises when attempting to shift.
Solution: Bleeding the Clutch Hydraulics
Air in the hydraulic system is a prime suspect. Air bubbles compress, preventing full clutch engagement. Here's how to bleed the system:
- Tools Needed: 10mm wrench, clear tubing, a container to catch fluid, and a friend (or a vacuum bleeder).
- Procedure:
- Locate the bleeder screw on the clutch slave cylinder (attached to the transmission).
- Attach the clear tubing to the bleeder screw and run the other end into the container.
- Have your friend slowly depress the clutch pedal.
- Open the bleeder screw. You should see fluid (and hopefully air bubbles) flowing into the container.
- Close the bleeder screw before your friend releases the clutch pedal.
- Repeat steps 3-5 until no more air bubbles are visible in the fluid.
- Top off the brake/clutch fluid reservoir (using DOT 3 or DOT 4 fluid) frequently throughout the process to prevent the system from running dry.
- Pro Tip: Use a vacuum bleeder for a one-person bleeding operation. These are relatively inexpensive and make the job much easier.
If bleeding doesn't solve the issue, move on to the next potential culprit.
Solution: Adjusting the Clutch Pedal
The 240SX clutch pedal has an adjustable rod that connects to the master cylinder. Incorrect adjustment can prevent full clutch engagement or disengagement.
- Tools Needed: 12mm and 14mm wrenches.
- Procedure:
- Locate the clutch pedal pushrod under the dashboard.
- Loosen the lock nut on the pushrod.
- Rotate the pushrod to adjust the pedal free play. Aim for about 5-15mm of free play at the top of the pedal travel. This ensures the master cylinder piston is fully retracted when the pedal is released.
- Tighten the lock nut.
- Test the clutch engagement. Readjust as necessary.
- Pro Tip: Too little free play can cause the clutch to slip, even when the pedal is released. Too much free play can prevent full clutch engagement. Find the sweet spot!
Solution: Checking for Leaks
Leaks in the master cylinder or slave cylinder will result in a loss of hydraulic pressure, leading to clutch engagement issues.
- Procedure:
- Carefully inspect the master cylinder (located under the dashboard) and the slave cylinder (attached to the transmission) for any signs of fluid leaks. Look for dampness or drips around the seals.
- Also, check the clutch lines for any visible damage or leaks.
- If you find a leak: Replace the leaking component immediately. Master and slave cylinder replacement are relatively straightforward DIY jobs, but you'll need to bleed the system afterward. Replacing the lines is also recommended if they are old or damaged.
- Approximate Cost: Master cylinder replacement: $50-$150. Slave cylinder replacement: $30-$100. Lines can vary greatly in price, from $50-$200+ depending on material and brand.
Problem 2: Clutch Chatter or Vibration
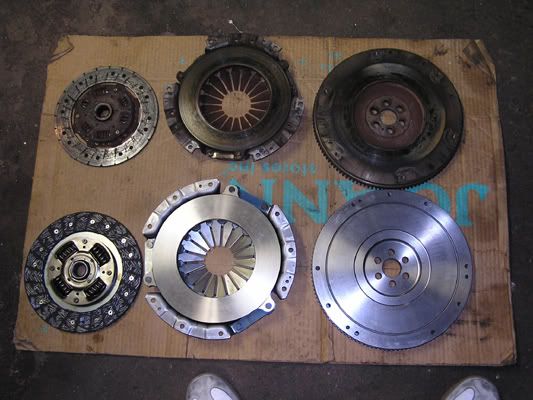
This manifests as a shaking or shuddering sensation when engaging the clutch, particularly in first gear or reverse. The 'White Bunny' clutch, being a performance clutch, is known to sometimes exhibit this characteristic more prominently than stock clutches.
Solution: Flywheel Surface Contamination
Oil or grease on the flywheel surface can cause clutch chatter.
- Procedure:
- Unfortunately, addressing this requires removing the transmission to access the clutch and flywheel.
- Carefully inspect the flywheel surface for any signs of contamination.
- Clean the flywheel surface with brake cleaner. If the contamination is severe, you may need to lightly sand the surface with fine-grit sandpaper to remove any residue.
- Inspect the rear main seal of the engine for leaks. If leaking, this will contaminate the new clutch disc very quickly. Replace as needed.
- Inspect the transmission input shaft seal for leaks. If leaking, this will contaminate the new clutch disc very quickly. Replace as needed.
- While the transmission is out, inspect the pilot bushing/bearing. If damaged, replace.
- Important: Ensure the clutch disc is also free of contamination. If it's soaked in oil, it's best to replace it.
- Pro Tip: Use gloves when handling the clutch disc and flywheel to prevent transferring oil from your hands.
Solution: Checking Engine and Transmission Mounts
Worn or damaged engine and transmission mounts can contribute to vibration and clutch chatter.
- Procedure:
- Visually inspect the engine and transmission mounts for cracks, tears, or excessive play.
- Try to move the engine and transmission by hand. Excessive movement indicates worn mounts.
- If mounts are worn: Replace them. Upgrading to polyurethane mounts can improve performance but may also increase NVH (Noise, Vibration, and Harshness).
- Approximate Cost: Engine and transmission mount replacement: $50-$200 per mount, depending on the type and brand. Labor can vary significantly.
Solution: Clutch Disc Break-in
New clutches often require a break-in period to properly seat the friction material. Aggressive driving before the break-in period can lead to clutch chatter.
- Procedure:
- Follow the manufacturer's recommendations for clutch break-in (consult the 'White Bunny' documentation or the vendor you purchased it from).
- Generally, this involves driving gently for the first 500-1000 miles, avoiding hard launches, excessive slipping, and high RPM shifts.
- Patience is key! A proper break-in will significantly improve clutch performance and longevity.
Problem 3: Clutch Slippage
This occurs when the clutch fails to fully engage, allowing the engine to rev freely without transmitting power to the wheels. You'll often notice this when accelerating in higher gears.
Solution: Incorrect Installation or Worn Clutch Disc
This is a serious problem that often requires transmission removal.
- Procedure:
- Verify that the clutch disc was installed correctly (friction material facing the flywheel).
- Inspect the clutch disc for wear. If the friction material is worn down to the rivets, the clutch needs replacement.
- Inspect the pressure plate for damage or wear. If the diaphragm spring is cracked or the friction surface is worn, the pressure plate needs replacement.
- Measure the flywheel step. Machining may be needed.
- Important: If you suspect clutch slippage, stop driving the vehicle immediately to prevent further damage to the clutch and flywheel.
- Approximate Cost: Clutch replacement (including labor): $500-$1500 or more, depending on the shop and the parts used.
Solution: Check the Clutch Fork and Pivot Ball
The clutch fork actuates the pressure plate. A worn or damaged clutch fork or pivot ball can prevent proper engagement.
- Procedure:
- Remove the transmission to access the clutch fork and pivot ball.
- Inspect the clutch fork for cracks, bends, or wear at the contact points.
- Inspect the pivot ball for wear.
- Replace the clutch fork or pivot ball if necessary. Consider upgrading to a reinforced clutch fork for increased durability.
- Pro Tip: Apply a small amount of high-temperature grease to the pivot ball before reassembling.
The 'White Bunny' clutch setup can be a fantastic upgrade for your 240SX, but proper installation and troubleshooting are crucial for optimal performance. By systematically addressing these common issues, you can ensure a smooth and reliable driving experience. If you're uncomfortable performing any of these repairs yourself, don't hesitate to consult a qualified mechanic familiar with Nissan 240SXs. Good luck, and happy drifting!