Cracked Dashboard Repair Methodology And Material Solutions
A cracked dashboard is more than just an aesthetic blemish; it can affect resale value, create distracting glare, and even pose a safety hazard if pieces become dislodged during an accident. Fortunately, with the right methodology and materials, many dashboard cracks can be successfully repaired at home, saving significant cost compared to professional upholstery work or a full dashboard replacement. This article outlines a comprehensive DIY repair procedure, focusing on material selection and best practices for a durable and visually appealing outcome.
Understanding Dashboard Materials and Crack Types
Before diving into the repair process, it's crucial to understand the material composition of your dashboard. Most dashboards are made of various plastics, including:
- ABS (Acrylonitrile Butadiene Styrene): Known for its impact resistance and rigidity. Commonly used in older vehicles.
- PVC (Polyvinyl Chloride): A versatile plastic often found in dashboards due to its affordability and durability. Can become brittle over time, especially with UV exposure.
- TPO (Thermoplastic Olefin): A more modern and flexible plastic often used in newer vehicles. TPO is more resistant to cracking than PVC in many cases.
- Polyurethane Foam (Covering): Many dashboards have a polyurethane foam layer covered with vinyl or leatherette to provide a soft, padded surface.
Identifying the specific plastic type can be challenging without manufacturer documentation. However, observing the texture, flexibility, and how the plastic reacts to heat (using a heat gun on an inconspicuous area) can provide clues. Knowing the material is crucial for selecting compatible repair materials.
Cracks typically fall into a few categories:
- Surface Cracks: Small, shallow cracks affecting only the top layer of the dashboard.
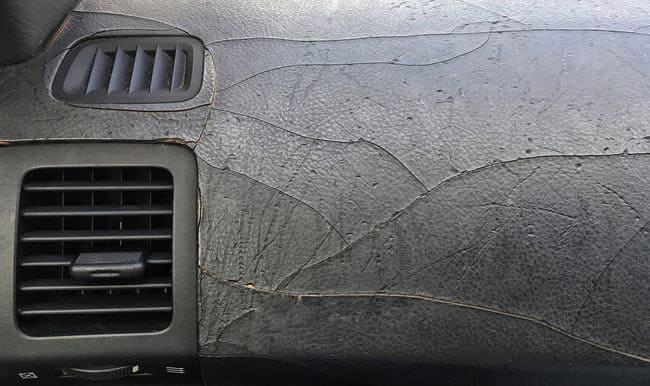
- Stress Cracks: Deeper cracks caused by expansion and contraction due to temperature changes, often radiating from vents or edges.
- Impact Cracks: Resulting from a direct blow to the dashboard, causing significant damage and potential material displacement.
The severity and type of crack will dictate the appropriate repair approach.
Essential Tools and Materials
For a professional-looking dashboard repair, gather the following tools and materials:
- Cleaning Supplies: Automotive interior cleaner, microfiber cloths, degreaser (isopropyl alcohol).
- Plastic Welder or Heat Gun (Optional): For bonding severe cracks in ABS or PVC dashboards.
- Flexible Plastic Filler: Specifically designed for automotive interiors. Look for products that are sandable and paintable. Examples include SEM Flexible Bumper Repair, or similar products from 3M or Evercoat. Avoid using body filler (bondo) intended for metal repairs, as it will likely crack and fail on a flexible dashboard.
- Sandpaper: Assorted grits (80, 180, 320, 400) for surface preparation and blending.
- Sanding Block: For achieving a smooth, even sanding surface.
- Adhesion Promoter: To enhance the bond between the filler and the dashboard surface.
- Texture Spray (Optional): To replicate the original dashboard texture. SEM Texture Coat is a popular option.
- Color-Matching Paint: Automotive interior paint or dye, matched to the original dashboard color. Use your vehicle's paint code to ensure accurate color matching. Consider using a professional auto paint supplier for custom color matching.
- Clear Coat (Optional): To protect the paint and provide a uniform sheen.
- Detailing Brush: For applying paint and texture spray in hard-to-reach areas.
- Mixing Sticks and Mixing Board: For properly combining the filler components.
- Putty Knife or Spreader: For applying the filler smoothly.
- Safety Glasses and Gloves: To protect your eyes and skin.
- Respirator: Essential when sanding or spraying paint and texture coatings.
- Heat Resistant Tape: For masking areas that need protection.
Step-by-Step Repair Methodology
- Preparation: Thoroughly clean the dashboard with automotive interior cleaner and degreaser. Remove any loose or flaking pieces of plastic from around the crack. Use a vacuum to remove any debris.
- Crack Stabilization (for severe cracks): For deep or wide cracks, use a plastic welder or heat gun to carefully bond the edges of the crack together. Apply gentle heat and pressure to melt the plastic together. This step is critical for structural integrity. If a plastic welder is unavailable, consider using a two-part epoxy adhesive designed for plastics. Always test the heat on an inconspicuous area first to avoid melting or warping the dashboard.
- Sanding: Sand the area around the crack with 80-grit sandpaper to create a rough surface for the filler to adhere to. Feather the edges of the crack to blend them into the surrounding area. Gradually increase the grit to 180 and then 320 to smooth out the surface.
- Filler Application: Mix the flexible plastic filler according to the manufacturer's instructions. Apply a thin, even layer of filler over the crack, slightly overfilling it. Use a putty knife or spreader to ensure a smooth, consistent application. Allow the filler to cure completely as directed.
- Sanding (Again): Once the filler is fully cured, sand it down to match the contour of the surrounding dashboard. Start with 180-grit sandpaper and gradually move to finer grits (320 and 400) to achieve a seamless blend. A sanding block will help maintain a flat, even surface.
- Adhesion Promoter: Apply a thin coat of adhesion promoter to the repaired area to ensure proper paint adhesion. Allow it to dry completely.
- Texturing (Optional): If your dashboard has a textured surface, use texture spray to replicate the original texture. Practice on a piece of cardboard first to get the application technique right. Apply several light coats of texture spray, allowing each coat to dry before applying the next.
- Painting: Apply several thin, even coats of color-matched automotive interior paint to the repaired area, allowing each coat to dry completely. Use a detailing brush to reach any tight corners or crevices. Avoid applying thick coats, as this can lead to runs and uneven coverage.
- Clear Coat (Optional): Apply a thin coat of clear coat to protect the paint and provide a uniform sheen.
- Final Touches: Allow the paint and clear coat to fully cure before handling the dashboard. Clean the surrounding area with automotive interior cleaner and microfiber cloths.
Troubleshooting Common Issues
- Filler Cracking: This is usually caused by using the wrong type of filler (e.g., body filler) or not properly preparing the surface. Ensure you use a flexible plastic filler and thoroughly sand the area before application.
- Paint Peeling: Insufficient surface preparation or using the wrong type of paint can cause paint to peel. Use an adhesion promoter and automotive interior paint specifically designed for plastics.
- Uneven Texture: Practicing with the texture spray on cardboard before applying it to the dashboard is essential. Apply several light coats rather than one heavy coat.
- Color Matching Issues: Always use your vehicle's paint code to ensure accurate color matching. Consider having a professional auto paint supplier custom-match the paint to your dashboard.
Alternative Repair Options
While DIY repair can be effective for many dashboard cracks, more severe damage may require professional intervention. Consider the following alternatives:
- Professional Upholstery Repair: A professional upholstery shop can repair or replace the damaged section of the dashboard, providing a seamless and durable repair.
- Dashboard Replacement: Replacing the entire dashboard is the most expensive option but may be necessary for severely damaged dashboards. You can either buy a new dashboard or salvage one from a junkyard.
- Dashboard Cover: A dashboard cover is a cost-effective way to conceal cracks and protect the dashboard from further damage. However, it will alter the original appearance of the interior.
By understanding the materials, utilizing the proper techniques, and investing in quality repair products, you can successfully repair most dashboard cracks and restore the appearance of your vehicle's interior. Remember to always prioritize safety and follow the manufacturer's instructions for all products used. Good luck!