Diagnosis And Replacement Of Front And Rear Wheel Bearings On A 240sx
So, you're hearing that telltale whirring, grinding, or maybe even a clicking sound coming from your 240SX's wheels? Chances are, you've got a wheel bearing going bad. Don't panic; replacing them is a manageable job for the experienced DIYer. This guide will walk you through the diagnosis and replacement of both front and rear wheel bearings on your S13 or S14 240SX.
Diagnosis: Pinpointing the Culprit
Before you start tearing things apart, it's crucial to accurately diagnose the failing bearing. Misdiagnosis can lead to unnecessary work and expense. Here's how to narrow it down:
Road Test
The simplest diagnostic tool is your ears. Perform a road test, paying close attention to the sounds emanating from each wheel. Note the following:
- Speed Sensitivity: Does the noise increase or decrease with speed? A bad wheel bearing's noise will usually increase with vehicle speed.
- Turning Test: This is key. Find a safe, open area. As you turn left, the load shifts to the right side of the car. If the noise *increases* when turning left, the right wheel bearing is likely the culprit. Conversely, if the noise increases when turning right, suspect the left wheel bearing.
- Load Sensitivity: Similarly, listen for the noise under different load conditions (acceleration vs. deceleration). A failing bearing might exhibit different noises based on load.
Visual Inspection & Play Check
Once you've identified a possible suspect, get the car safely supported on jack stands. Always use jack stands! Never work under a car supported only by a jack.
- Spin the Wheel: With the wheel off the ground, spin it by hand. Listen for any grinding, clicking, or roughness. Also, feel for any unusual vibrations.
- Rock the Wheel: Grip the wheel at the 12 o'clock and 6 o'clock positions. Try to rock it back and forth. Do the same at the 3 o'clock and 9 o'clock positions. Excessive play (more than a few millimeters) indicates a worn bearing or, possibly, worn ball joints/tie rod ends (so double-check those!). You might also notice the brake rotor moving independently of the hub if the bearing is truly shot.
- Visual Inspection: Look for any signs of grease leakage around the hub. This could indicate a compromised bearing seal, allowing contaminants in and lubricant out. Check the condition of the CV boot (for front bearings) to ensure it's not torn, as this can lead to premature CV joint failure and similar noises.
Important Note: Sometimes, a noise that sounds like a wheel bearing can actually be a tire issue (e.g., cupping or uneven wear). Before condemning a bearing, try rotating your tires to see if the noise moves.
Front Wheel Bearing Replacement
Replacing front wheel bearings on a 240SX requires removing the entire knuckle/spindle assembly. This isn't a small job, so allocate a good chunk of time. You will typically need a shop press to do this properly and safely.
Tools and Materials
- New wheel bearing(s) and seals
- Shop press with appropriate adapters
- Wheel chocks
- Jack and jack stands
- Lug wrench
- Socket set (metric)
- Wrench set (metric)
- Hammer
- Punch
- Torque wrench
- Brake cleaner
- Grease (high-temperature wheel bearing grease)
- Penetrating oil
- Brake fluid (if brake lines need disconnecting)
- Optional: new cotter pins, brake pads, rotors
Procedure
- Preparation: Loosen the lug nuts on the wheel you're working on. Safely lift the vehicle and support it with jack stands. Remove the wheel.
- Brake Caliper Removal: Disconnect the brake line from the caliper (be prepared for brake fluid to leak – have a container ready). Remove the brake caliper mounting bolts and carefully remove the caliper. Hang the caliper out of the way using a bungee cord or wire – do not let it hang by the brake line!
- Brake Rotor Removal: Remove the brake rotor. It might be stuck; use penetrating oil and gentle taps with a hammer if necessary.
- ABS Sensor Removal (if equipped): Carefully remove the ABS sensor from the knuckle. These can be brittle, so be gentle. Disconnect the sensor wiring.
- Tie Rod End Removal: Use a tie rod end puller or a pickle fork to separate the tie rod end from the knuckle.
- Lower Ball Joint Separation: Use a ball joint separator tool to separate the lower ball joint from the knuckle.
- Axle Nut Removal: Remove the axle nut. This may require considerable force. You may need to use an impact wrench.
- Knuckle Removal: Separate the drive axle from the hub assembly. This might require some persuasion with a soft-faced hammer. Be careful not to damage the axle threads. Remove the upper control arm from the knuckle, unbolting the upper ball joint. Now the knuckle should be free.
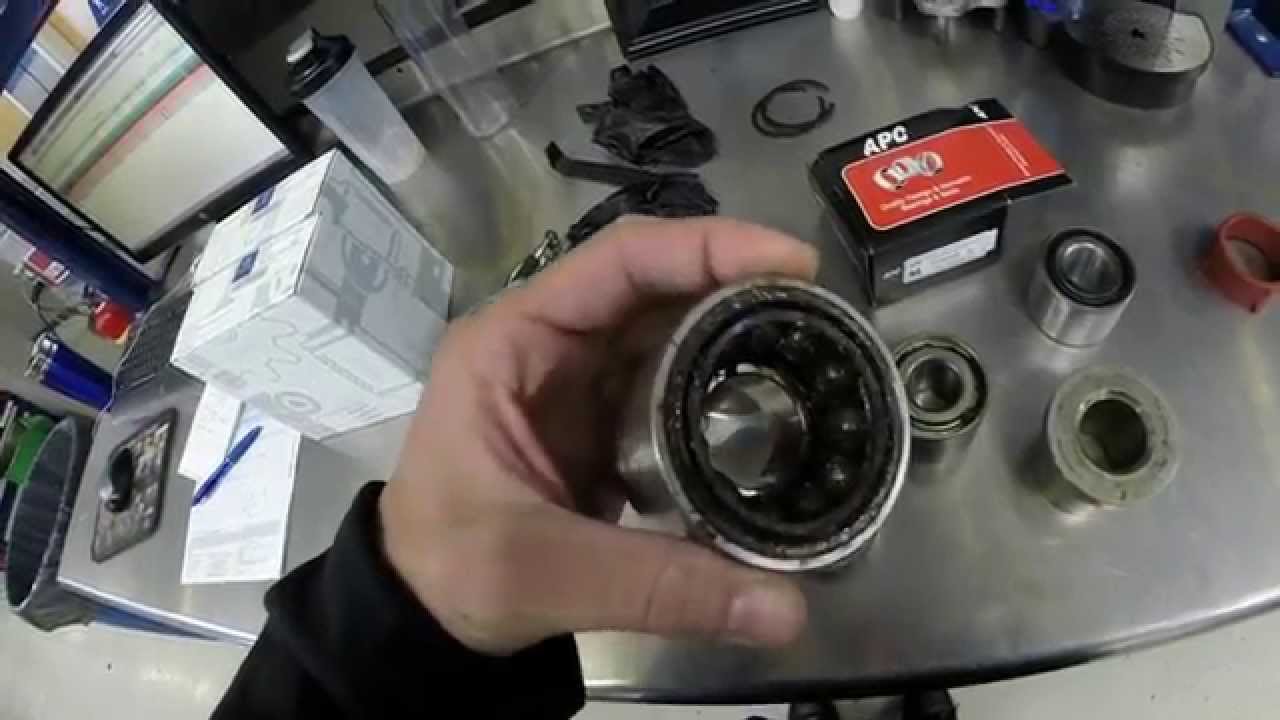
- Bearing Removal (Press): Take the knuckle to a shop press. Use the appropriate adapters to press out the old wheel bearing. Note the orientation of the bearing before removing it – you'll need to install the new one the same way. Also, remove the circlip that holds the bearing in place BEFORE pressing.
- Bearing Installation (Press): Carefully press in the new wheel bearing using the shop press and the correct adapters. Make sure the bearing is seated properly and fully. Reinstall the circlip.
- Hub Installation (Press): Press the hub back into the new bearing. Again, use the correct adapters to avoid damaging the bearing.
- Reassembly: Reinstall all components in the reverse order of removal. Torque all fasteners to the manufacturer's specifications. Use new cotter pins where applicable. Bleed the brakes if you disconnected the brake lines.
- Repeat: Repeat the process on the other side if necessary.
Rear Wheel Bearing Replacement
Rear wheel bearings on a 240SX can be a bit more involved, especially the driven wheels (i.e. not the front wheels that only steer). The procedure varies slightly depending on whether you have a solid axle (like on some older models) or an independent rear suspension (IRS). We'll focus on the more common IRS setup. This will also require access to a press for removing and installing bearings.
Tools and Materials
Essentially the same as the front, with the addition of:
- Slide hammer with hub puller attachment
Procedure (IRS)
- Preparation: Same as the front – loosen lug nuts, lift the vehicle, support with jack stands, and remove the wheel.
- Brake Components Removal: Remove the brake caliper, rotor, and parking brake assembly. The parking brake mechanism can be tricky, so take pictures as you disassemble it to aid in reassembly.
- Axle Removal: Disconnect the axle from the differential. Usually this involves unbolting the axle flange from the differential flange. Be careful; differential fluid might leak. Support the axle as you remove it to prevent damage to the CV joints.
- Hub Removal: This is where the slide hammer comes in. Attach the hub puller attachment to the hub and use the slide hammer to pull the hub assembly from the knuckle. This might require some force.
- Knuckle Removal: Disconnect the upper and lower control arms from the knuckle. The knuckle should now be free.
- Bearing Removal and Installation (Press): Take the knuckle and hub to a shop press. Press out the old bearing from the knuckle. Press the new bearing into the knuckle.
- Hub Bearing Installation (Press): You may need to press the hub out of the bearing assembly to properly replace it, depending on your model. In any case, ensure the hub is pressed into the new bearing carefully, using the appropriate adapters.
- Reassembly: Reinstall all components in the reverse order of removal. Torque all fasteners to the manufacturer's specifications. Reinstall the parking brake assembly, referring to your pictures if needed. Bleed the brakes if necessary.
- Repeat: Repeat the process on the other side if necessary.
Important Considerations
- Torque Specifications: Always torque fasteners to the manufacturer's specifications. Using the correct torque is crucial for ensuring proper bearing preload and preventing premature failure. Refer to a service manual for your specific 240SX year and model.
- Bearing Preload: Some wheel bearing designs require a specific preload setting. This is often achieved by tightening the axle nut to a specific torque and then backing it off a certain amount. Consult your service manual for the correct procedure.
- Wheel Alignment: After replacing wheel bearings, especially on the front, it's a good idea to get a wheel alignment. This will ensure proper tire wear and handling.
- Safety First: Always prioritize safety. Wear safety glasses, gloves, and appropriate clothing. Use jack stands to support the vehicle. If you're not comfortable with any part of the procedure, seek the help of a qualified mechanic.
Replacing wheel bearings is a challenging but rewarding task. By following these instructions and taking your time, you can save money and gain valuable experience working on your 240SX. Good luck, and happy wrenching!