Diagnosis And Replacement Of The Fuel Level Sending Unit In A 240sx
So, your trusty 240SX's fuel gauge is acting up, huh? Flickering wildly, showing empty when you know there's gas in the tank, or just plain stuck? Chances are, you're dealing with a faulty fuel level sending unit. It's a common issue in these cars, especially with age, but thankfully, it's a repair most DIY enthusiasts can tackle with the right tools and a bit of patience. Let's break down how to diagnose the problem and get that fuel gauge reading accurately again.
Diagnosis: Is it Really the Sending Unit?
Before diving in and replacing parts, let's confirm that the sending unit is indeed the culprit. Here are some common symptoms that point towards a failing unit:
- Erratic Fuel Gauge Readings: The needle jumps around randomly, even when driving on a smooth surface.
- Gauge Stays at Empty (or Full): Despite filling up, the gauge refuses to budge. Conversely, it might remain pegged at full even after driving a significant distance.
- Inaccurate Readings: The gauge consistently shows the wrong fuel level. For instance, it might read half a tank when you know it's nearly full.
- Fuel Light Issues: The low fuel light might come on prematurely or not at all, even when the gauge reads near empty.
However, before condemning the sending unit, let's rule out a few other possibilities:
1. Check the Wiring and Connections
This is the first and easiest step. Corrosion and loose connections are frequent causes of fuel gauge problems. Locate the fuel pump/sending unit access panel (usually under the rear seat or in the trunk, depending on your specific 240SX model – consult your service manual for the exact location). Once you've found it, carefully remove the panel. You should see wires connected to the sending unit. Inspect these wires for any damage, corrosion, or loose connections. Clean any corrosion with a wire brush or electrical contact cleaner and ensure the connections are secure.
Tip: Disconnect the battery before fiddling with any electrical components to avoid accidental shorts.
2. Inspect the Gauge Cluster
While less common, a faulty fuel gauge within the instrument cluster itself can also be the source of the problem. If you suspect this, you might try swapping the entire gauge cluster with a known good one (if you have access to one) to see if the problem disappears. Alternatively, you can carefully remove the cluster and inspect the connections at the back. Look for any signs of damage or corrosion.
3. The Ground Connection
A poor ground can cause all sorts of electrical gremlins. Locate the ground wire for the fuel pump/sending unit (it's usually a black wire connected to the chassis near the fuel tank). Ensure the connection is clean, tight, and free of corrosion. Clean it up with a wire brush and some sandpaper if necessary.
4. Using a Multimeter to Test
If the wiring and connections all look good, you can use a multimeter to test the sending unit's resistance. With the sending unit disconnected, measure the resistance between the sending unit's signal wire and ground. The resistance should vary depending on the fuel level. Refer to your 240SX service manual for the correct resistance values at different fuel levels. If the resistance is way off or doesn't change as you manually move the float arm (if accessible), then the sending unit is likely bad.
Caution: Be extremely careful when working around fuel tanks and fuel lines. Avoid open flames or sparks.
Replacement: Getting the Job Done
Okay, so you've confirmed that the sending unit needs to be replaced. Here's a step-by-step guide to the replacement process:
Tools and Materials You'll Need:
- New Fuel Level Sending Unit (make sure you get the correct one for your year and model 240SX)
- Socket set
- Wrench set
- Screwdrivers (Phillips and flathead)
- Pliers
- Fuel line disconnect tool (if applicable)
- Multimeter
- Wire brush
- Electrical contact cleaner
- New fuel pump gasket (highly recommended)
- Rags or shop towels
- Safety glasses
- Gloves
- Jack and jack stands (if necessary to access the fuel tank)
- Drain pan (to catch any spilled fuel)
- Service Manual for your 240SX (essential for torque specs and specific instructions)
Step-by-Step Replacement Guide:
- Safety First! Disconnect the negative battery cable. Work in a well-ventilated area. Have a fire extinguisher nearby.
- Access the Fuel Pump/Sending Unit: Remove the access panel in the trunk or under the rear seat (refer to your service manual for the location).
- Disconnect Electrical Connections: Carefully disconnect the electrical connectors from the fuel pump/sending unit assembly.
- Disconnect Fuel Lines: Disconnect the fuel lines from the fuel pump assembly. Be prepared for some fuel spillage. Use a fuel line disconnect tool if necessary. Have rags ready to absorb any fuel.
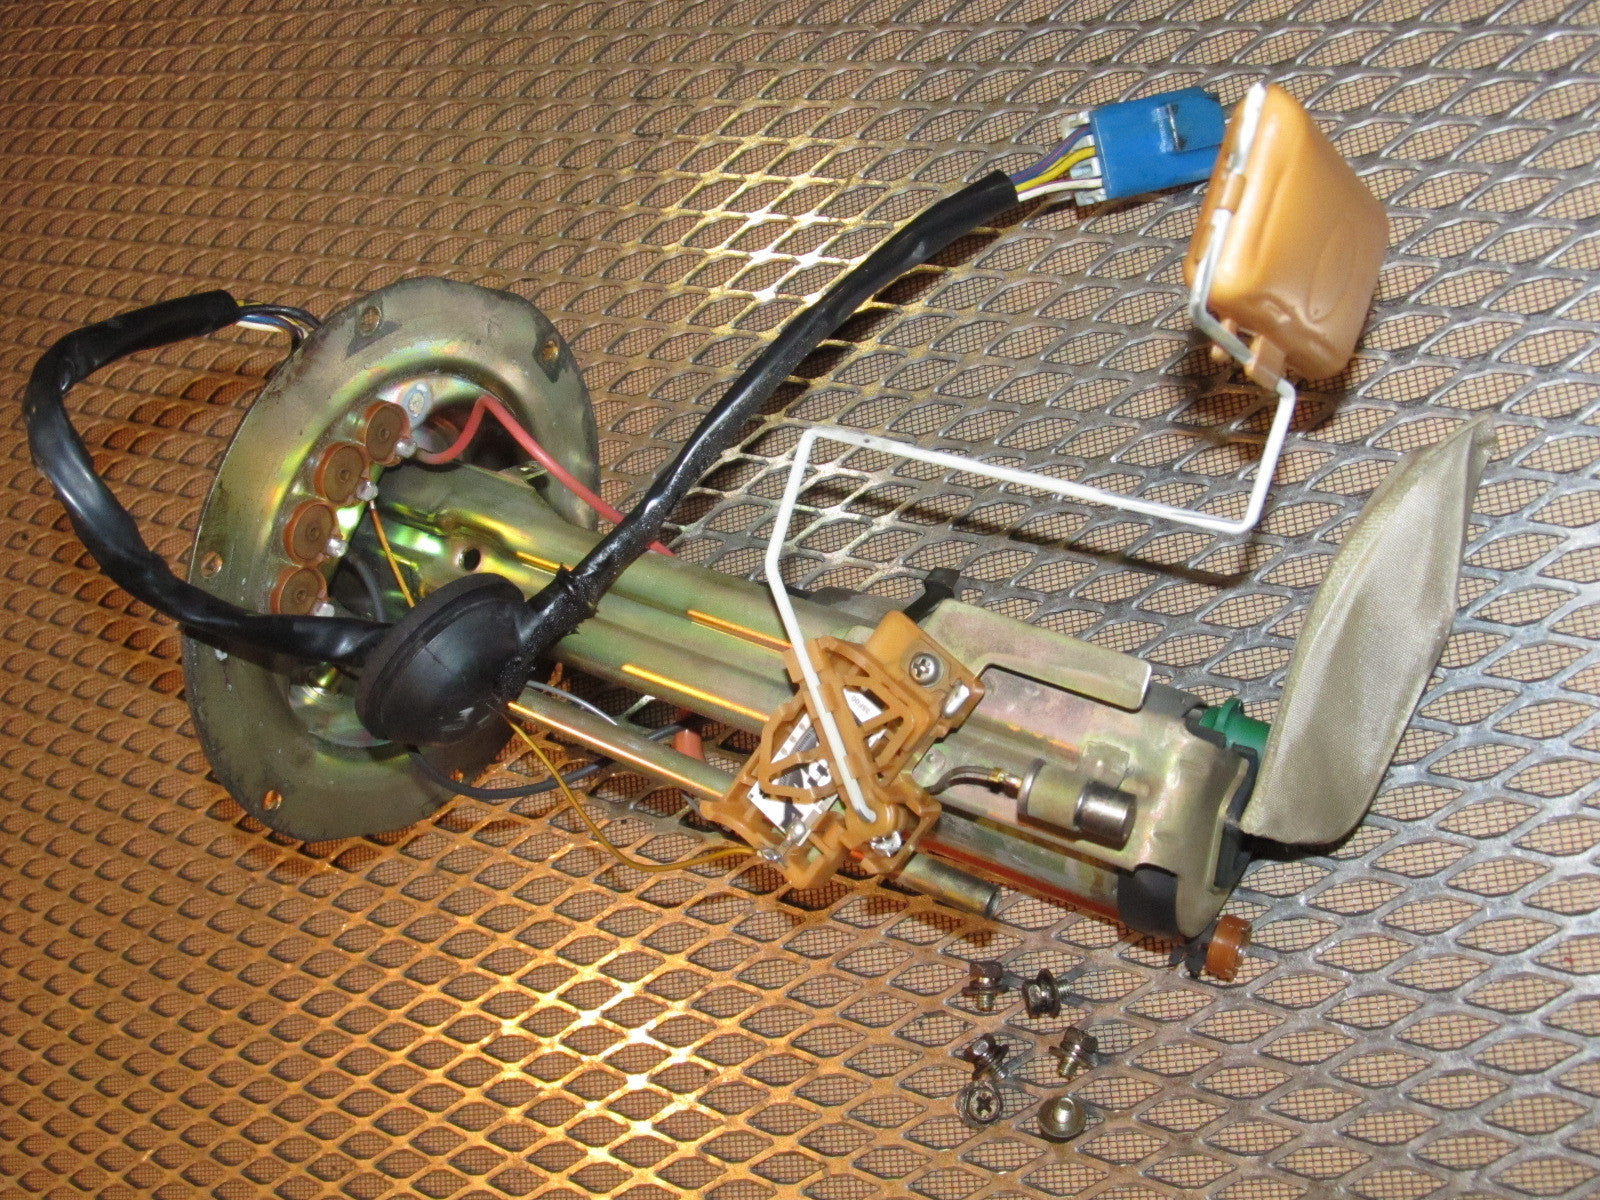
- Remove the Fuel Pump/Sending Unit Assembly: Typically, there's a retaining ring that holds the fuel pump/sending unit assembly in place. Use a tool designed for this purpose (or carefully use a hammer and screwdriver, but be extremely cautious not to damage the ring or the fuel tank). Rotate the retaining ring to unlock it and then carefully lift out the entire fuel pump/sending unit assembly.
- Separate the Sending Unit from the Pump (if necessary): Depending on the design, the sending unit may be integrated with the fuel pump or it may be a separate component that can be detached. If it's separate, carefully disconnect it from the pump.
- Install the New Sending Unit: Install the new sending unit in the reverse order of removal. Ensure all connections are secure. If the sending unit is integrated with the fuel pump, you may need to replace the entire fuel pump assembly.
- Install a New Fuel Pump Gasket: Always replace the fuel pump gasket with a new one to ensure a proper seal and prevent fuel leaks.
- Reinstall the Fuel Pump/Sending Unit Assembly: Carefully lower the fuel pump/sending unit assembly back into the fuel tank. Align it correctly and then secure it with the retaining ring. Make sure the retaining ring is properly locked in place.
- Reconnect Fuel Lines and Electrical Connections: Reconnect the fuel lines and electrical connectors to the fuel pump assembly. Ensure they are securely connected.
- Reinstall the Access Panel: Reinstall the access panel in the trunk or under the rear seat.
- Reconnect the Battery: Reconnect the negative battery cable.
- Test the Fuel Gauge: Turn the ignition key to the "on" position (but don't start the engine). Observe the fuel gauge. It should now show the correct fuel level.
- Check for Leaks: Start the engine and carefully inspect around the fuel pump/sending unit assembly for any fuel leaks. If you find any leaks, immediately turn off the engine and address the problem.
Important Considerations:
- Fuel Tank Level: It's best to perform this repair when the fuel tank is as empty as possible. This will minimize fuel spillage and make the job easier.
- Fuel Line Disconnection: Disconnecting fuel lines can be tricky. Be prepared for some fuel spillage. Use the correct fuel line disconnect tool to avoid damaging the fuel lines.
- Torque Specs: Use a torque wrench to tighten all fasteners to the correct torque specifications (refer to your service manual). Over-tightening can damage the fuel tank or the fuel pump assembly.
- Cleanliness: Keep everything clean during the repair. Dirt and debris can contaminate the fuel system.
Cost: What to Expect
The cost of replacing a fuel level sending unit can vary depending on several factors:
- Sending Unit Cost: The price of a new sending unit can range from $50 to $200, depending on the brand, quality, and whether it's integrated with the fuel pump.
- Labor Cost (if applicable): If you choose to have a mechanic perform the repair, labor costs can range from $150 to $400, depending on the shop's hourly rate and the complexity of the job.
- Additional Parts: Don't forget to factor in the cost of a new fuel pump gasket, fuel line disconnect tool (if needed), and any other supplies you might need.
So, doing it yourself can save you a significant amount of money. However, if you're not comfortable working on fuel systems, it's best to leave the job to a qualified mechanic.
Final Thoughts: Replacing the fuel level sending unit in your 240SX can seem daunting, but with the right tools, information, and a bit of caution, it's a manageable DIY project. Just remember to prioritize safety, consult your service manual, and take your time. Good luck, and happy motoring!