Engine Rebuild Process Documentation And Torque Sequences
The internal combustion engine, a marvel of engineering, transforms chemical energy into mechanical work, propelling our vehicles forward. While seemingly robust, engines are subject to wear and tear, eventually requiring a rebuild to restore their performance. A crucial aspect of any successful engine rebuild is meticulous documentation and adherence to precise torque sequences. This guide delves into the importance of these practices, providing an in-depth look at the process.
The Foundation: Documentation is King
Before disassembling a single bolt, detailed documentation is paramount. Think of it as creating a roadmap for reassembly, ensuring that every component returns to its rightful place. Here’s what your documentation should include:
Initial Assessment
Begin with a thorough assessment of the engine's condition before disassembly. Note any unusual noises, leaks, or performance issues. This provides valuable clues about potential problems and helps prioritize inspection areas. Consider performing compression and leak-down tests and documenting the results. Take high-resolution photos of the engine from various angles, highlighting any existing damage or unusual wear patterns.
Disassembly Notes and Labeling
During disassembly, meticulously document the location of each component. Use a digital camera to capture images of each step, focusing on wiring harnesses, vacuum lines, and hose connections. Label everything clearly using masking tape and a permanent marker. For example, label each connecting rod cap with its corresponding cylinder number (e.g., "Rod Cap #1"). Store bolts and fasteners in labeled bags or containers, organizing them by engine section (e.g., "Cylinder Head Bolts," "Intake Manifold Bolts"). Note the orientation of components like pistons and connecting rods. A simple sketch showing their position can be invaluable during reassembly.
Parts Inventory and Inspection
Create a detailed inventory of all removed parts. Note their condition, including any signs of wear, damage, or corrosion. Use precision measuring tools like calipers and micrometers to check critical dimensions, such as cylinder bore diameter, piston diameter, crankshaft journal diameter, and valve stem diameter. Compare these measurements to the manufacturer's specifications. Record all measurements in a spreadsheet or notebook. This data will help determine which parts need to be replaced or machined. Note the manufacturer and part number of each component if possible. Document any specific problems observed with each part, such as scoring on a cylinder wall or excessive play in a valve guide.
Service Manuals and Technical Bulletins
Obtain a comprehensive service manual for your specific engine model. These manuals provide detailed information on disassembly, inspection, reassembly, and torque specifications. Supplement the service manual with any relevant technical service bulletins (TSBs) that address common issues or updates for your engine. Online forums and enthusiast communities can also be valuable resources for finding information and tips specific to your engine.
Torque Sequences: Precision Tightening
Torque is the rotational force applied to a fastener, measured in units like foot-pounds (ft-lb) or Newton-meters (Nm). Applying the correct torque is essential for proper clamping force, preventing leaks, and ensuring the long-term reliability of the engine. Using the correct torque sequence ensures even distribution of the clamping force.
Why Torque Sequences Matter
Imagine tightening the head bolts on a cylinder head. If you tighten one bolt completely before moving to the next, you'll create uneven pressure on the head gasket. This can lead to leaks, warping of the cylinder head, and even engine failure. Torque sequences distribute the clamping force evenly across the surface, preventing these problems.
General Torque Sequence Guidelines
While specific torque sequences vary depending on the engine, some general guidelines apply:
- Start with the Center: Most torque sequences begin with the bolts located in the center of the component and work outward in a spiral or crisscross pattern. This helps to distribute the clamping force evenly from the center outwards.
- Follow a Progressive Approach: Torque sequences often involve multiple passes, gradually increasing the torque applied to each bolt. For example, you might tighten the bolts to one-third of the final torque value on the first pass, two-thirds on the second pass, and the full torque on the final pass.
- Lubrication is Key: Always lubricate the threads of bolts and fasteners with the recommended lubricant (usually engine oil or a specific thread lubricant) unless otherwise specified in the service manual. Lubrication reduces friction, allowing for more accurate torque readings.
- Use a Calibrated Torque Wrench: A torque wrench is an essential tool for any engine rebuild. Use a high-quality torque wrench that is properly calibrated. Periodically check the calibration of your torque wrench to ensure its accuracy. There are two common types: beam and click type. Click type wrenches are easier to use and provide an audible signal when the desired torque is reached. Beam type wrenches are less expensive but require careful observation of the torque indicator.
Examples of Torque Sequences
Here are a few examples of torque sequences for common engine components:
Cylinder Head Bolts
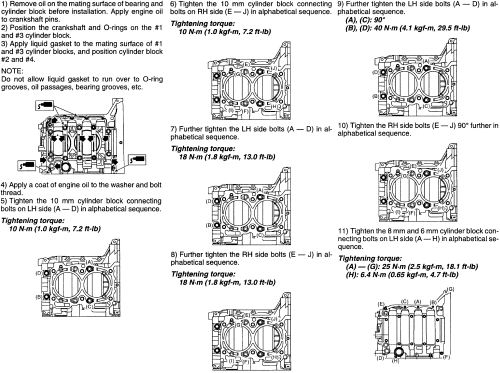
Cylinder head bolt torque sequences are typically spiral or crisscross patterns. The service manual will specify the exact sequence and torque values. A common example might be a three-step sequence: 30 ft-lb, 60 ft-lb, and then a final angle tightening (e.g., 90 degrees). Angle tightening uses a degree wheel to apply precise angular rotation after reaching a specific torque value.
Connecting Rod Bolts
Connecting rod bolts are typically tightened in two or three steps. The sequence is usually straightforward, alternating between the two bolts on each connecting rod cap. Accurate torque is crucial for these bolts, as they are subject to extreme stress during engine operation.
Main Bearing Cap Bolts
Main bearing cap bolts, like cylinder head bolts, require precise torque and sequence to ensure proper crankshaft alignment and prevent bearing failure. The sequence is often a spiral or crisscross pattern, starting with the center bolts.
Special Considerations
Some fasteners are torque-to-yield (TTY) bolts. These bolts are designed to stretch slightly when tightened, providing a more consistent clamping force. TTY bolts must be replaced after each use, as they have already been stretched to their yield point. The service manual will indicate whether a bolt is TTY and specify the correct tightening procedure, which often involves a combination of torque and angle tightening.
Note: Always refer to the service manual for your specific engine model for the correct torque sequences and values. Incorrect torque can lead to serious engine damage.
Conclusion: Precision and Patience
Engine rebuilding is a complex process that requires precision, patience, and a thorough understanding of engine mechanics. Meticulous documentation and adherence to precise torque sequences are essential for ensuring the longevity and reliability of your rebuilt engine. By following these guidelines and consulting the service manual, you can significantly increase your chances of a successful rebuild and enjoy the satisfaction of bringing a worn engine back to life.