Fabrication And Installation Of A Braided Stainless Steel Clutch Hardline
So, you're thinking about upgrading to a braided stainless steel clutch hardline? Excellent choice! It's a modification that offers improved feel and reliability over the factory rubber hose, especially in high-performance applications or older vehicles. This article will guide you through the process of fabricating and installing your own braided stainless steel clutch hardline, covering everything from selecting the right components to proper installation techniques.
Why Upgrade to a Braided Stainless Steel Clutch Hardline?
Before we dive into the how-to, let's quickly recap the benefits. Factory rubber clutch lines are prone to expansion under pressure. This expansion absorbs some of the force applied to the clutch pedal, leading to a softer, less precise feel. Over time, rubber also degrades, leading to cracks and leaks. Braided stainless steel lines, on the other hand, offer several advantages:
- Reduced Expansion: The stainless steel braid significantly reduces expansion under pressure, providing a more consistent and responsive clutch feel.
- Increased Durability: Stainless steel is far more durable than rubber, resisting abrasion, corrosion, and degradation from heat and chemicals.
- Improved Aesthetics: Let's be honest, a braided stainless steel line looks pretty darn good under the hood!
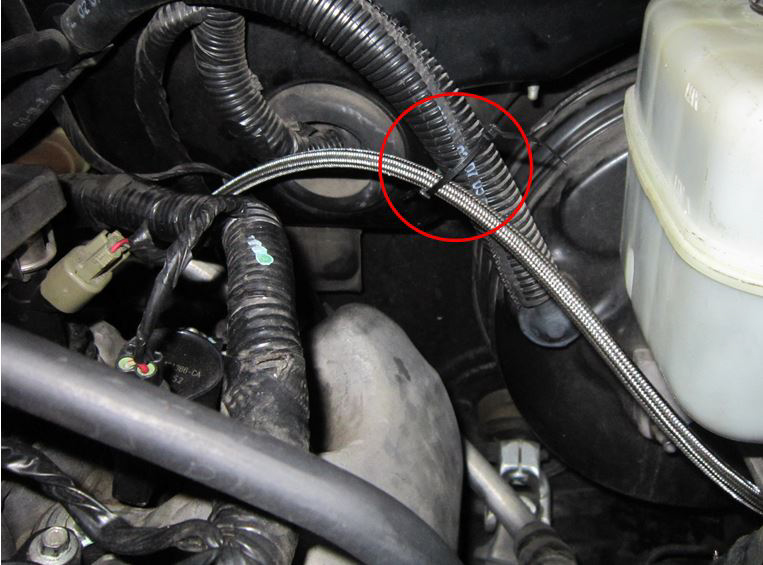
Components You'll Need
Fabricating a custom clutch line requires a few specific components. Quality is paramount here; don't skimp on cheaper alternatives, as a failure in the clutch line can be catastrophic.
1. Braided Stainless Steel Hose
This is the heart of the system. The hose consists of a Teflon (PTFE) inner liner surrounded by a tightly woven stainless steel braid. The PTFE liner is essential for compatibility with brake fluid (DOT 3, DOT 4, or DOT 5.1). Hose sizes are typically specified using the "AN" (Army-Navy) system. For most clutch applications, an AN-3 or AN-4 hose is sufficient. AN fittings use a 37-degree flare. Measure the total length required, accounting for any bends, and purchase slightly more than you think you need. It's better to have extra than to come up short.
2. AN Fittings
These fittings connect the hose to the clutch master cylinder, slave cylinder, and any intermediate hard lines. You'll need two main types:
- Straight or Angled Fittings: These connect directly to the master and slave cylinders. Common angles include straight, 45-degree, and 90-degree. Choose the angle that provides the cleanest routing and avoids sharp bends in the hose. Ensure the fitting size matches your hose size (e.g., AN-3 fitting for AN-3 hose).
- Hose Ends: These are specialized fittings designed to be crimped or swaged onto the end of the braided stainless steel hose. They come in reusable and non-reusable styles. Reusable fittings are generally preferred by DIYers, as they allow for disassembly and adjustment if needed. However, they are more expensive. Choose the style that suits your budget and skill level.
It's crucial to select fittings that are compatible with your hose and the ports on your master and slave cylinders. You may need adapters to convert from a metric thread on your cylinder to the AN fitting thread. Take careful measurements and consult with a reputable supplier to ensure compatibility. Check the port type, either inverted flare or bubble flare, on both master and slave cylinders.
3. Flare Wrench Set
A flare wrench is essential for loosening and tightening brake line fittings. These wrenches have a partially enclosed head that grips more of the fitting than a standard open-end wrench, reducing the risk of rounding off the corners. A set of varying sizes is highly recommended.
4. Hose Cutter or Abrasive Cut-off Wheel
A specialized hose cutter designed for braided stainless steel is ideal. This will provide a clean, burr-free cut. Alternatively, an abrasive cut-off wheel (like a Dremel with a cut-off disc) can be used, but requires extra care to prevent fraying of the braid.
5. Vise and Soft Jaws
A vise is needed to hold the hose and fittings securely during assembly. Soft jaws (made of aluminum or plastic) are crucial to prevent damaging the fittings and hose during tightening.
6. Assembly Lube
A small amount of assembly lube will help the hose end slide onto the hose and make tightening the fittings easier.
7. Brake Fluid
Use the brake fluid specified for your vehicle (DOT 3, DOT 4, or DOT 5.1). Make sure it's fresh, as brake fluid is hygroscopic (absorbs moisture from the air).
8. Bleeder Kit or Pressure Bleeder
Essential for bleeding the air out of the clutch system after installation.
9. Safety Glasses and Gloves
Always wear safety glasses and gloves when working with brake fluid, as it can irritate the skin and eyes.
Fabrication Process
Now that you have all the necessary components, let's move on to the fabrication process. This involves cutting the hose to length and attaching the hose ends.
Step 1: Measure and Cut the Hose
Carefully measure the required hose length, accounting for the routing and any bends. Add a couple of extra inches for safety. Secure the hose in a vise with soft jaws. Using a hose cutter or abrasive cut-off wheel, make a clean, square cut. If using an abrasive wheel, wrap the hose tightly with masking tape at the cut point to minimize fraying.
Step 2: Install Hose Ends (Reusable Style)
The installation process varies slightly depending on the specific brand and style of reusable hose end. However, the general steps are as follows:
- Disassemble the Hose End: Most reusable hose ends consist of two or three pieces: the socket (or nut), the nipple (or olive), and sometimes a sleeve. Disassemble the hose end.
- Slide on the Socket (or Nut): Slide the socket (or nut) over the hose. Ensure it's oriented correctly; the threads should face towards the cut end of the hose.
- Insert the Nipple (or Olive): Depending on the design, you may need to push the nipple (or olive) into the end of the hose until it bottoms out. Some designs require you to pull the stainless steel braid over the nipple.
- Assemble the Hose End: Screw the socket (or nut) onto the nipple. Use two wrenches, one to hold the nipple and the other to tighten the socket. Refer to the manufacturer's instructions for the correct torque specification. Overtightening can damage the hose or fitting.
Step 3: Inspect and Test
Carefully inspect the completed hose assembly for any leaks or damage. Give the hose a good tug to ensure the hose ends are securely attached. While a pressure test is ideal, it's not always feasible for DIYers. A thorough visual inspection is crucial. Important: Before final installation, temporarily connect the hose to the master cylinder and slave cylinder (without fully tightening). Briefly depress the clutch pedal to check for leaks before fully bleeding the system. This minimizes the risk of introducing air into a leaky system.
Installation Process
With your custom clutch line fabricated, you're ready to install it on your vehicle.
Step 1: Disconnect the Old Clutch Line
Start by locating the existing clutch line. It typically runs from the clutch master cylinder (usually located on the firewall) to the clutch slave cylinder (mounted on the transmission). Use a flare wrench to carefully loosen the fittings at both ends. Be prepared for some brake fluid to spill, so have rags handy. Important: Depress the clutch pedal several times to relieve pressure in the system before disconnecting the line. If the fittings are corroded or stuck, apply penetrating oil and let it soak for a while.
Step 2: Remove the Old Line
Once the fittings are loose, carefully remove the old clutch line. Pay attention to the routing of the line, as you'll need to follow the same path with the new line.
Step 3: Install the New Clutch Line
Install the new braided stainless steel clutch line, following the original routing. Ensure the line is not rubbing against any sharp edges or hot components. Tighten the fittings securely, but do not overtighten. Use a flare wrench and be mindful of the torque specifications. If you're using thread sealant (e.g., Teflon tape), apply it sparingly to the threads of the fittings.
Step 4: Bleed the Clutch System
After installing the new line, you'll need to bleed the clutch system to remove any air that may have entered during the process. There are several methods for bleeding the clutch:
- Two-Person Bleeding: One person depresses the clutch pedal while the other opens and closes the bleeder screw on the slave cylinder.
- Pressure Bleeding: A pressure bleeder applies pressure to the brake fluid reservoir, forcing fluid through the system and out the bleeder screw.
- Vacuum Bleeding: A vacuum bleeder creates a vacuum at the bleeder screw, drawing fluid through the system.
Refer to your vehicle's service manual for the recommended bleeding procedure. Continue bleeding the system until all air bubbles are gone and the fluid flows clear.
Step 5: Test and Inspect
After bleeding the system, test the clutch pedal feel. It should be firm and consistent. Check for leaks at all fittings. Take the vehicle for a test drive and monitor the clutch performance. If you experience any issues, re-bleed the system or inspect the fittings for leaks.
Conclusion
Fabricating and installing a braided stainless steel clutch hardline is a rewarding upgrade that can significantly improve your vehicle's clutch feel and reliability. By following these steps and taking your time, you can achieve professional results and enjoy the benefits of this modification for years to come. Remember safety is paramount! If you're uncomfortable with any part of this process, it's always best to consult with a qualified mechanic. Good luck!