Fabrication And Installation Of A Custom Shift Boot For The 240sx
The Nissan 240SX, a beloved sports coupe, is known for its sleek design and tunable engine. A small detail that can significantly enhance its interior aesthetics and driving experience is a custom shift boot. Replacing a worn or damaged shift boot, or simply upgrading to a personalized design, can elevate the look and feel of your 240SX. This article provides a comprehensive guide to the fabrication and installation of a custom shift boot for your 240SX.
Why Upgrade to a Custom Shift Boot?
Before diving into the fabrication and installation process, let's explore the benefits of a custom shift boot:
- Aesthetics: A custom shift boot allows you to personalize your car's interior, matching your style and preferences. You can choose from various materials, colors, and stitching patterns.
- Durability: Factory shift boots often wear out over time. A custom boot made from high-quality materials can offer superior durability and longevity.
- Improved Feel: Depending on the material chosen, a custom boot can provide a more comfortable and tactile feel when shifting gears.
- Restoration: For older 240SX models, a custom shift boot can help restore the interior to its original glory or improve upon the original design.
- Value: A well-executed custom shift boot can slightly increase the resale value of your vehicle by demonstrating attention to detail and care.
Planning Your Custom Shift Boot
The first step involves careful planning and material selection. Consider the following factors:
Material Selection
Choosing the right material is crucial for the look, feel, and durability of your shift boot. Popular options include:
- Leather: A classic choice, leather offers a luxurious feel, durability, and a wide range of colors and textures. Genuine leather is more expensive but offers superior longevity compared to synthetic leather (pleather).
- Alcantara: A synthetic suede-like material, Alcantara provides a soft, grippy texture and a high-end look, often found in performance vehicles.
- Vinyl: A budget-friendly option, vinyl is durable and easy to clean, but may not offer the same luxurious feel as leather or Alcantara.
- Suede: Offers a unique texture and visual appeal. Requires more care as it can be prone to staining.
- Custom Fabrics: You can also use custom fabrics to match your car's interior, such as tweed, canvas, or even performance fabrics like ballistic nylon.
Color and Stitching
Consider the color scheme of your 240SX's interior. Choose a color that complements the existing upholstery and trim. Stitching details can add a personalized touch. Options include:
- Matching Stitching: Blends seamlessly with the material for a subtle look.
- Contrasting Stitching: Creates a bolder statement and highlights the shape of the shift boot.
- Diamond Stitching: A more intricate pattern that adds texture and visual interest.
Tools and Materials Required
Gather the following tools and materials before starting the fabrication process:
- Your chosen fabric
- Sewing machine (a heavy-duty machine is recommended for leather)
- Scissors or rotary cutter
- Measuring tape or ruler
- Pencil or fabric marker
- Pins
- Thread (matching or contrasting, depending on your preference)
- Seam ripper
- Cardboard or paper for creating a template
- Shift boot retaining ring (if the original is damaged or missing)
- Needle and thread (for hand stitching if needed)
- Upholstery glue (optional, for securing the boot to the retaining ring)
Fabrication Process: Creating Your Custom Shift Boot
Follow these steps to fabricate your custom shift boot:
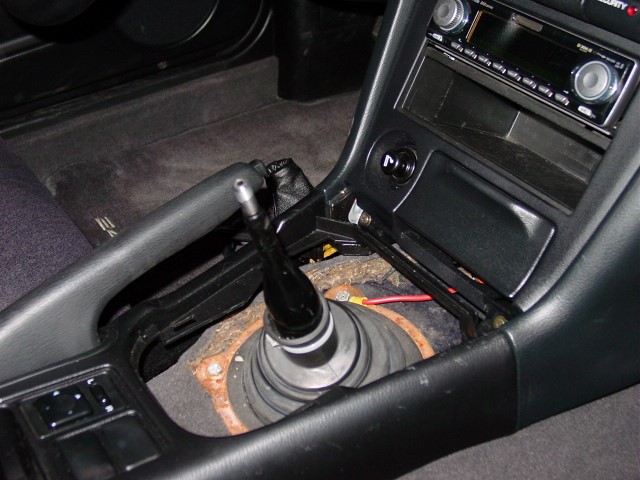
1. Removing the Old Shift Boot
Carefully remove the old shift boot from your 240SX. This usually involves:
- Gently prying the retaining ring from the center console.
- Disconnecting any clips or fasteners that secure the boot.
- Removing the shift knob (refer to your vehicle's manual for specific instructions).
Important: Take photos of the original shift boot and its mounting points before removing it. This will serve as a reference during installation.
2. Creating a Template
Use the old shift boot as a template or create a new template from scratch. To create a new template:
- Measure the circumference of the shift lever opening and the base of the retaining ring.
- Determine the desired height of the shift boot.
- Sketch a pattern on cardboard or paper, taking into account the shape and contours of the center console.
- Add seam allowances (typically 1/2 inch) to all edges of the pattern.
Tip: It’s always a good idea to create a test boot out of inexpensive fabric like muslin to check the fit before cutting your final material.
3. Cutting the Fabric
Place the template on your chosen fabric and trace around it with a fabric marker or pencil. Carefully cut out the fabric pieces, ensuring clean and accurate cuts. If your design requires multiple pieces, cut each piece separately.
4. Sewing the Shift Boot
Using your sewing machine, sew the fabric pieces together, following the template. Start with the seams that form the main body of the shift boot. Be sure to use a stitch length appropriate for the fabric you are using. For leather, use a slightly longer stitch. For lighter fabrics, use a shorter stitch. If necessary, hand-stitch intricate details or areas that are difficult to reach with the sewing machine.
5. Finishing the Edges
Finish the edges of the shift boot to prevent fraying and create a clean, professional look. Options include:
- Serging: A serger machine creates a clean, overlocked edge.
- Zigzag Stitching: A zigzag stitch on your sewing machine can prevent fraying.
- Folding and Stitching: Fold the edges of the fabric inward and stitch them down to create a clean hem.
6. Attaching the Retaining Ring
Carefully stretch the finished shift boot over the retaining ring. You can use upholstery glue to secure the boot to the ring for added stability. Ensure the boot is centered and properly aligned before the glue dries.
Installation: Installing Your Custom Shift Boot in Your 240SX
Once the custom shift boot is fabricated, install it in your 240SX:
1. Reinstalling the Retaining Ring
Align the retaining ring with the opening in the center console and gently press it into place. Ensure it is securely fastened.
2. Reinstalling the Shift Knob
Screw the shift knob back onto the shift lever, tightening it securely. Refer to your vehicle's manual for the correct torque specifications.
3. Final Adjustments
Make any necessary adjustments to the shift boot to ensure it fits properly and looks aesthetically pleasing. Check that the shift lever moves freely and that the boot does not interfere with any other components.
Maintenance Tips
To keep your custom shift boot looking its best, follow these maintenance tips:
- Regularly vacuum or wipe down the boot to remove dust and debris.
- Use a leather cleaner and conditioner (if applicable) to keep the material supple and prevent cracking.
- Avoid exposing the boot to direct sunlight for extended periods, as this can cause fading.
- Promptly clean any spills or stains to prevent permanent damage.
Expert Tip: Applying a fabric protectant spray can help repel stains and make cleaning easier.
Troubleshooting Common Issues
Here are some common issues you might encounter and how to resolve them:
- Shift boot doesn't fit properly: Double-check your measurements and template. If the boot is too small, you may need to create a new template with larger dimensions. If it's too large, carefully trim the excess fabric.
- Seams are coming undone: Ensure you are using a strong enough thread and a proper stitch length for your fabric. Reinforce the seams with additional stitching if necessary.
- Retaining ring is loose: Ensure the retaining ring is properly seated in the center console. If it's still loose, you may need to replace it with a new one.
Conclusion
Fabricating and installing a custom shift boot for your 240SX is a rewarding project that can significantly enhance your car's interior. By following these steps and taking your time, you can create a personalized shift boot that reflects your style and improves your driving experience. Remember to prioritize safety and accuracy throughout the process. With a little effort and attention to detail, you can transform your 240SX's interior with a custom shift boot that stands out. Enjoy the process, and happy shifting!