Fabrication And Selection Of Engine Mounts For An Ls1 Swap In A 240sx
So, you're thinking about dropping an LS1 into your 240SX? Excellent choice! That's a recipe for serious fun. But before you get too carried away dreaming about tire smoke, let's talk about something absolutely critical: engine mounts. Getting these right is non-negotiable for a safe, reliable, and enjoyable LS swap.
Understanding Engine Mounts: The Foundation of Your Swap
Engine mounts are more than just chunks of rubber and metal. They are the crucial interface between the engine and the chassis. They serve several vital functions:
- Supporting the engine's weight: Obvious, but needs stating. An LS1 is a relatively heavy engine, and the mounts need to handle that load reliably.
- Damping vibrations: Engines produce a lot of vibrations. Mounts absorb these to prevent them from being transmitted to the chassis, which would result in a noisy and uncomfortable ride.
- Minimizing engine movement: During acceleration, braking, and cornering, the engine wants to twist and move. Mounts constrain this movement, preventing interference with other components (like the steering shaft or exhaust).
For an LS swap, these functions are even more important. You're dealing with an engine that wasn't originally designed for the 240SX chassis, so carefully selecting and installing the correct mounts is paramount.
Fabrication Options: Weighing the Pros and Cons
When it comes to mounting that LS1, you've got a few fabrication avenues to explore:
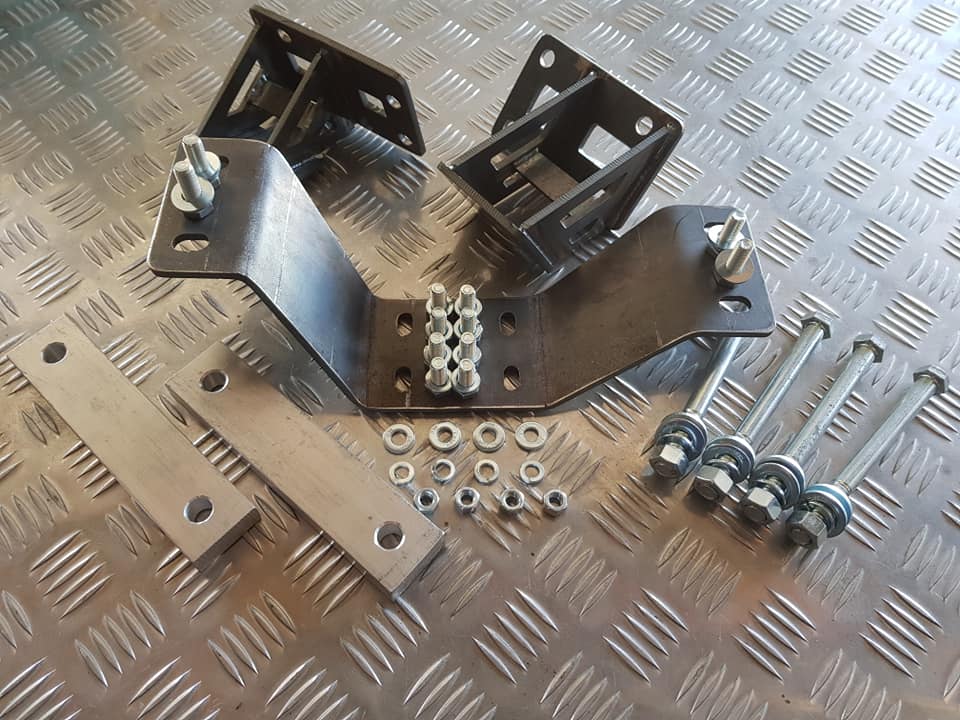
1. Off-the-Shelf Swap Kits: The Easiest Route
Several companies offer complete LS swap kits specifically designed for the 240SX. These kits typically include:
- Engine mount brackets: These bolt to the engine block and allow you to adapt it to the 240SX chassis.
- Chassis mounts: These weld (or sometimes bolt) to the 240SX's frame rails and provide a point of attachment for the engine mount brackets.
- Transmission crossmember: Required to support the transmission. Some kits include this.
Pros:
- Easiest installation: Designed for direct fitment, minimizing fabrication work.
- Good starting point for beginners: Takes the guesswork out of figuring out engine placement.
- Often include other necessary components: Such as headers, oil pans, and wiring harnesses, which are tailored to the swap.
Cons:
- Cost: Swap kits can be expensive, especially if they include a lot of extra parts.
- Limited customization: You're stuck with the engine placement and mount design chosen by the manufacturer. If you have specific needs (e.g., needing to run a different intake manifold or header configuration), a kit might not work.
- Quality varies: Research the manufacturer carefully. Some kits are better designed and manufactured than others. Look for kits made from high-quality steel (like DOM steel) with good welding.
2. Hybrid Approach: Modifying Existing Mounts
This involves taking existing engine mounts (either from another vehicle or aftermarket universal mounts) and modifying them to fit both the LS1 engine and the 240SX chassis. This can save some money, but requires significant fabrication skills.
Pros:
- More control over engine placement: Allows you to fine-tune the engine's position for optimal weight distribution or clearance.
- Potentially cheaper than a full swap kit: If you already have some of the necessary parts.
Cons:
- Requires advanced fabrication skills: Welding, cutting, and metal shaping are essential.
- Time-consuming: Modifying existing parts can take a lot of time and effort.
- Potential for error: If you don't have a good understanding of engine mounting geometry, you could end up with a poorly designed system.
3. Full Custom Fabrication: The Ultimate DIY Challenge
This involves designing and building engine mounts from scratch. This is the most challenging option, but it also offers the greatest degree of customization.
Pros:
- Maximum customization: You can design the mounts to perfectly suit your specific needs and engine configuration.
- Potential for cost savings: If you have access to materials and equipment, you can build mounts for a relatively low cost.
Cons:
- Requires expert fabrication skills: Not for the faint of heart. You need to be proficient in welding, metalworking, and design.
- Very time-consuming: Designing and building mounts from scratch takes a lot of time and effort.
- High risk of error: Requires a thorough understanding of engine mounting principles and structural mechanics. A mistake could lead to catastrophic failure.
Selecting the Right Mount Material and Bushings
The material used for the mount brackets and the type of bushings you choose are equally crucial for performance and longevity.
Mount Bracket Material: Steel vs. Aluminum
Steel: The most common and generally recommended material for engine mount brackets. Steel offers excellent strength and durability, and it's relatively easy to weld. Mild steel (like A36) or higher-strength steel (like DOM tubing) is commonly used.
Aluminum: Lighter than steel, but also weaker. Aluminum can be used for engine mounts in certain applications (like race cars where weight is critical), but it's generally not recommended for street cars. Aluminum requires specialized welding techniques and is more prone to cracking under stress.
Bushing Material: Rubber, Polyurethane, or Solid
Rubber Bushings: The most common type of bushing used in factory engine mounts. Rubber bushings provide excellent vibration damping and a comfortable ride.
Pros:
- Excellent vibration damping: Minimizes noise and vibration in the cabin.
- Comfortable ride: Provides a smooth and compliant ride.
- Inexpensive: Relatively cheap compared to other materials.
Cons:
- Soft and flexible: Allows for more engine movement, which can affect handling and drivetrain performance.
- Short lifespan: Rubber deteriorates over time, especially when exposed to oil and heat.
Polyurethane Bushings: A stiffer and more durable alternative to rubber. Polyurethane bushings provide better engine control and improved handling.
Pros:
- Improved engine control: Reduces engine movement, resulting in sharper throttle response and better handling.
- Increased durability: Polyurethane is more resistant to wear and tear than rubber.
- Wide range of durometers: Polyurethane bushings are available in different durometers (hardness levels), allowing you to fine-tune the amount of stiffness.
Cons:
- Increased vibration: Transmits more vibration to the chassis, resulting in a louder and less comfortable ride.
- More expensive than rubber: Polyurethane bushings are typically more expensive than rubber bushings.
Solid Mounts: Offer the ultimate in engine control, but at the expense of comfort. Solid mounts eliminate all engine movement, resulting in the most direct connection between the engine and the chassis. They are typically used in racing applications where performance is the top priority.
Pros:
- Maximum engine control: Eliminates all engine movement, resulting in the most precise throttle response and handling.
Cons:
- Extreme vibration: Transmits a significant amount of vibration to the chassis, resulting in a very harsh ride.
- Increased risk of component failure: The lack of vibration damping can put extra stress on other components, such as the transmission and driveshaft.
- Not suitable for street cars: Solid mounts are generally not recommended for street cars due to the extreme vibration.
Key Considerations Before You Buy or Build
Before you start welding or ordering parts, consider these factors:
- Your budget: Swap kits can be expensive, while custom fabrication can quickly add up in material costs.
- Your skill level: Be honest about your abilities. Don't attempt a full custom build if you've never welded before.
- Your intended use: A street car will have different needs than a dedicated track car.
- Engine placement: Consider where you want the engine to sit in the chassis. This will affect your mount design and potentially require modifications to other components (like the exhaust headers).
- Clearance: Ensure there's adequate clearance between the engine, chassis, and other components (steering shaft, exhaust, etc.).
A final word of advice: Do your research! There are many resources available online, including forums, build threads, and videos. Learn from others' experiences and avoid common pitfalls. Getting your engine mounts right is the foundation for a successful and enjoyable LS swap in your 240SX.