Factory Paint Code And Specifications For 1990 Nissan 240sx In Red
The vibrant red hue adorning many 1990 Nissan 240SX models wasn't just a simple coat of paint; it was a carefully formulated and meticulously applied finish designed to withstand the rigors of daily driving while maintaining its aesthetic appeal. Understanding the factory paint code and its associated specifications provides valuable insight into the composition, application process, and potential restoration challenges for these iconic sports coupes.
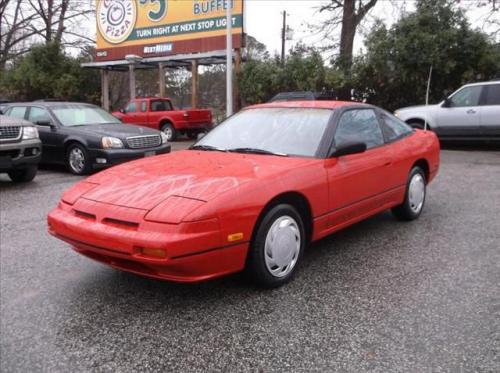
The Paint Code: AH3 - Cherry Red Pearl (Super Red IV)
The primary red color option for the 1990 Nissan 240SX was designated by the paint code AH3, commonly known as Cherry Red Pearl or, sometimes, Super Red IV. This code is crucial for identifying the exact shade and formulation originally applied at the factory. Locating this code on your vehicle is the first step in any restoration or touch-up project.
Finding the Paint Code
The paint code for a 1990 Nissan 240SX is typically found on a metal plate located in the engine bay. Look for a small, rectangular plate riveted to the firewall or the inner fender, often near the strut tower on either side. The plate will contain various vehicle identification information, including the chassis code, model year, and, most importantly, the paint code. The paint code will usually be labeled as "COLOR" or "EXT COLOR" followed by the alphanumeric code AH3. Be sure to double-check the code, as subtle variations existed in red shades across different Nissan models of the era.
Understanding the Paint System: A Two-Stage Approach
The AH3 paint finish on the 1990 240SX was not a simple single-stage paint. It employed a two-stage system, consisting of a base coat and a clear coat. This system offers several advantages over single-stage paints, including enhanced gloss, improved UV resistance, and increased durability.
The Base Coat: Color and Metallic Pigments
The base coat is the foundation of the paint system, providing the color and visual characteristics of the finish. For AH3, the base coat consisted of a specific blend of red pigments combined with metallic flakes, giving the paint its characteristic pearl effect. The precise ratio of pigments and metallic particles was carefully controlled during the manufacturing process to ensure consistent color and appearance. The metallic flakes, typically composed of aluminum or mica, reflect light, creating the depth and shimmer associated with pearl finishes. The specific formulation of the base coat is proprietary to Nissan and its paint suppliers, but aftermarket paint manufacturers can closely replicate it.
The Clear Coat: Protection and Gloss
The clear coat is the final layer applied over the base coat, providing a protective barrier against environmental factors such as UV radiation, acid rain, and scratches. It also enhances the gloss and depth of the finish. The clear coat used on the 1990 240SX was a two-component urethane clear coat, meaning it required the addition of a hardener or activator to initiate the curing process. This type of clear coat offers excellent durability, chemical resistance, and gloss retention. The application of the clear coat was crucial for achieving the desired appearance and longevity of the paint finish. Improper application, such as too much or too little clear coat, could lead to issues like orange peel, runs, or premature failure of the finish.
Paint Specifications and Application Process
While exact figures for the paint thickness and application methods used at the Nissan factory are closely guarded secrets, we can infer several details based on industry practices and available information.
Paint Thickness
The total paint thickness for a factory finish on a 1990 240SX was likely in the range of 4-6 mils (thousandths of an inch). This thickness would be distributed between the primer, base coat, and clear coat layers. The base coat would typically be thinner than the clear coat, contributing less to the overall thickness. Achieving the correct paint thickness was essential for ensuring proper adhesion, durability, and appearance. Too little paint could result in inadequate protection and poor coverage, while too much paint could lead to runs, sags, and other defects.
Application Method
The paint was applied using automated spray equipment in a controlled environment. Robotic spray arms would precisely apply the primer, base coat, and clear coat in multiple thin layers to achieve uniform coverage and minimize defects. The spraying process involved careful control of factors such as paint pressure, atomization, and spray gun speed. After application, the painted bodies were baked in ovens at controlled temperatures to cure the paint and ensure proper adhesion. This baking process cross-linked the paint molecules, creating a hard, durable finish.
Restoration and Touch-Up Considerations
When restoring or touching up the AH3 paint on a 1990 Nissan 240SX, several factors must be considered to achieve a factory-quality result.
Color Matching
Due to the age of the original paint and the effects of UV exposure and weathering, perfectly matching the original color can be challenging. Even with the correct paint code, variations in pigment batches and application techniques can result in subtle differences in color. Therefore, it is essential to have the paint custom-mixed by a reputable automotive paint supplier who can use spectrophotometry to analyze the existing paint and create a closely matched formulation. Avoid relying solely on the paint code without verifying the color match.
Surface Preparation
Proper surface preparation is crucial for achieving a durable and aesthetically pleasing finish. This involves thoroughly cleaning the surface to remove any dirt, grease, wax, or contaminants. Any rust or corrosion must be completely removed and treated. Dents and imperfections should be filled with body filler and sanded smooth. The surface should then be primed with a suitable automotive primer to provide a uniform base for the paint.
Application Techniques
When applying the paint, it is essential to use proper techniques to achieve uniform coverage and minimize defects. This includes using a high-quality spray gun, maintaining the correct spray pressure and distance, and applying multiple thin layers of paint. Allow each layer to dry properly before applying the next. After applying the clear coat, wet sanding and polishing may be necessary to remove any imperfections and achieve a smooth, glossy finish.
Clear Coat Selection
Choosing the right clear coat is also important. Select a high-quality two-component urethane clear coat that is compatible with the base coat and offers excellent UV resistance and durability. Follow the manufacturer's instructions for mixing and application carefully.
Conclusion
The AH3 Cherry Red Pearl paint on the 1990 Nissan 240SX represents a specific formulation and application process designed to provide both aesthetic appeal and durability. Understanding the components of this paint system, from the base coat with its metallic pigments to the protective clear coat, is essential for anyone undertaking restoration or touch-up work. By paying close attention to color matching, surface preparation, and application techniques, it is possible to restore the vibrant red finish of these classic sports cars to their former glory.
The devil is in the details, and a proper understanding of the paint specifications is key to a successful restoration.