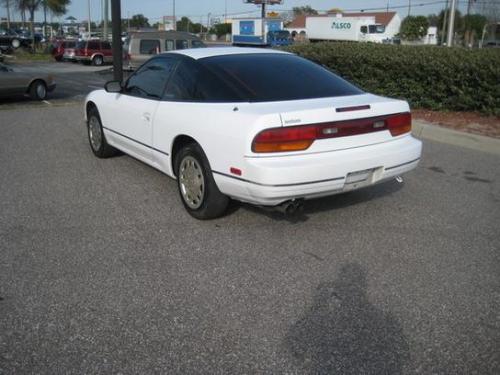
Factory Paint Code And Specifications For 1991 Nissan 240sx In White
Alright, let's dive into the specifics of the factory paint code and specifications for a 1991 Nissan 240SX in white. This information is crucial whether you're doing a full restoration, touching up a few scratches, or even just trying to match aftermarket body panels. Getting the right paint code is paramount to achieving a seamless and professional look.
Understanding the Paint Code
The paint code for your 1991 240SX in white will typically be located on the vehicle's identification plate. This plate is commonly found in one of a few locations: inside the engine bay (often on the firewall), on the driver's side door jamb, or sometimes under the hood latch. You're looking for a sequence of characters that specifically designates the exterior paint color. For white 240SX models of that year, the most common paint code is #326 - White.
It's *extremely* important to double-check the vehicle's actual identification plate. There might be slight variations depending on the specific production run or regional differences. Don’t just assume all 1991 240SX cars in white used the same paint; always verify. Even if a previous owner repainted the car, the original paint code can still be a helpful starting point.
Paint codes are essentially shorthand instructions to paint manufacturers. They don't just tell them it's "white," but give them the exact proportions of pigments and binders needed to recreate the factory finish. This is why using the correct code is so vital.
Paint Type and Composition
In 1991, Nissan primarily used Acrylic Lacquer or Acrylic Urethane paints. While acrylic lacquer was common in earlier years, by the early 90s, acrylic urethane was becoming the standard due to its increased durability, resistance to UV damage, and overall better finish. It's highly likely that your 1991 240SX, if it retains its original paint, would have used an acrylic urethane system.
Here's a breakdown of what that means, technically:
- Acrylic: This refers to the type of resin used in the paint. Acrylic resins are known for their good color retention and relatively easy application.
- Urethane: Urethane resins provide enhanced durability and chemical resistance compared to lacquers. They also create a harder, more chip-resistant finish.
Note: If you are repairing damage to an original acrylic lacquer finish, *avoid* spraying modern urethane-based paints directly over it. The solvents in urethane paints can react adversely with the lacquer, causing lifting, cracking, or other undesirable effects. You'll either need to completely remove the old lacquer or apply a compatible sealer or primer to create a barrier.
If you're planning a full repaint, you have more flexibility in your choice of paint system. Modern basecoat/clearcoat systems offer excellent durability and color matching, and are often the preferred choice for restoration projects. However, always research compatibility between different paint types and ensure proper surface preparation.
Specifications and Mixing Ratios
Once you have the paint code (#326 - White), you can take it to a reputable automotive paint supplier. They'll be able to mix the paint to the exact factory specifications. Keep in mind that even with the correct paint code, there can be slight variations in the final color due to factors like the age of the original paint, exposure to sunlight, and the specific equipment used for mixing.
Here’s what to expect when the paint shop formulates the paint:
- Pigment Volume Concentration (PVC): This refers to the volume percentage of pigment in the dry paint film. It’s a critical factor affecting opacity, color intensity, and durability. For a solid white paint like #326, the PVC will be relatively high to achieve good coverage. The specific PVC will be determined by the paint manufacturer based on the chosen paint system.
- Binder Volume Concentration (BVC): This is the volume percentage of the binder (resin) in the dry paint film. The binder holds the pigment together and provides adhesion to the substrate. The BVC and PVC are inversely related; a higher PVC generally means a lower BVC.
- Solvent Volume Concentration (SVC): This is the volume percentage of solvents in the wet paint. Solvents help to dissolve the resin and pigment, allowing the paint to be sprayed or brushed. The SVC evaporates during drying, leaving behind the solid paint film.
The paint supplier will provide you with the proper mixing ratios for the paint, reducer, and hardener (if applicable). Adhering strictly to these ratios is critical for achieving the desired finish, gloss, and durability. Don't deviate from the manufacturer's recommendations. Typically, this information will be printed directly on the paint can or provided in a separate data sheet.
For example, a common mixing ratio for an acrylic urethane basecoat might be 4:1:1 (paint:reducer:hardener). A clearcoat might have a different ratio, such as 2:1:1.
Test Spray: Before painting the entire car (or even a large panel), always perform a test spray on a piece of scrap metal or cardboard. This allows you to verify the color match, check the spray gun settings, and ensure that the paint lays down smoothly.
Application Techniques
Achieving a factory-quality paint job requires more than just the right paint; it also demands proper application techniques.
- Surface Preparation: This is arguably the most important step. The surface must be clean, dry, and free of rust, grease, wax, and any other contaminants. Sanding is typically required to create a smooth surface for the primer to adhere to. Use progressively finer grits of sandpaper, ending with at least 400-grit for primer and 600-grit for the basecoat.
- Priming: Apply a high-quality automotive primer to create a uniform surface for the basecoat. Primer also helps to fill in minor imperfections and provides corrosion protection. Follow the manufacturer's recommendations for the number of coats and drying time. Sand the primer smooth before applying the basecoat.
- Basecoat Application: Apply the basecoat in thin, even coats, overlapping each pass by about 50%. Allow each coat to dry completely before applying the next. The number of coats required will depend on the opacity of the paint and the desired level of coverage. Typically, 2-3 coats are sufficient.
- Clearcoat Application (If Applicable): If you're using a basecoat/clearcoat system, apply the clearcoat after the basecoat has dried. Clearcoat provides a glossy, durable finish and protects the basecoat from UV damage and scratches. Apply 2-3 coats of clearcoat, allowing each coat to flash (partially dry) before applying the next.
- Wet Sanding and Polishing (Optional): After the clearcoat has fully cured (typically several days), you can wet sand and polish it to remove any imperfections and enhance the gloss. Start with a fine-grit sandpaper (e.g., 2000-grit) and progressively work your way up to finer grits. Then, use a polishing compound and a buffing pad to restore the gloss.
Spray Gun Settings: Proper spray gun settings are crucial for achieving a smooth, even finish. Adjust the fluid tip, air pressure, and fan pattern to match the type of paint you're using and the size of the surface you're painting. Consult the spray gun manufacturer's instructions for specific recommendations.
Important Safety Note: Always wear appropriate personal protective equipment (PPE) when painting, including a respirator, gloves, and eye protection. Work in a well-ventilated area to avoid inhaling harmful fumes.
Where to Purchase Paint
You can purchase automotive paint from a variety of sources, including:
- Local Automotive Paint Suppliers: These suppliers typically offer a wide selection of paints, reducers, hardeners, and other supplies. They can also provide expert advice and custom mixing services.
- Online Retailers: Several online retailers specialize in automotive paint and supplies. This can be a convenient option if you don't have a local supplier. However, be sure to choose a reputable retailer and read reviews carefully.
- Automotive Parts Stores: Some automotive parts stores also carry a limited selection of automotive paint. However, their selection may be more limited than that of a dedicated paint supplier.
When purchasing paint, be sure to specify the paint code (#326 - White), the year of your vehicle (1991), and the type of paint you want (e.g., acrylic urethane basecoat/clearcoat).
Dealing with Fading and Color Variance
Even with the correct paint code, you may encounter slight color variations due to fading, oxidation, and other factors. If you're only touching up a small area, it can be difficult to achieve a perfect match. In these cases, you may need to blend the new paint into the surrounding area to minimize the visibility of the repair.
Professional paint shops often use specialized equipment to analyze the color of the existing paint and create a custom match. This is the best way to ensure a seamless repair, but it can be more expensive than using a standard paint code.
In conclusion, painting your 1991 240SX requires careful attention to detail, starting with verifying the correct paint code. By understanding the paint type, mixing ratios, and application techniques, you can achieve a factory-quality finish that will restore your car to its former glory. Good luck with your project!