Front Wheel Bearing Replacement And Torque Procedures
Replacing a front wheel bearing might seem like a task reserved for seasoned mechanics, but with the right knowledge, tools, and a meticulous approach, it's a project achievable by the dedicated amateur engineer. This guide delves deep into the process, focusing not just on the "how" but also on the "why" behind each step, ensuring a thorough understanding of the forces at play and the critical importance of proper torque procedures.
Understanding the Front Wheel Bearing
Before we grab the wrenches, let's appreciate what the front wheel bearing does. Its primary role is to allow the wheel to rotate smoothly and freely, while supporting the weight of the vehicle. This critical component resides within the wheel hub assembly and is subjected to immense radial (perpendicular to the axis of rotation) and axial (parallel to the axis of rotation) loads. Bearings are designed to minimize friction and allow for efficient transfer of power to the wheels.
There are generally two types of front wheel bearings:
- Tapered Roller Bearings: Commonly found in older vehicles and some trucks, these bearings feature cone-shaped rollers that ride on matching cone-shaped races. They are adjustable, which allows for precise pre-load settings, but require regular inspection and adjustment.
- Sealed Hub Assemblies: Modern vehicles often use sealed hub assemblies, where the bearing, hub, and sometimes the ABS sensor are integrated into a single, pre-lubricated, non-adjustable unit. These are easier to replace as a unit but offer no adjustability.
Tools and Materials Required
Having the right tools makes all the difference. Here's a comprehensive list:
- Jack and Jack Stands: Safety first! Always use jack stands to support the vehicle.
- Wheel Chocks: To prevent the vehicle from rolling.
- Socket Set: Including deep sockets, impact sockets, and metric/SAE sizes. A range is essential.
- Torque Wrench: A must for accurate tightening. Get one with a suitable range for wheel bearing applications.
- Breaker Bar: For loosening stubborn bolts.
- Hammer: For persuasion.
- Punch/Drift: For driving out stubborn components.
- Wheel Bearing Press or Hub Tamer: Depending on the vehicle, you may need to press the bearing in/out of the hub. A shop press is ideal, but a hub tamer (on-car bearing press) can work in some situations.
- Ball Joint Separator or Pickle Fork: To separate ball joints if necessary.
- Penetrating Oil: For loosening rusted bolts.
- Brake Cleaner: For cleaning components.
- New Wheel Bearing/Hub Assembly: Ensure it's the correct part for your vehicle.
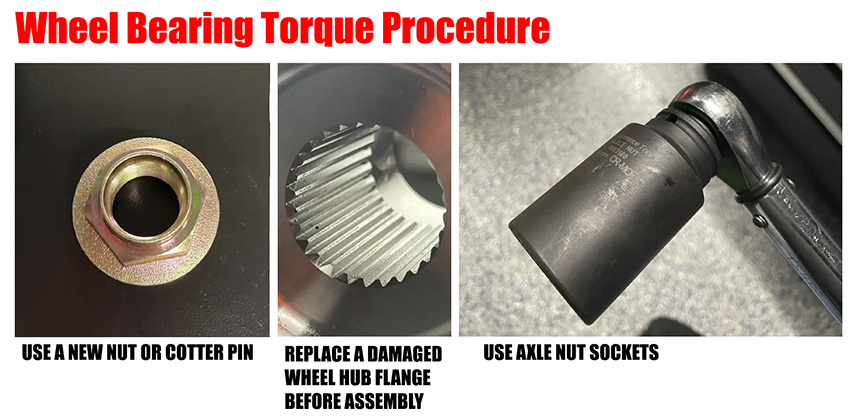
- New Cotter Pin/Axle Nut: Always replace these with new ones.
- Grease: For lubricating bearing surfaces (if applicable).
- Gloves and Safety Glasses: Protection is paramount.
Step-by-Step Replacement Procedure (Generic Example)
This is a general outline. Always consult your vehicle's repair manual for specific instructions and torque specifications.
1. Preparation
Begin by safely lifting the vehicle using a jack and securing it with jack stands. Chock the rear wheels. Loosen the lug nuts on the wheel you'll be working on before lifting the vehicle. Remove the wheel.
2. Disconnecting Components
This step can vary greatly depending on your vehicle's suspension design. Common tasks include:
- Removing the Brake Caliper: Unbolt the caliper and carefully suspend it out of the way using wire or a bungee cord. Do not let it hang by the brake hose. Remove the brake pads and rotor.
- Disconnecting the ABS Sensor: Disconnect the ABS sensor wire and carefully remove the sensor from the hub. Be gentle, as these sensors are delicate.
- Loosening the Axle Nut: If equipped, remove the cotter pin and loosen the axle nut using a breaker bar. This nut is often very tight.
- Separating Suspension Components: You may need to disconnect the tie rod end, ball joint, or strut from the steering knuckle (hub carrier). Use a ball joint separator or pickle fork for this task. Note: A pickle fork can damage the ball joint boot.
3. Removing the Hub/Bearing Assembly
With everything disconnected, you can now remove the hub/bearing assembly. The method depends on your vehicle:
- Sealed Hub Assembly: Unbolt the hub assembly from the steering knuckle. It might be necessary to use a hammer and punch to gently tap it loose. Penetrating oil can help.
- Tapered Roller Bearings (and Separate Hubs): Removing the rotor will usually expose the outer bearing. The hub and inner bearing will then come off the spindle.
4. Bearing Removal (If Necessary)
If you are replacing just the bearing in a hub, you'll need a bearing press or hub tamer. This is where things can get tricky. Follow these guidelines:
- Safety First: Wear safety glasses!
- Pressing Out the Old Bearing: Carefully position the hub and bearing in the press and use the appropriate adapters to press the old bearing out of the hub. Support the hub properly to avoid damage.
- Pressing in the New Bearing: Ensure the new bearing is oriented correctly. Use the correct adapters to press the new bearing into the hub. Apply even pressure to avoid damaging the bearing. Cleanliness is crucial.
Important: Pressing on the wrong part of the bearing can damage it irreparably. Always press on the outer race when installing the bearing into the hub.
5. Installation and Reassembly
With the new bearing/hub assembly ready, reassembly is the reverse of disassembly. Pay close attention to torque specifications.
- Installing the Hub/Bearing Assembly: Bolt the hub assembly to the steering knuckle.
- Reconnecting Suspension Components: Reconnect the tie rod end, ball joint, and strut, tightening the fasteners to the specified torque. Replace any cotter pins.
- Installing the Brake Rotor, Caliper, and Pads: Reinstall the brake rotor, caliper, and pads. Bleed the brakes if necessary.
- Reconnecting the ABS Sensor: Reconnect the ABS sensor and secure the wire.
- Tightening the Axle Nut: This is a critical step. Install a new axle nut and torque it to the manufacturer's specified torque. This torque is typically quite high and requires a substantial torque wrench. Install a new cotter pin.
- Installing the Wheel: Reinstall the wheel and tighten the lug nuts to the specified torque in a star pattern.
6. Final Checks
Lower the vehicle and remove the wheel chocks. Double-check all connections and fasteners. After a short test drive, re-torque the lug nuts.
The Critical Role of Torque
Throughout this process, the use of a torque wrench is paramount. Torque specifications are provided by the manufacturer and are crucial for ensuring proper preload on the bearing, secure fastening of components, and preventing damage. Using the correct torque prevents:
- Bearing Failure: Under-torquing can lead to excessive play and premature bearing wear. Over-torquing can damage the bearing races and rollers.
- Component Loosening: Insufficient torque on bolts can cause them to loosen over time, leading to potential failure and safety hazards.
- Thread Damage: Over-torquing can strip threads, requiring costly repairs.
Understanding Torque Specifications: Torque is typically expressed in foot-pounds (ft-lbs) or Newton-meters (Nm). Your torque wrench will have a scale indicating these units. Ensure your torque wrench is properly calibrated for accurate readings.
Torque Procedures: Key Considerations
Here are some important points to consider when using a torque wrench:
- Clean Threads: Ensure the threads of bolts and nuts are clean and free of debris. Dirty threads can affect the accuracy of the torque reading.
- Lubrication: Follow the manufacturer's recommendations for lubrication. Some fasteners require lubrication on the threads or under the head.
- Multiple Passes: For critical fasteners, it's often recommended to torque in multiple passes. For example, torque to 50% of the final value, then 75%, and finally to the full specified torque.
- Angle Tightening: Some manufacturers specify torque plus angle tightening. This involves torquing to a specific value and then rotating the fastener a specified number of degrees. This ensures proper stretch of the bolt and consistent clamping force.
- Consistent Technique: Apply the torque smoothly and steadily. Avoid jerky movements. Listen for the click of the torque wrench, indicating that the desired torque has been reached. Do not continue tightening after the click.
Troubleshooting
Even with careful preparation, challenges can arise:
- Stubborn Bolts: Apply penetrating oil liberally and allow it to soak. Use a breaker bar for increased leverage. Heat can also help loosen rusted bolts.
- Damaged Threads: Use a thread chaser to repair damaged threads. In severe cases, you may need to replace the component.
- Stuck Hub/Bearing Assembly: Use a slide hammer or carefully tap the assembly with a hammer and punch.
Conclusion
Replacing a front wheel bearing requires patience, attention to detail, and a thorough understanding of the components involved. By following the procedures outlined in this guide and adhering to proper torque specifications, you can successfully complete this task and gain a deeper appreciation for the mechanics of your vehicle. Remember to always consult your vehicle's repair manual for specific instructions and safety precautions. Safety is paramount, and if you're ever unsure about any aspect of the procedure, consult a qualified mechanic.