Fuse And Relay Diagram For The Nissan 240sx Interior And Engine Bay Fuse Boxes
Okay, so you're troubleshooting an electrical issue in your Nissan 240SX, and you suspect a blown fuse or a faulty relay. You've come to the right place! The 240SX, while a fantastic car, is getting on in years, and electrical gremlins are a common issue. Locating the correct fuse or relay can be a real headache if you don't have the diagrams handy. This guide will walk you through the location of the fuse boxes in both the interior and engine bay, provide diagrams, and offer some practical advice to help you diagnose and fix the problem.
Locating the Fuse Boxes
The Nissan 240SX has two main fuse box locations:
- Interior Fuse Box: Located under the driver's side dashboard, usually to the left of the steering column. You might need to get down on your hands and knees to see it clearly. It's covered by a plastic panel that's held in place by clips or screws (depending on the year).
- Engine Bay Fuse Box: Found in the engine compartment, typically on the driver's side, near the battery. It's a black plastic box with a latching cover.
Before you start fiddling around, disconnect the negative terminal of your battery. This simple step can prevent accidental shorts and potential electrical damage while you're working. Safety first!
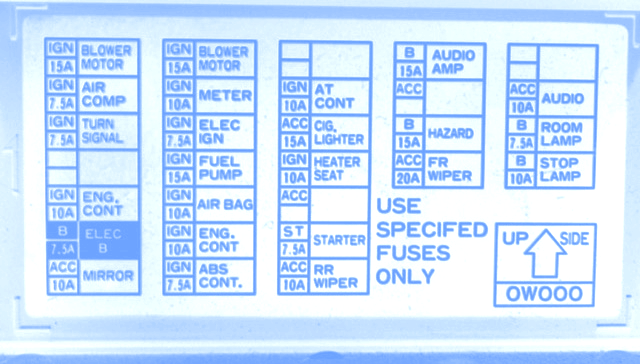
Interior Fuse Box Diagram and Function
This fuse box handles many of the interior electrical components. Unfortunately, the exact fuse layout can vary slightly depending on the year and trim of your 240SX (S13 or S14). However, here's a generalized diagram that covers the most common configurations. *Always double-check with your owner's manual or a specific diagram for your year model if possible.*
General Interior Fuse Box Layout:
(Imagine a simplified grid here, showing rows and columns. Since I can't create a visual diagram, I'll describe the common fuse functions and their approximate amperage.)
- Dome Light: 10A
- Clock: 10A
- Radio: 10A
- Cigarette Lighter: 15A
- Wiper Motor: 20A
- Hazard Lights: 15A
- Turn Signals: 10A
- Rear Defogger: 20A
- Power Windows: 20A/30A (depending on model)
- Power Door Locks: 20A
- ECU Backup: 10A
Important Tip: Look for a fuse puller clipped to the inside of the fuse box cover. This little tool makes removing and replacing fuses much easier. If it's missing, a pair of needle-nose pliers will do the trick, but be careful not to damage the fuse contacts.
Engine Bay Fuse Box Diagram and Function
The engine bay fuse box protects the critical engine management and charging systems. This is where you'll find fuses for the fuel pump, ignition system, and more.
General Engine Bay Fuse Box Layout:
(Again, picture a grid layout. Fuse descriptions and amperage will follow.)
- Main Fuse (ALT Fuse): 80A (Protects the entire electrical system)
- Fuel Pump: 15A
- Ignition: 15A
- Headlights: 15A (per side, sometimes separate fuses for high/low beam)
- Cooling Fan: 30A
- ABS (if equipped): 30A
- ECCS (Engine Control Computer System): 10A/15A (might have multiple fuses)
- A/C Compressor: 10A
- Horn: 10A
Note: Some 240SX models may have relays within the engine bay fuse box. Relays are basically electrically controlled switches that handle higher current loads than fuses. Common relays include the fuel pump relay, ignition relay, and headlight relay.
Troubleshooting Tips and Solutions
Okay, you've located the fuse boxes and have a general idea of the fuse layout. Now, let's get down to troubleshooting. Here's a systematic approach:
- Identify the Symptom: What's not working? Be specific. For example, "The headlights don't turn on" instead of "The car has electrical problems."
- Consult the Diagrams: Find the fuse or relay associated with the affected component in the diagrams above (and your owner's manual, if you have it).
- Inspect the Fuse: Pull the fuse out and examine it closely. A blown fuse will have a broken filament inside. A good fuse will have a continuous filament. You can also use a multimeter to test for continuity. If there is no continuity, then the fuse is bad.
- Replace the Fuse: If the fuse is blown, replace it with a fuse of the exact same amperage. Using a fuse with a higher amperage can overload the circuit and cause damage. Using a fuse with a lower amperage can cause the fuse to blow prematurely.
- Test the Component: After replacing the fuse, test the component to see if it's working again. If the fuse blows again immediately, there's a short circuit somewhere in the wiring.
- Check the Relay (If Applicable): If the fuse isn't blown, the problem might be with the relay. Relays can fail due to age, corrosion, or internal damage. Swapping a relay with a known good one (of the same type) is a good way to test it. You can also test the relay with a multimeter to make sure the relay coil has continuity, and that the relay contacts switch when voltage is applied to the coil.
- Inspect Wiring: If the fuse keeps blowing, or if the component still doesn't work after replacing the fuse and checking the relay, you'll need to inspect the wiring for shorts or breaks. Look for frayed wires, damaged connectors, or signs of corrosion. This can be a time-consuming process, but it's often necessary to find the root cause of the problem.
Tools Needed
To tackle most fuse and relay problems, you'll need the following tools:
- Fuse Puller: As mentioned earlier, this makes removing fuses much easier.
- Multimeter: An essential tool for testing fuses, relays, and wiring.
- Needle-Nose Pliers: Useful for removing fuses and working in tight spaces.
- Screwdrivers (Phillips and Flathead): For removing fuse box covers and other components.
- Wiring Diagram: A detailed wiring diagram specific to your year and model 240SX is invaluable for tracing electrical problems. Online forums and repair manuals are your best bet for finding one.
- Replacement Fuses: Keep a variety of fuses on hand so you're prepared for anything.
- Wire Strippers/Crimpers: If you need to repair any wiring, these tools will come in handy.
Approximate Repair Costs
The cost of fixing a fuse or relay problem can vary greatly depending on the complexity of the issue. Here's a rough estimate:
- Replacing a Fuse: A fuse typically costs only a few dollars.
- Replacing a Relay: Relays can range from $10 to $50, depending on the type.
- Wiring Repair: This is where costs can escalate quickly. Simple wire repairs might only cost $50-$100, but more complex repairs, such as tracing and fixing a short circuit, could run several hundred dollars.
- Professional Diagnosis: If you're unable to diagnose the problem yourself, a mechanic will likely charge an hourly rate for diagnosis, which can range from $75 to $150 per hour.
When to Seek Professional Help
While many fuse and relay problems can be solved with a little patience and some basic tools, there are times when it's best to seek professional help. Consider taking your 240SX to a qualified mechanic if:
- You're uncomfortable working with electrical systems.
- You've replaced the fuse multiple times, and it keeps blowing.
- You suspect a short circuit but can't locate it.
- The problem is affecting critical engine functions, such as the fuel pump or ignition system.
Working on your 240SX can be a rewarding experience, but it's important to know your limits. When in doubt, consult a professional to avoid further damage or potential injury. Good luck with your troubleshooting!