How To Check If Spark Plug Is Bad
So, your engine's running a little rough, maybe misfiring, or your fuel economy's taken a nosedive. One of the first suspects should always be your spark plugs. These little guys are the unsung heroes of your combustion engine, but they're also subject to wear and tear. Knowing how to check if a spark plug is bad is a crucial skill for any DIY mechanic, whether you're troubleshooting a problem or just doing some preventative maintenance. This guide will give you the knowledge to diagnose spark plug issues like a pro.
Why This Matters: Diagnosing Spark Plug Problems
Understanding spark plug condition is vital for several reasons:
- Engine Performance: Faulty spark plugs can lead to misfires, reduced power, poor acceleration, and rough idling.
- Fuel Economy: Inefficient combustion due to bad spark plugs wastes fuel and increases emissions.
- Preventative Maintenance: Regularly checking spark plugs can identify underlying engine problems early on, preventing more serious and expensive repairs.
- Learning & Tuning: Inspecting spark plugs after modifications (like adding a turbo or tuning the ECU) helps assess if the engine is running correctly and efficiently.
Think of spark plugs as the canaries in the coal mine for your engine. Their condition often reflects the overall health and operating conditions of the engine. By learning to read their telltale signs, you can diagnose a wide range of issues.
Key Specs and Main Parts of a Spark Plug
Before diving into diagnostics, let's review the key components of a spark plug:
- Terminal: The top of the spark plug where the spark plug wire or coil-on-plug (COP) unit connects.
- Insulator: Typically made of ceramic, it prevents the high-voltage electricity from grounding out before reaching the electrode.
- Metal Shell: The threaded part that screws into the cylinder head, providing grounding and heat dissipation.
- Center Electrode: The central conductor that carries the high-voltage current.
- Side Electrode (Ground Electrode): A metal strap welded to the metal shell. The spark jumps from the center electrode to the side electrode, igniting the air-fuel mixture.
- Gap: The space between the center and side electrodes. This gap is critical for proper spark formation.
Important specifications include:
- Gap Size: Measured in inches or millimeters, it must be within the manufacturer's specified range for your engine.
- Heat Range: Indicates the plug's ability to dissipate heat. A "hot" plug retains more heat, while a "cold" plug dissipates heat faster. Using the wrong heat range can cause pre-ignition or fouling.
- Thread Size and Reach: The dimensions of the threaded portion, ensuring the plug properly fits and seals in the cylinder head.
How It Works: The Spark Plug's Role in Combustion
The spark plug's job is simple but crucial. It receives a high-voltage pulse from the ignition coil (or COP unit). This high voltage, typically in the range of 12,000 to 45,000 volts, creates an electrical arc across the gap between the center and side electrodes. This arc ignites the compressed air-fuel mixture in the combustion chamber, starting the power stroke that drives the piston.
The timing of this spark is critical and is controlled by the engine's computer (ECU) and ignition system. Precise timing ensures optimal combustion and engine performance.
Real-World Use: Troubleshooting Spark Plug Condition
Here’s how to check your spark plugs and interpret their condition:
- Gather Your Tools: You'll need a spark plug socket (the correct size for your plugs), a ratchet, an extension, a torque wrench, a spark plug gap tool (feeler gauges or a gapping tool), and possibly some penetrating oil.
- Safety First: Ensure the engine is cold. Working on a hot engine can cause burns. Disconnect the negative battery terminal to prevent accidental electrical shocks.
- Access the Spark Plugs: Remove the spark plug wires or COP units. Be careful not to damage them. If using spark plug wires, mark each wire with a number corresponding to the cylinder it serves. This prevents miswiring during reinstallation.
- Remove the Spark Plugs: Use the spark plug socket and ratchet to carefully loosen and remove the plugs. Avoid dropping them, as this can damage the electrode.
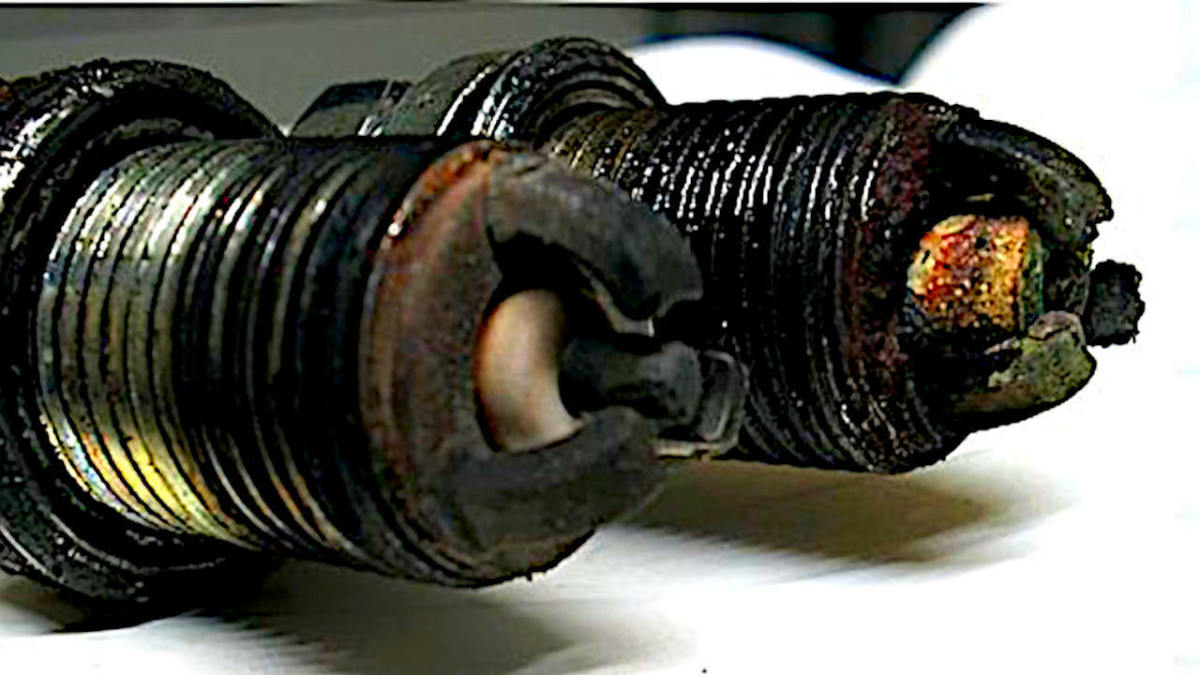
- Inspect the Spark Plugs: Examine each plug carefully. Look for the following:
- Normal Condition: Tan or light gray deposits indicate healthy engine operation.
- Fouling:
- Wet Fouling (Fuel or Oil): Wet spark plugs suggest excessive fuel or oil entering the combustion chamber. This could be caused by leaky fuel injectors, worn piston rings, or faulty valve seals.
- Dry Fouling (Carbon): Black, sooty deposits indicate a rich fuel mixture (too much fuel, not enough air). This could be due to a faulty oxygen sensor, clogged air filter, or malfunctioning fuel injectors.
- Overheating: White or blistered insulator indicates excessive heat. This could be caused by a lean fuel mixture, incorrect ignition timing, or using spark plugs with the wrong heat range.
- Detonation: Damaged or eroded electrodes indicate detonation (uncontrolled combustion) which can be extremely damaging to the engine. This could be caused by low octane fuel, excessive engine load, or advanced timing.
- Physical Damage: Cracked insulators or broken electrodes are signs of serious problems. Replace the spark plug immediately.
- Excessive Wear: Rounded electrodes and a widened gap indicate normal wear. It's time to replace the spark plugs.
- Check the Gap: Use a spark plug gap tool to verify the gap is within the manufacturer's specified range. Adjust the gap carefully by gently bending the side electrode.
- Reinstall the Spark Plugs: Apply a small amount of anti-seize compound to the spark plug threads (optional but recommended). Torque the spark plugs to the manufacturer's specified torque using a torque wrench. Overtightening can damage the cylinder head.
- Reconnect the COP Units or Spark Plug Wires: Ensure they are securely connected. If using spark plug wires, double-check that they are connected in the correct firing order.
Basic Troubleshooting Tips:
- If all spark plugs show the same problem, it indicates a system-wide issue (e.g., lean or rich fuel mixture).
- If only one or two spark plugs are fouled, it points to a problem specific to those cylinders (e.g., leaky injector or worn valve seal).
- Always replace spark plugs in a complete set. Replacing only one or two plugs can lead to uneven engine performance.
Safety: Handling High-Voltage Components
Spark plugs and ignition systems involve high voltage, which can be dangerous. Observe the following precautions:
- Always disconnect the negative battery terminal before working on the ignition system.
- Never touch spark plug wires or COP units while the engine is running or the ignition is on. The high voltage can cause a severe electrical shock.
- Work in a well-ventilated area. Some cleaning solvents and penetrating oils can be flammable or toxic.
- Wear safety glasses to protect your eyes from debris.
- Allow the engine to cool completely before working on the spark plugs.
If you're unsure about any aspect of spark plug diagnosis or replacement, consult a qualified mechanic. Working with the ignition system requires caution and knowledge.
By systematically inspecting your spark plugs, you can gain valuable insights into the health and performance of your engine. Remember to always prioritize safety and consult your vehicle's service manual for specific instructions and torque specifications.