How To Hook Up Garage Door Opener
So, you're looking to dive into the wiring of your garage door opener? Excellent! Whether you're troubleshooting a faulty unit, installing a new one, or just expanding your knowledge of home automation, understanding the electrical layout is crucial. This guide, along with the detailed wiring diagram we have available for download, will provide you with the necessary knowledge and practical steps. This knowledge allows you to safely interact with and maintain this complex electromechanical system.
Purpose of Understanding the Garage Door Opener Wiring Diagram
Why bother with the wiring diagram at all? Well, think of it as the roadmap for your garage door opener's electrical system. It's indispensable for several reasons:
- Troubleshooting: When your garage door starts acting up – refusing to open, closing erratically, or displaying other bizarre behaviors – the wiring diagram helps you pinpoint the source of the problem. You can systematically trace circuits and identify faulty components.
- Installation: Installing a new garage door opener can be straightforward, but having the wiring diagram ensures you connect everything correctly, avoiding potential damage or malfunctions.
- Modification/Automation: If you're into home automation and want to integrate your garage door opener with a smart home system, understanding the wiring is essential for safely connecting control modules and sensors.
- Repair: Replacing damaged wiring, switches, or other electrical components becomes significantly easier with the diagram as your guide.
- Education: Simply understanding how your garage door opener functions can be incredibly satisfying. It demystifies a common piece of technology and empowers you to perform basic maintenance and repairs yourself.
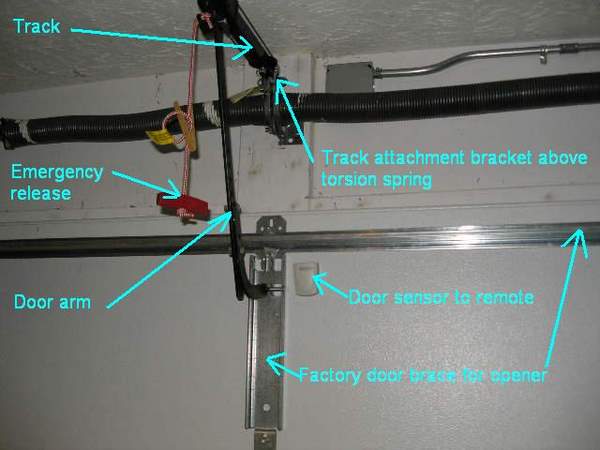
Key Specs and Main Parts
Before we delve into the diagram itself, let's quickly review the key specifications and main components you'll encounter. These are the building blocks of any garage door opener system:
- Voltage: Most residential garage door openers operate on standard 120V AC (Alternating Current) power. However, the control circuits often use lower voltages, such as 24V AC or DC, for safety and control purposes. Always verify the voltage of each component before working on it.
- Motor: The heart of the system. This is typically a reversible AC motor that drives the garage door up and down via a chain, belt, or screw drive.
- Limit Switches: These switches, usually located near the motor, define the upper and lower limits of the door's travel. They prevent the motor from over-running and damaging the door or the opener.
- Safety Sensors (Photo Eyes): These are crucial safety devices located near the bottom of the door opening. They emit an infrared beam. If the beam is interrupted (by a person, pet, or object), the door will automatically reverse, preventing injury.
- Wall Control (Push Button): The standard wall-mounted button that opens and closes the door. It typically sends a low-voltage signal to the control board.
- Remote Receiver/Transmitter: The radio receiver inside the opener that picks up the signal from your remote control. The transmitter is the handheld remote itself.
- Control Board: The "brain" of the operation. This circuit board houses the microcontroller and other electronic components that manage the motor, safety sensors, wall control, and remote receiver.
- Transformer: Steps down the 120V AC input voltage to the lower voltage required for the control circuits.
- Capacitor: Usually a large capacitor to provide the motor with the starting torque.
Symbols and Notations in the Wiring Diagram
Understanding the symbols and notations in the wiring diagram is crucial for interpreting it correctly. Here's a breakdown of common symbols you'll encounter:
- Lines: Solid lines represent wires. Dashed lines might indicate shielded cables or optional connections.
- Colors: Wires are typically color-coded (e.g., black for hot, white for neutral, green for ground). The diagram will usually include a color key.
- Resistors: A zig-zag line represents a resistor. The value of the resistance (in ohms, Ω) is usually indicated nearby.
- Capacitors: Two parallel lines represent a capacitor. The capacitance value (in microfarads, μF) is usually indicated nearby.
- Diodes: A triangle pointing to a line represents a diode. Diodes allow current to flow in only one direction.
- Transistors: Various symbols represent different types of transistors (e.g., BJT, MOSFET). These are used for switching and amplification.
- Switches: A line connected to a "T" represents a switch. The type of switch (e.g., single-pole single-throw (SPST), single-pole double-throw (SPDT)) will be indicated.
- Motors: A circle with an "M" inside represents a motor.
- Transformers: Two coils with parallel lines between them represent a transformer. The primary and secondary voltages are usually indicated.
- Ground: A symbol resembling an upside-down pyramid represents a ground connection.
The diagram may also include abbreviations and acronyms, such as AC (Alternating Current), DC (Direct Current), NO (Normally Open), NC (Normally Closed), and COM (Common). Refer to the diagram's legend for a complete list of symbols and their meanings.
How It Works: A Simplified Explanation
The basic operation of a garage door opener is as follows:
- When you press the wall control or remote button, it sends a low-voltage signal to the control board.
- The control board activates a relay (an electrically operated switch).
- The relay then applies power to the motor. The polarity of the power determines whether the motor rotates to open or close the door.
- The motor turns a drive mechanism (chain, belt, or screw) that raises or lowers the door.
- As the door approaches its upper or lower limit, it activates the limit switches.
- The limit switches cut power to the motor, stopping the door at the desired position.
- The safety sensors constantly monitor the door opening. If the infrared beam is broken, the control board immediately reverses the motor, preventing the door from closing on an obstruction.
Real-World Use: Basic Troubleshooting Tips
Here are a few basic troubleshooting tips you can use with the wiring diagram:
- Door Doesn't Open or Close: Check the power supply to the opener. Use a multimeter to verify that 120V AC is reaching the unit. Then, check the low-voltage wiring to the wall control. If the wiring is damaged, replace it. Test the limit switches to ensure they are functioning correctly.
- Door Reverses Unexpectedly: Inspect the safety sensors (photo eyes). Make sure they are aligned and clean. Check the wiring to the sensors for any damage or loose connections. Sometimes sunlight interfering with the sensors can cause issues.
- Remote Doesn't Work: Replace the batteries in the remote. Check the antenna wire on the receiver. Reprogram the remote to the receiver according to the manufacturer's instructions. If the receiver board is damaged, it may need to be replaced.
- Motor Runs But Door Doesn't Move: Inspect the drive mechanism (chain, belt, or screw). Make sure it's properly engaged and not broken or slipping.
Always disconnect the power to the opener before attempting any repairs. Refer to the wiring diagram to identify the specific components and circuits you need to test.
Safety: Important Precautions
Working with electrical systems can be dangerous. Here are some essential safety precautions:
- Disconnect Power: Always disconnect the power to the garage door opener at the circuit breaker before working on it. This is the most important safety precaution.
- Use Proper Tools: Use insulated tools designed for electrical work.
- Test Voltage: Before touching any wires, use a multimeter to verify that they are not live.
- Work in a Dry Environment: Avoid working on electrical systems in wet or damp conditions.
- Capacitors Can Be Dangerous: The large capacitor used in the motor circuit can store a dangerous electrical charge even after the power is disconnected. Discharge the capacitor before handling it. This is usually done with a resistor to slowly drain the charge.Never touch the terminals of the capacitor directly.
- Follow the Diagram: Strictly adhere to the wiring diagram. Incorrect wiring can damage the opener or create a fire hazard.
- If in Doubt, Consult a Professional: If you're not comfortable working with electrical systems, consult a qualified electrician or garage door technician.
This article provides a foundational understanding of garage door opener wiring. To dive deeper and gain access to a comprehensive wiring diagram, you can download the file. Remember to always prioritize safety and consult a professional when needed.