How To Reset The Check Engine Light On A Nissan Sentra?
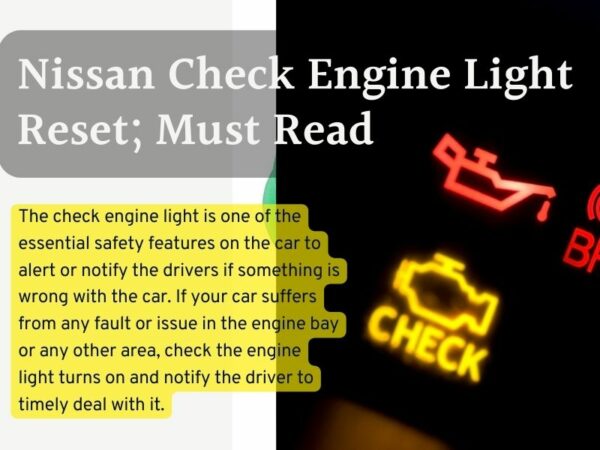
The dreaded check engine light (CEL), also known as the malfunction indicator lamp (MIL), is a common sight on dashboards. While it can be alarming, it doesn't always indicate a catastrophic failure. Understanding how to reset the CEL on your Nissan Sentra can save you time and money, especially if you're a seasoned DIYer who regularly performs maintenance and modifications. This article provides a comprehensive guide on how to safely and effectively reset the CEL on your Sentra, along with the necessary background information.
Background: Nissan Sentra Engine Management System
Modern Nissan Sentras, like most contemporary vehicles, utilize a sophisticated engine management system controlled by the Engine Control Unit (ECU), sometimes also referred to as the Powertrain Control Module (PCM). This computer monitors a vast array of sensors throughout the engine and drivetrain. These sensors provide real-time data on various parameters, including:
- Oxygen Sensor (O2 Sensor) Data: Measures the oxygen content in the exhaust stream to ensure optimal air-fuel mixture.
- Mass Airflow (MAF) Sensor Data: Measures the volume of air entering the engine, crucial for calculating the correct fuel injection amount.
- Throttle Position Sensor (TPS) Data: Indicates the throttle valve's position, directly related to driver input and engine load.
- Crankshaft Position Sensor (CKP) Data: Monitors the crankshaft's position and speed, essential for timing ignition and fuel injection.
- Camshaft Position Sensor (CMP) Data: Monitors the camshaft's position, used in conjunction with the CKP sensor for precise valve timing.
- Engine Coolant Temperature (ECT) Sensor Data: Measures the engine's coolant temperature, affecting fuel enrichment and ignition timing.
- Manifold Absolute Pressure (MAP) Sensor Data: Measures the pressure inside the intake manifold, indicating engine load.
The ECU uses this information to control various actuators, such as fuel injectors, ignition coils, and the idle air control valve, to optimize engine performance, fuel efficiency, and emissions. When the ECU detects a problem or a parameter outside of its pre-programmed specifications, it stores a Diagnostic Trouble Code (DTC) and illuminates the CEL.
Technical Breakdown: How the CEL System Works
The CEL system is designed to alert the driver to potential issues affecting engine operation or emissions. When a sensor reading falls outside a defined threshold, or if a self-test fails, the ECU triggers a DTC. These codes are standardized across the automotive industry, allowing mechanics (and DIYers) to diagnose problems using an OBD-II (On-Board Diagnostics II) scanner. The OBD-II system is mandated in most vehicles manufactured after 1996.
Here’s a simplified breakdown of the process:
- Sensor Input: A sensor measures a specific parameter (e.g., O2 sensor voltage).
- ECU Analysis: The ECU compares the sensor reading to its programmed range.
- DTC Trigger: If the reading is outside the range, the ECU stores a DTC.
- MIL Illumination: The ECU activates the CEL on the dashboard.
- Freeze Frame Data: The ECU often captures "freeze frame" data, which records the engine parameters at the moment the DTC was triggered. This provides valuable context for diagnosis.
Resetting the CEL essentially clears the stored DTCs and deactivates the warning light. However, it's crucial to understand that resetting the CEL does not fix the underlying problem. If the fault persists, the CEL will likely reappear shortly after being reset.
Methods for Resetting the CEL on a Nissan Sentra
There are several methods for resetting the CEL on a Nissan Sentra. Here are the most common approaches:
1. Using an OBD-II Scanner
This is the recommended and most reliable method. OBD-II scanners are readily available online and at auto parts stores. They range from basic code readers to more advanced scanners with graphing and data logging capabilities.
Steps:
- Locate the OBD-II Port: On most Nissan Sentras, the OBD-II port is located under the dashboard on the driver's side, usually near the steering column.
- Connect the Scanner: Plug the OBD-II scanner into the port.
- Turn on the Ignition: Turn the ignition key to the "ON" position (without starting the engine).
- Power On Scanner: Most scanners will power on automatically or have a power button.
- Read DTCs: Follow the scanner's instructions to read the stored DTCs. Write down or photograph these codes for future reference. Understanding the DTC is critical before simply clearing it. A P0300 code, for instance, signifies a random/multiple cylinder misfire.
- Clear DTCs: Navigate to the "Clear Codes" or "Erase Codes" function on the scanner and follow the prompts.
- Verify Reset: Turn off the ignition, remove the scanner, and start the engine. The CEL should be off. If it reappears immediately, the underlying problem still exists.
2. Disconnecting the Battery (Not Recommended)
While disconnecting the battery can sometimes reset the CEL, this method is generally not recommended for several reasons:
- Loss of Data: Disconnecting the battery can erase other important data stored in the ECU, such as radio presets, learned fuel trims, and adaptive shift patterns in the transmission.
- Potential Damage: In rare cases, disconnecting the battery incorrectly can damage sensitive electronic components.
- Ineffective for Persistent Problems: If the underlying issue causing the CEL persists, the light will return quickly.
If you must use this method, proceed with extreme caution:
Steps (Use with caution):
- Locate the Battery: The battery is typically located under the hood.
- Disconnect the Negative Terminal: Use a wrench to loosen the nut on the negative (-) battery terminal. Carefully remove the cable from the terminal. Ensure the cable doesn't touch the terminal during the process.
- Wait 15-30 Minutes: This allows the ECU to completely discharge.
- Reconnect the Negative Terminal: Reattach the negative cable to the battery terminal and tighten the nut securely.
- Start the Engine: Start the engine and check if the CEL is off.
3. Driving Cycle (For Some Specific Codes)
In some cases, especially after repairing certain emissions-related issues, the CEL may not immediately clear even after using an OBD-II scanner. The ECU needs to perform a "driving cycle" to confirm that the repair was successful.
A driving cycle involves a specific sequence of driving conditions that allows the ECU to run its diagnostic tests. The exact driving cycle requirements vary depending on the DTC and the vehicle model. Nissan's specific driving cycle instructions can be found in the factory service manual (FSM) for your specific Sentra model and year. However, a general example might include:
- Cold Start: Start the engine from a cold condition (engine temperature below 122°F or 50°C).
- Idle: Allow the engine to idle for a specific period (e.g., 2-3 minutes).
- Steady Cruise: Drive at a steady speed (e.g., 40-55 mph) for a specific distance (e.g., 5-10 miles).
- Deceleration: Decelerate without using the brakes to allow the ECU to cut off fuel.
- Stop and Idle: Come to a complete stop and allow the engine to idle for a few minutes.
Monitor the CEL during the driving cycle. If the repair was successful, the light should turn off after the ECU completes its diagnostic tests. If the CEL remains on, the underlying problem still exists.
Common Issues and Maintenance Concerns
Several common issues can trigger the CEL on a Nissan Sentra:
- Faulty O2 Sensors: O2 sensors degrade over time and can cause lean or rich fuel mixtures.
- Loose Gas Cap: A loose or damaged gas cap can cause evaporative emissions (EVAP) system leaks.
- Catalytic Converter Failure: Catalytic converters can fail due to age, overheating, or contamination.
- MAF Sensor Problems: A dirty or faulty MAF sensor can disrupt the air-fuel mixture.
- Spark Plug Issues: Worn or fouled spark plugs can cause misfires.
- Vacuum Leaks: Vacuum leaks can alter the air-fuel ratio and cause engine performance issues.
- EVAP System Leaks: Leaks in the EVAP system can trigger DTCs related to evaporative emissions.
Regular maintenance is crucial for preventing CEL issues. This includes:
- Oil Changes: Regular oil changes prevent engine wear and tear.
- Air Filter Replacement: A clean air filter ensures proper airflow to the engine.
- Spark Plug Replacement: Replace spark plugs according to the manufacturer's recommended interval.
- Fuel System Cleaning: Use fuel injector cleaner periodically to prevent fuel injector clogs.
- Visual Inspections: Regularly inspect hoses and vacuum lines for cracks or leaks.
Do's and Don'ts / Best Practices
- Do: Always read and record the DTCs before clearing the CEL. This information is invaluable for troubleshooting.
- Do: Research the DTCs to understand the potential causes of the problem.
- Do: Address the underlying problem that triggered the CEL before simply resetting it.
- Do: Use a quality OBD-II scanner for accurate readings and reliable resetting.
- Don't: Ignore the CEL. Even if the car seems to be running fine, the CEL indicates a potential problem that could worsen over time.
- Don't: Disconnect the battery unless absolutely necessary. It can erase important data and potentially damage electronic components.
- Don't: Drive aggressively or excessively to complete a driving cycle. Follow the recommended driving cycle procedures carefully.
- Don't: Assume that resetting the CEL will fix the problem. It only clears the code; it doesn't repair the underlying issue.
Conclusion
Resetting the CEL on your Nissan Sentra is a straightforward process, especially with an OBD-II scanner. However, it's crucial to remember that the CEL is a warning system, and ignoring it can lead to more serious problems. Always read and understand the DTCs before clearing the light, and address the underlying issue promptly. Investing in a quality OBD-II scanner is highly recommended for any DIY mechanic, as it provides valuable diagnostic information and allows you to monitor your vehicle's health effectively. By following these guidelines, you can safely and effectively manage your Sentra's CEL and ensure its long-term reliability.