Infiniti J30 Rear Brake Caliper And Rotor Upgrade For The Nissan 240sx
Are you looking to improve the braking performance of your Nissan 240SX? One popular and relatively straightforward upgrade involves swapping out the rear brake calipers and rotors for those from an Infiniti J30. This modification offers increased stopping power and a more aggressive look without breaking the bank. This article will guide you through the benefits, requirements, and steps involved in a Infiniti J30 rear brake caliper and rotor upgrade for your Nissan 240SX.
Why Upgrade Your 240SX Rear Brakes?
The Nissan 240SX, especially models from the late '80s and early to mid '90s, is a well-loved platform for drifting, track days, and general spirited driving. However, the stock braking system can often be a limiting factor, particularly under demanding conditions. The standard rear brakes can suffer from brake fade, a phenomenon where braking power decreases due to overheating. Upgrading offers several benefits:
- Improved Stopping Power: Larger rotors and calipers provide a greater surface area for friction, resulting in shorter stopping distances.
- Reduced Brake Fade: Increased thermal mass helps dissipate heat more effectively, minimizing brake fade.
- Enhanced Pedal Feel: A more responsive and confident pedal feel allows for better brake modulation.
- Cost-Effective Upgrade: Compared to aftermarket big brake kits, the Infiniti J30 swap is a budget-friendly option.
- Aesthetic Improvement: Larger rotors often look more aggressive behind aftermarket wheels.
Why the Infiniti J30 Rear Brake Setup?
The Infiniti J30 (manufactured from 1993-1997) uses a rear brake caliper and rotor setup that is remarkably similar to the 240SX. Critically, it uses the same mounting bolt pattern, making it a bolt-on or near-bolt-on upgrade, minimizing the need for custom fabrication. The J30 rear brakes are larger than the 240SX units, providing a significant performance boost. Furthermore, J30 parts are often readily available at auto parts stores or online retailers, making them accessible and affordable.
What You'll Need: Parts and Tools
Parts List:
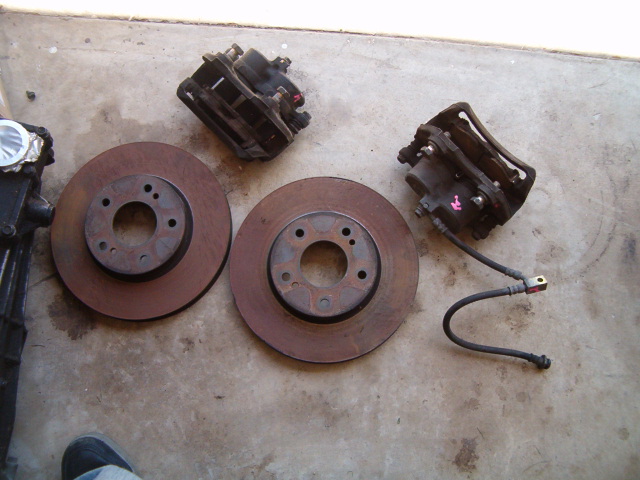
- Infiniti J30 Rear Brake Calipers (Left and Right): Source these from a salvage yard, auto parts store (remanufactured), or online retailer. Ensure they are in good working condition.
- Infiniti J30 Rear Brake Rotors (Left and Right): New or lightly used rotors are recommended. Check for thickness and runout before installation.
- Brake Pads: Choose brake pads appropriate for your driving style. Performance pads will offer better stopping power but may produce more noise and dust.
- Brake Lines: Consider upgrading to stainless steel braided brake lines for improved pedal feel and reduced brake line expansion. While the stock lines may work, they are often old and brittle and the upgrade is worth doing at the same time.
- Brake Fluid: Use a high-quality DOT 4 brake fluid. ATE Type 200 or Motul RBF600 are popular choices.
- Caliper Mounting Bolts (if needed): Inspect the existing bolts. If they are corroded or damaged, replace them.
- Optional: New parking brake shoes (if yours are worn), rotor retaining screws, anti-seize compound.
Tools Required:
- Jack and Jack Stands: Essential for safely lifting and supporting the vehicle.
- Wheel Chocks: To prevent the car from rolling.
- Socket Set and Wrenches: Metric sizes are required.
- Torque Wrench: For tightening bolts to the correct specifications.
- Brake Caliper Compressor Tool: To retract the caliper pistons.
- Brake Line Wrench (Flare Nut Wrench): To avoid rounding off the brake line fittings.
- Screwdrivers: Various sizes for removing clips and other fasteners.
- Hammer: For gently tapping components into place.
- Wire Brush: For cleaning surfaces.
- Gloves: To protect your hands.
- Safety Glasses: To protect your eyes.
- Brake Cleaner: For cleaning brake components.
- Catch Container: For collecting brake fluid.
Step-by-Step Installation Guide
Disclaimer: Brake work should only be performed by qualified individuals. If you are not comfortable working on brakes, consult a professional mechanic. Improperly installed brakes can lead to serious injury or death.
- Preparation: Park the 240SX on a level surface, engage the parking brake, and chock the front wheels. Loosen the rear lug nuts before lifting the vehicle.
- Lift and Secure: Use a jack to lift the rear of the car and secure it with jack stands placed under the designated jacking points.
- Remove Wheels: Remove the rear wheels.
- Disconnect Brake Lines: Carefully disconnect the brake lines from the stock calipers using a brake line wrench. Be prepared for brake fluid to leak. Use a catch container to collect the fluid. Plug the brake lines to prevent excessive fluid loss and contamination.
- Remove Old Calipers and Rotors: Unbolt the stock calipers from the mounting brackets and remove them. Remove the old rotors. You may need to loosen the parking brake adjustment to remove the rotors more easily. If the rotor is stuck, gently tap it with a hammer.
- Clean Mounting Surfaces: Use a wire brush to clean the caliper mounting brackets and the hub surface. Remove any rust or debris.
- Install New Rotors: Install the Infiniti J30 rotors onto the hubs. Secure them with the rotor retaining screws (if applicable).
- Install New Calipers: Mount the Infiniti J30 calipers onto the mounting brackets. Use the correct mounting bolts and torque them to the specified value (refer to a service manual).
- Connect Brake Lines: Connect the brake lines (stock or upgraded stainless steel lines) to the calipers. Ensure the fittings are properly tightened to prevent leaks.
- Install Brake Pads: Install the new brake pads into the calipers.
- Bleed the Brakes: Bleed the brake system to remove any air bubbles. Start with the caliper furthest from the master cylinder (usually the passenger rear). Use the proper bleeding procedure and ensure the brake fluid reservoir remains full. Bleed until clear, bubble-free fluid comes out of each bleeder valve.
- Adjust Parking Brake: Adjust the parking brake shoes to ensure proper operation. This is typically done by adjusting a star wheel inside the rotor. Refer to a service manual for the correct procedure.
- Reinstall Wheels: Reinstall the rear wheels and tighten the lug nuts to the specified torque.
- Lower Vehicle: Carefully lower the vehicle to the ground.
- Final Check: Pump the brake pedal several times to ensure proper brake function. Check for leaks around the brake line fittings and calipers.
- Test Drive: Perform a test drive in a safe area to ensure the brakes are working correctly. Start with gentle braking and gradually increase the intensity. Be aware that the brakes may require a bedding-in period for optimal performance.
Tips and Considerations
- Brake Pad Selection: Choose brake pads that are appropriate for your driving style and intended use. Aggressive pads will provide better stopping power but may wear faster and produce more noise and dust.
- Brake Line Upgrade: Upgrading to stainless steel braided brake lines is highly recommended. They provide a firmer pedal feel and reduce brake line expansion under pressure.
- Brake Fluid Choice: Use a high-quality DOT 4 brake fluid. Higher-performance fluids like ATE Type 200 or Motul RBF600 have higher boiling points and are better suited for track use.
- Caliper Rebuild: If you are using used calipers, consider rebuilding them with new seals and pistons. This will ensure optimal performance and prevent leaks.
- Parking Brake: Inspect the parking brake shoes and hardware while the rotors are off. Replace them if they are worn or damaged.
- Proper Bleeding: Bleeding the brakes properly is crucial for optimal brake performance. Ensure all air bubbles are removed from the system.
- Torque Specifications: Always torque bolts to the specified values. Over-tightening can damage components, while under-tightening can lead to loosening.
- Bedding-In Procedure: Follow the brake pad manufacturer's recommended bedding-in procedure for optimal brake performance and pad life.
Troubleshooting
- Soft Brake Pedal: This is usually caused by air in the brake lines. Re-bleed the brakes thoroughly. Also, check for leaks in the brake lines and calipers.
- Brake Squeal: Brake squeal can be caused by several factors, including worn brake pads, glazed rotors, or vibration between the pads and calipers. Try applying brake grease to the back of the brake pads. If the squeal persists, consider replacing the pads or rotors.
- Uneven Braking: Uneven braking can be caused by a sticking caliper, contaminated brake pads, or a warped rotor. Inspect the calipers for proper operation and replace any damaged components.
- Brake Fluid Leaks: Check for leaks around the brake line fittings, calipers, and master cylinder. Tighten any loose fittings and replace any damaged components.
Conclusion
The Infiniti J30 rear brake caliper and rotor upgrade is a popular and effective way to improve the braking performance of your Nissan 240SX. By following these instructions carefully and taking the necessary precautions, you can enhance your car's stopping power and enjoy a more confident driving experience. Remember to prioritize safety and consult a professional mechanic if you are unsure about any aspect of the installation process. With improved brakes, your 240SX will be better equipped for spirited driving, track days, or simply navigating everyday traffic.
Always double check your work, and test your brakes in a safe environment before resuming normal driving. This upgrade, performed correctly, can dramatically improve the safety and performance of your vehicle. Good luck!