Installation And Aerodynamic Principles Of A Chassis-mounted Rear Wing On A 240sx
The Nissan 240SX, a darling of drifting and a canvas for countless modifications, often sees its silhouette augmented by a chassis-mounted rear wing. Beyond the aesthetic appeal, a properly installed and adjusted wing can significantly alter the car's aerodynamic characteristics, improving grip and stability. However, slapping on just any wing without understanding the underlying principles can be detrimental. This article delves into the installation process and the crucial aerodynamic principles behind a chassis-mounted rear wing on a 240SX.
Installation: More Than Just Bolting It On
While the allure of a quicker lap time or a more controlled drift is strong, the installation phase demands meticulous attention. A poorly installed wing can vibrate, fatigue mounting points, or even detach entirely, posing a serious safety risk. Here's a step-by-step guide to a robust and reliable installation:
1. Selecting the Right Wing and Mounting Hardware
The market is saturated with rear wings, varying in size, airfoil design, and materials. For a 240SX, consider the intended use. A larger wing with a more aggressive airfoil is suitable for high-speed track use, while a smaller, less aggressive wing is often preferred for drift applications where maintaining yaw control is crucial. Materials matter too: aluminum is lightweight and strong but can be more susceptible to fatigue cracks than steel, which offers superior strength but adds weight.
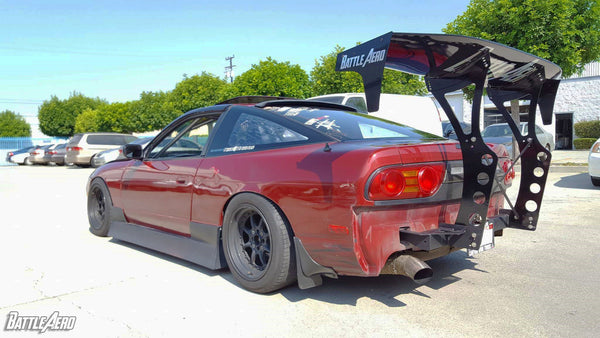
Crucially, choose a wing specifically designed for chassis mounting. Trunk-mounted wings, which attach only to the trunk lid, are often purely aesthetic and lack the structural integrity to withstand significant aerodynamic loads. Look for wings that come with robust mounting plates designed to distribute the load across a larger area of the chassis. If custom mounting solutions are required, consult a professional fabricator to ensure proper load distribution and weld quality.
The mounting hardware is equally critical. Opt for high-strength bolts (Grade 8 or equivalent) and ensure they are of the correct length. Too short, and they won't provide sufficient thread engagement; too long, and they can interfere with other components. Use washers to further distribute the load and prevent the bolts from digging into the mounting plates. Lock washers or locking nuts are essential to prevent loosening due to vibration.
2. Preparing the Mounting Locations
Identifying suitable mounting locations on the chassis is paramount. Ideally, choose reinforced sections of the frame or roll cage. Avoid mounting directly to thin sheet metal, as it will likely deform under load. Common locations include the rear frame rails or the area where the rear bumper mounts. If necessary, reinforce the chosen locations with additional plating welded to the chassis.
Once the locations are selected, carefully measure and mark the drilling points. Precision is crucial to ensure the wing is mounted symmetrically and perpendicular to the car's longitudinal axis. Use a center punch to create a starting point for the drill bit, preventing it from wandering. Drill pilot holes first, followed by the final hole size specified by the wing manufacturer. Deburr the holes to remove any sharp edges that could damage the mounting hardware or create stress concentrations.
3. Installing the Wing
With the mounting locations prepared, it's time to install the wing. Apply anti-seize compound to the bolt threads to prevent corrosion and ensure easy removal in the future. Carefully align the wing mounting plates with the drilled holes and insert the bolts. Tighten the bolts in a star pattern to evenly distribute the load and prevent warping. Torque the bolts to the manufacturer's specifications using a torque wrench. Over-tightening can damage the bolts or the mounting plates, while under-tightening can lead to loosening and failure.
After the initial installation, thoroughly inspect the wing and mounting hardware for any signs of stress or misalignment. Drive the car at gradually increasing speeds, paying close attention to any vibrations or unusual noises. Retighten the bolts after the first few drives, as they may settle slightly. Regularly inspect the wing and mounting hardware as part of your routine maintenance.
Aerodynamic Principles: More Than Meets the Eye
A rear wing, in its essence, is an inverted airfoil. Instead of generating lift like an airplane wing, it generates downforce, increasing the vertical load on the rear tires. This increased load translates to greater grip, allowing for higher cornering speeds and improved stability. However, understanding the aerodynamic principles at play is crucial to maximizing the wing's effectiveness and avoiding unintended consequences.
1. Angle of Attack (AOA)
The angle of attack is the angle between the wing's chord line (an imaginary line from the leading edge to the trailing edge) and the relative wind (the direction of the airflow approaching the wing). Increasing the AOA generally increases downforce, but only up to a certain point. Beyond that point, the airflow separates from the wing's surface, leading to stall. Stall drastically reduces downforce and increases drag, negating the wing's benefits.
The optimal AOA varies depending on the wing design, car speed, and track conditions. A shallower AOA is typically used for high-speed tracks to minimize drag, while a steeper AOA is used for tighter, slower tracks to maximize downforce. Experimentation and data logging are crucial to finding the optimal AOA for your specific setup.
2. Airfoil Design
The shape of the airfoil plays a significant role in determining the wing's aerodynamic characteristics. Different airfoil designs are optimized for different purposes. Some airfoils are designed to generate maximum downforce, while others are designed to minimize drag. Some airfoils are more sensitive to changes in AOA than others. A well-designed airfoil will provide a predictable and consistent downforce response over a wide range of AOAs.
Wings with multiple elements (e.g., biplane or triplane wings) can further enhance downforce and reduce drag. These elements work together to redirect airflow and create a more efficient pressure differential. However, multi-element wings are also more complex to design and adjust.
3. Aspect Ratio
The aspect ratio of a wing is the ratio of its span (the distance between the wingtips) to its chord (the width of the wing). Wings with a higher aspect ratio (longer and narrower) tend to be more efficient at generating downforce and produce less induced drag (drag created by the wingtip vortices). However, high-aspect-ratio wings are also more prone to flexing and vibration.
4. Wing Placement and Interference
The placement of the wing on the chassis significantly affects its performance. Ideally, the wing should be positioned in clean, undisturbed airflow. Placing the wing too close to the roofline or the rear bumper can disrupt the airflow and reduce its effectiveness. Consider the car's overall aerodynamic profile when choosing the wing's mounting location.
Furthermore, the wing can interact with other aerodynamic devices on the car, such as front splitters, diffusers, and side skirts. These interactions can be complex and difficult to predict without wind tunnel testing or computational fluid dynamics (CFD) analysis. A well-balanced aerodynamic package is crucial to achieving optimal performance.
5. Downforce vs. Drag: The Balancing Act
While downforce is desirable, it always comes at the cost of increased drag. Drag reduces top speed and fuel efficiency. The key is to find the optimal balance between downforce and drag for your specific application. A car with excessive downforce may be slow on straightaways, while a car with insufficient downforce may lack grip in corners.
"Aerodynamic modifications are a delicate balancing act. What might seem like a simple bolt-on upgrade can significantly alter the car's handling characteristics, for better or worse."
Adjusting the wing's AOA is a simple way to fine-tune the downforce/drag balance. However, it's important to consider the overall aerodynamic package and make adjustments to other components as needed.
In conclusion, installing a chassis-mounted rear wing on a 240SX is more than just bolting on a piece of metal. It requires careful planning, meticulous installation, and a thorough understanding of the underlying aerodynamic principles. By following the guidelines outlined in this article, you can ensure that your wing is properly installed and adjusted to maximize its effectiveness and improve your car's performance.