Installation Of A Molded Plastic Or Upholstered Dashboard Overlay
Installing a Molded Plastic or Upholstered Dashboard Overlay: A Comprehensive Guide
A cracked or damaged dashboard can significantly detract from your vehicle's appearance and value. Fortunately, replacing the entire dashboard can be a costly and labor-intensive process. An alternative solution is installing a dashboard overlay, also known as a dashboard cover. These overlays are designed to fit directly over your existing dashboard, concealing imperfections and providing a fresh, new look. This guide will walk you through the process of installing both molded plastic and upholstered dashboard overlays, ensuring a professional-looking result.
What is a Dashboard Overlay?
A dashboard overlay is a custom-molded piece of plastic or fabric designed to adhere to the surface of your existing dashboard. They are available in various materials, colors, and textures to match or complement your vehicle's interior. They offer a cost-effective way to improve the aesthetics of your car's interior without the expense and complexity of a full dashboard replacement.
Molded plastic overlays are typically made from ABS plastic, known for its durability and resistance to cracking and fading. They offer a smooth, seamless appearance and are relatively easy to clean. Upholstered overlays, on the other hand, are covered in fabric or vinyl, providing a more luxurious and comfortable feel. They are often preferred for vehicles with original upholstered dashboards.
Tools and Materials Needed
Before you begin the installation, gather the necessary tools and materials. This will ensure a smooth and efficient process. Here's a comprehensive list:
- Dashboard Overlay (specifically designed for your vehicle's make, model, and year)
- Silicone Adhesive (high-quality, specifically designed for automotive use)
- Isopropyl Alcohol (for cleaning the dashboard)
- Clean Microfiber Cloths
- Putty Knife or Scraper (plastic, to avoid damaging the dashboard)
- Masking Tape
- Scissors or Utility Knife (for trimming excess material on upholstered overlays)
- Heat Gun (optional, for warming the overlay for easier molding)
- Vacuum Cleaner (to remove debris from the dashboard)
- Safety Glasses
- Gloves
- Weights (sandbags or similar, to apply pressure during adhesive curing)
Preparation is Key: Cleaning and Inspection
Proper preparation is crucial for a successful dashboard overlay installation. Take your time and follow these steps carefully:
- Clean the Dashboard: Thoroughly clean the entire surface of the dashboard with isopropyl alcohol and a clean microfiber cloth. This will remove any dirt, grease, oil, or wax that could interfere with the adhesive bond. Pay particular attention to areas where the overlay will be directly contacting the dashboard. Let the alcohol evaporate completely before proceeding.
- Inspect for Damage: Carefully inspect the dashboard for any significant cracks, holes, or loose pieces. If necessary, repair these imperfections before installing the overlay. You can use a plastic filler or epoxy to fill in cracks and secure any loose pieces. Allow the repair to fully cure according to the product instructions.
- Dry Fit the Overlay: Before applying any adhesive, dry fit the dashboard overlay to ensure it fits properly. Carefully align the overlay with the contours of the dashboard and check for any gaps or overlaps. If necessary, use a heat gun (on a low setting) to gently warm the overlay and make it more pliable for molding to the dashboard's shape. Be cautious not to overheat the overlay, as this can damage the material.
- Mark Alignment Points: Use masking tape to mark key alignment points on both the dashboard and the overlay. This will help you accurately position the overlay during the final installation. Pay special attention to areas around vents, gauges, and other dashboard features.
Applying the Adhesive
Once you've prepared the dashboard and dry-fitted the overlay, it's time to apply the adhesive. Follow these steps carefully to ensure a strong and lasting bond:
- Apply Adhesive to the Overlay: Apply a thin, even layer of silicone adhesive to the back of the dashboard overlay. Use a putty knife or scraper to spread the adhesive smoothly, ensuring complete coverage. Pay particular attention to the edges and corners of the overlay. Follow the adhesive manufacturer's instructions for application and curing times.
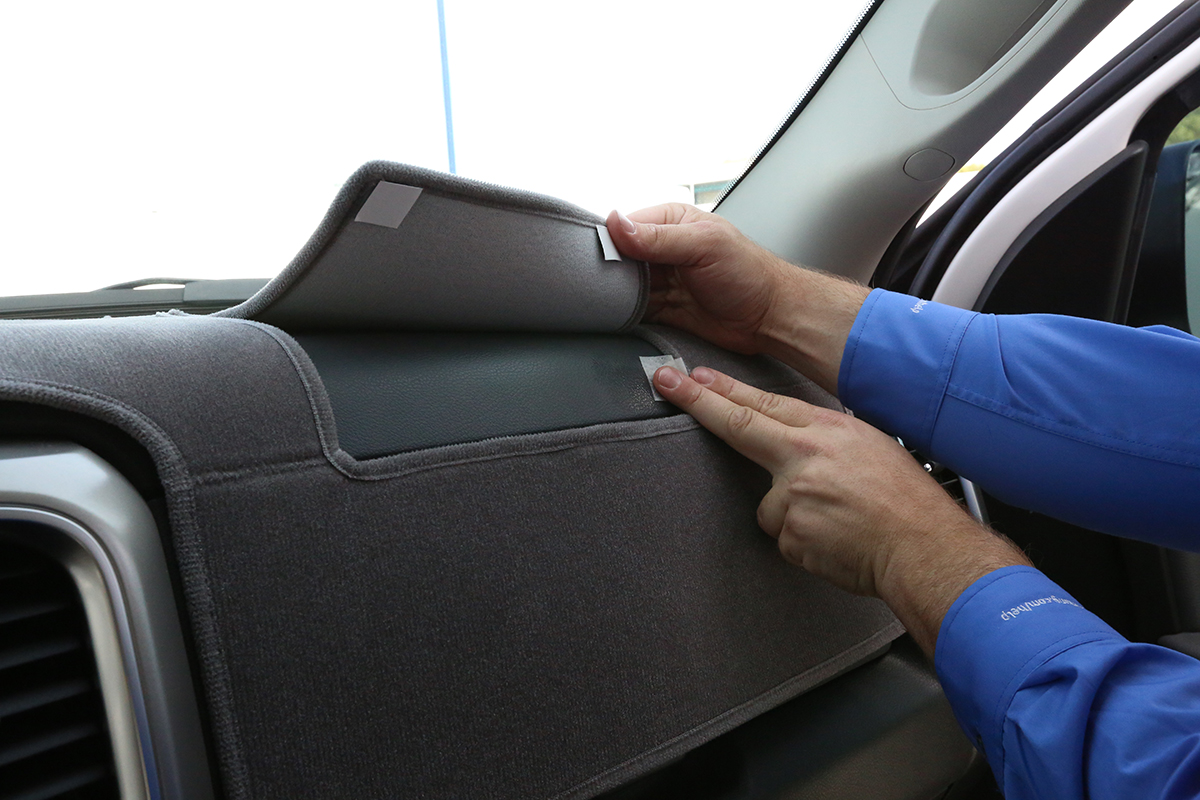
- Position the Overlay: Carefully align the overlay with the marked alignment points on the dashboard. Gently press the overlay into place, starting from the center and working outwards. Use a clean microfiber cloth to wipe away any excess adhesive that squeezes out around the edges.
- Secure the Overlay: Use masking tape to secure the overlay to the dashboard. Apply tape around the edges of the overlay and across any areas that may need extra support. Place weights (sandbags or similar) on top of the overlay to apply even pressure and ensure a strong adhesive bond.
Finishing Touches
After the adhesive has cured according to the manufacturer's instructions (typically 24-48 hours), you can remove the masking tape and weights. Inspect the installation for any imperfections or areas that may need additional attention. Here's how to complete the installation:
- Trim Excess Material (Upholstered Overlays): If you're installing an upholstered overlay, you may need to trim any excess material around the edges. Use a sharp utility knife or scissors to carefully trim the material, following the contours of the dashboard. Be careful not to cut into the dashboard itself.
- Clean the Overlay: Clean the surface of the dashboard overlay with a mild soap and water solution and a clean microfiber cloth. This will remove any remaining adhesive residue or fingerprints.
- Final Inspection: Perform a final inspection of the installation to ensure that the overlay is securely attached and that all vents, gauges, and other dashboard features are properly aligned.
Tips for a Successful Installation
Here are some additional tips to help you achieve a professional-looking dashboard overlay installation:
- Choose the Right Overlay: Select a dashboard overlay that is specifically designed for your vehicle's make, model, and year. This will ensure a proper fit and a seamless appearance.
- Use High-Quality Adhesive: Invest in a high-quality silicone adhesive that is specifically designed for automotive use. This will ensure a strong and lasting bond, even in extreme temperatures.
- Take Your Time: Don't rush the installation process. Take your time to properly prepare the dashboard, apply the adhesive, and secure the overlay.
- Work in a Well-Ventilated Area: When working with adhesives and cleaning solutions, it's important to work in a well-ventilated area to avoid inhaling harmful fumes.
- Consult a Professional: If you're not comfortable installing the dashboard overlay yourself, consider hiring a professional installer. They have the experience and expertise to ensure a perfect installation.
Troubleshooting Common Issues
Even with careful preparation and execution, you may encounter some common issues during the dashboard overlay installation process. Here are some tips for troubleshooting these problems:
- Overlay Doesn't Fit Properly: If the overlay doesn't fit properly, double-check that you've selected the correct overlay for your vehicle. You may also need to gently warm the overlay with a heat gun to make it more pliable.
- Adhesive Doesn't Bond Properly: If the adhesive doesn't bond properly, make sure you've thoroughly cleaned the dashboard and that you're using a high-quality adhesive. You may also need to apply more pressure to the overlay during the curing process.
- Bubbles Under the Overlay: If you have bubbles under the overlay, you can try to smooth them out by gently pressing on the overlay with a clean microfiber cloth. If the bubbles persist, you may need to carefully lift the overlay and reapply the adhesive.
Maintaining Your Dashboard Overlay
Once your dashboard overlay is installed, proper maintenance will help keep it looking its best for years to come. Here are some tips:
- Regular Cleaning: Clean your dashboard overlay regularly with a mild soap and water solution and a clean microfiber cloth. This will remove any dirt, dust, or grime that can accumulate over time.
- Avoid Harsh Chemicals: Avoid using harsh chemicals or abrasive cleaners on your dashboard overlay, as these can damage the material.
- Protect from Sunlight: Protect your dashboard overlay from direct sunlight by parking your vehicle in the shade or using a sunshade. This will help prevent fading and cracking.
Installing a molded plastic or upholstered dashboard overlay is a relatively simple and cost-effective way to improve the appearance of your vehicle's interior. By following these steps and tips, you can achieve a professional-looking result that will last for years to come. Remember to always prioritize safety and take your time throughout the process. Good luck!