Installation Of An Infiniti J30 (r200v) Differential Into A Nissan 240sx
Swapping the stock differential in a Nissan 240SX can significantly improve its handling and performance, especially when adding horsepower. A popular and relatively affordable upgrade is installing an Infiniti J30 (R200V) differential. The R200V offers a stronger housing and, often, a limited-slip differential (LSD) option compared to the stock 240SX differential. This article provides a comprehensive guide to installing an Infiniti J30 R200V differential into a Nissan 240SX.
Why Choose an Infiniti J30 (R200V) Differential?
Before diving into the installation process, let's understand why the J30 R200V differential is a favored choice for 240SX enthusiasts:
- Strength: The R200V differential boasts a stronger housing than the stock 240SX unit (typically an R200). This is crucial for handling increased power output, preventing premature failure.
- Limited-Slip Differential (LSD) Availability: Many J30s came equipped with a viscous LSD. This significantly improves traction by distributing power to both rear wheels, especially during cornering or when one wheel loses grip. An open differential, common in base model 240SXs, will spin only the wheel with the least resistance.
- Cost-Effectiveness: J30 differentials are generally more affordable than aftermarket LSD units, making them a budget-friendly upgrade.
- Bolt-In Compatibility (Mostly): The J30 differential is largely a bolt-in affair with some modifications, making it a manageable project for experienced DIYers.
What You'll Need
Gathering all the necessary tools and parts before starting the installation will save you time and frustration. Here's a comprehensive list:
Parts:
- Infiniti J30 R200V Differential (ideally with the viscous LSD)
- Differential Fluid (High-quality synthetic 75W-90 gear oil is recommended)
- New Differential Cover Gasket or RTV sealant
- New Differential Mounting Bushings (Optional, but highly recommended. Polyurethane bushings offer improved performance and durability.)
- Driveshaft Bolts (New bolts are always a good idea)
- Axle Seals (Replace these while you're in there – prevention is key!)
- Pinion Flange Adapter or Driveshaft Modification (See below for details)
- Possibly, J30 Axles (See below for details)
Tools:
- Jack and Jack Stands
- Wheel Chocks
- Socket Set (Metric)
- Wrench Set (Metric)
- Torque Wrench
- Breaker Bar
- Hammer
- Punch or Drift
- Pry Bar
- Fluid Drain Pan
- Gloves
- Safety Glasses
- Penetrating Oil (PB Blaster or similar)
- Shop Rags
- Torx Bit Set (Possibly needed for differential cover bolts)
- Axle Puller (May be needed, depending on axle stubbornness)
Installation Steps
Follow these steps carefully to ensure a successful installation:
1. Preparation
Safety First! Engage the parking brake, chock the front wheels, and securely lift the rear of the 240SX with a jack. Place jack stands under the frame rails for support. Never work under a vehicle supported only by a jack.
2. Disconnecting the Existing Differential
- Drain the Differential Fluid: Locate the drain plug on the bottom of the differential housing and remove it, allowing the fluid to drain completely into a drain pan.
- Disconnect the Driveshaft: Unbolt the driveshaft from the differential pinion flange. You may need to rotate the driveshaft to access all the bolts. Mark the orientation of the driveshaft relative to the flange before removal; it's beneficial to reinstall it in the same orientation.
- Disconnect the Axles: This step is the most challenging. You'll need to disconnect the axles from the differential. Depending on your 240SX and the axle setup, you may need to use an axle puller. Penetrating oil applied well in advance can help significantly. The axles are retained by c-clips inside the differential.
- Support the Differential: Place a jack under the differential housing to support its weight.
- Remove the Differential Mounting Bolts: Locate the bolts securing the differential to the subframe. These can be stubborn, so a breaker bar may be necessary.
- Lower and Remove the Old Differential: Carefully lower the jack and remove the old differential.
3. Preparing the Infiniti J30 Differential
- Inspect the J30 Differential: Before installation, thoroughly inspect the J30 differential for any damage or leaks. Check the axle seals and pinion seal. If they show signs of wear or damage, replace them now.
- Replace Bushings (Recommended): Now is the perfect time to replace the differential mounting bushings. Using polyurethane bushings can improve handling and reduce wheel hop. Press out the old bushings and press in the new ones using a shop press or appropriate tools.
- Install New Axle Seals: Using a seal driver or a socket of the appropriate size, gently tap in the new axle seals.
- Clean the Mating Surfaces: Clean the differential housing mating surface where the differential cover will seal. Use a gasket scraper or razor blade to remove any old gasket material.
4. Addressing the Pinion Flange Difference
This is where things can get a little tricky. The pinion flange on the J30 differential is different from the one on the 240SX. You have two main options:
- Pinion Flange Adapter: These adapters allow you to bolt the 240SX driveshaft directly to the J30 pinion flange. This is often the easiest solution.
- Driveshaft Modification: You can have a driveshaft shop modify your 240SX driveshaft to fit the J30 pinion flange. This involves welding on a new flange. This can be more expensive than an adapter, but can provide a stronger, more reliable solution.
Choose the option that best suits your budget and skill level.
5. Installing the Infiniti J30 Differential
- Position the J30 Differential: Place the jack under the J30 differential and carefully lift it into position.
- Install the Mounting Bolts: Install the differential mounting bolts and torque them to the manufacturer's specifications.
- Connect the Axles: Reinstall the axles into the differential. Ensure they are fully seated and the c-clips are properly engaged. This can be challenging; patience is key.
- Connect the Driveshaft: Install the pinion flange adapter (if using) and connect the driveshaft to the differential. Torque the driveshaft bolts to the manufacturer's specifications.
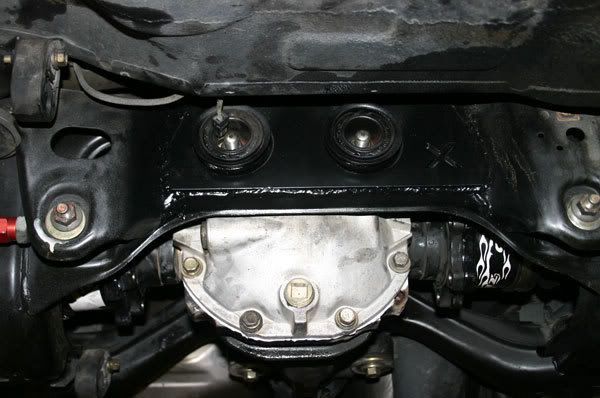
- Install the Differential Cover: Install a new differential cover gasket or apply a thin, even bead of RTV sealant to the differential housing mating surface. Install the differential cover and torque the bolts to the manufacturer's specifications. Follow the correct tightening sequence (usually a criss-cross pattern) to ensure even pressure.
6. Filling the Differential with Fluid
- Locate the Fill Plug: Locate the fill plug on the side of the differential housing.
- Fill with Fluid: Remove the fill plug and fill the differential with high-quality synthetic 75W-90 gear oil until the fluid level reaches the bottom of the fill plug hole.
- Reinstall the Fill Plug: Reinstall the fill plug and torque it to the manufacturer's specifications.
7. Final Checks and Lowering the Vehicle
- Inspect for Leaks: Double-check all connections and seals for any leaks.
- Lower the Vehicle: Carefully lower the vehicle and remove the jack stands.
Important Considerations
- Axle Compatibility: While many 240SX owners have successfully used their stock axles with the J30 differential, some have experienced issues with the axle spline length. If you encounter problems, you may need to use J30 axles. This *can* introduce complications related to hub compatibility, requiring you to potentially swap hubs or axles shafts. Do thorough research on 240SX forums to understand the experiences of others.
- LSD Inspection: If you're relying on the J30 differential having a functional LSD, it's wise to test it before installation. While a viscous LSD *can* be functional after sitting for a while, the fluid inside it degrades over time. There are tests you can perform (such as rotating the input shaft and seeing how the output shafts react) to get a sense of its condition.
- Torque Specifications: Always use a torque wrench and torque all bolts to the manufacturer's specifications. Overtightening can damage the bolts or the differential housing.
- Professional Help: If you are not comfortable performing any of these steps, seek the help of a qualified mechanic. A mistake during installation can lead to serious damage or injury.
Conclusion
Installing an Infiniti J30 R200V differential into your Nissan 240SX is a worthwhile upgrade that can significantly improve its performance. While it requires some mechanical skill and attention to detail, following these steps carefully will help you achieve a successful and rewarding result. Remember to prioritize safety and seek professional help if needed. With the added strength and potential for a limited-slip differential, your 240SX will be better equipped to handle more power and provide a more engaging driving experience. Good luck!