Installation Of The Xenon Polyurethane Front Air Dam On A Nissan 240sx
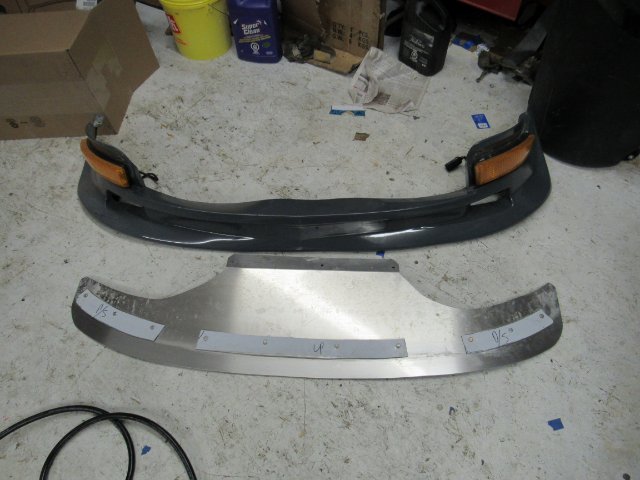
So, you've got yourself a shiny new Xenon polyurethane front air dam for your Nissan 240SX! Excellent choice. These air dams not only enhance the aggressive look of your 240 but can also improve aerodynamics at higher speeds. However, slapping it on isn't always as straightforward as the box suggests. This guide will walk you through common issues and provide solutions for a smooth installation.
Problem: Identifying the Right Air Dam and Ensuring Compatibility
Before you even crack open the packaging, verify that you have the correct air dam for your specific 240SX model year (S13 or S14) and trim. Xenon offers different designs, and what fits one year might not fit another. Check the part number on the box against the documentation or the Xenon website.
Solution: Double-Check Part Numbers and Pre-Fit
The most common mistake is assuming all 240SX models are created equal. They aren't! S13 (1989-1994) and S14 (1995-1998) models require different air dams. Even within those generations, subtle differences in bumpers or body kits could impact fitment. Always double-check the part number. Before you start drilling any holes, test fit the air dam against your front bumper. Hold it in place and visually inspect for any gaps, overlaps, or interference. This initial step can save you a lot of headaches later.
Problem: Improper Surface Preparation
Polyurethane, while durable, needs a properly prepared surface for adhesives and paint to bond correctly. A dirty, oily, or rough surface will result in poor adhesion, leading to the air dam eventually detaching or the paint chipping prematurely.
Solution: Thorough Cleaning and Sanding
Start by washing the area of the bumper where the air dam will attach with soap and water. Next, use a wax and grease remover to eliminate any lingering contaminants. After cleaning, lightly sand the bonding surface with 180-220 grit sandpaper. This creates a mechanical bond for the adhesive. Wipe away any sanding dust with a tack cloth. For optimal adhesion, consider using a plastic adhesion promoter. This spray-on product preps the plastic surface for better bonding with adhesives or paints. Allow it to dry completely before proceeding.
Problem: Incorrect Adhesive Selection
Using the wrong adhesive is a surefire way to compromise the installation. Cheap or inappropriate adhesives might not bond well with polyurethane or withstand the vibrations and weather conditions the air dam will face. Silicone-based adhesives are generally not recommended as they often lack the necessary strength and flexibility.
Solution: Use a High-Quality Polyurethane Adhesive
Invest in a high-quality polyurethane adhesive specifically designed for automotive applications. 3M and Lord Fusor are reputable brands. These adhesives offer excellent bonding strength, flexibility, and resistance to temperature changes and UV exposure. Follow the manufacturer's instructions for application, including any recommended cure times. Typically, you'll apply a bead of adhesive along the air dam's mounting flange and press it firmly against the bumper. Some adhesives require a primer for optimal bonding, so read the instructions carefully.
Problem: Difficulty with Alignment and Securing the Air Dam
Maintaining proper alignment while the adhesive cures can be challenging. Without adequate support, the air dam might shift, resulting in a misaligned and unsightly installation. Also, relying solely on adhesive might not be enough, especially in high-stress areas.
Solution: Clamps, Screws, and Proper Alignment Techniques
Clamps are your best friend here. Use a combination of clamps (padded to avoid scratching the paint) to hold the air dam firmly in place while the adhesive cures. Start by aligning the air dam perfectly. Use masking tape to mark the desired position on the bumper. Then, apply the adhesive and carefully press the air dam into place. Secure it with clamps, ensuring even pressure along the entire bonding surface. In addition to adhesive, consider using self-tapping screws in strategic locations, especially at the corners and areas subjected to high stress. Pre-drill small pilot holes to prevent cracking the polyurethane or the bumper. Stainless steel screws are recommended for corrosion resistance. After the adhesive has cured, remove the clamps and inspect the installation. Touch up any areas as needed.
Problem: Drilling Holes in the Wrong Places
If your installation requires drilling holes, accuracy is paramount. Drilling in the wrong places can damage the bumper, weaken the air dam, and result in a sloppy-looking installation.
Solution: Careful Measurement and Marking
Before drilling any holes, thoroughly measure and mark the locations. Use a template if one is provided. If not, create your own by carefully measuring the air dam and transferring those measurements to the bumper. Use a center punch to create a small indentation at each drill point. This will prevent the drill bit from wandering. Start with a small pilot hole and gradually increase the size until you reach the desired diameter. Use a drill bit designed for plastic to avoid cracking the bumper. After drilling, deburr the edges of the holes to prevent sharp edges from damaging the air dam or causing injury.
Problem: Paint Matching and Application
Getting the paint to match your 240SX's existing color can be tricky. Even if you have the factory paint code, variations in age and weathering can affect the color. Poor paint application can also ruin the look of the air dam.
Solution: Professional Paint Matching and Application
The best solution is to take your 240SX to a reputable auto body shop for paint matching and application. They have the equipment and expertise to create a perfect color match and apply the paint evenly and professionally. If you're confident in your painting skills, you can attempt it yourself, but be prepared to spend some time and effort. Start by finding the correct paint code for your car (usually located on a sticker in the door jamb or engine bay). Purchase the paint and primer from a reputable automotive paint supplier. Follow the manufacturer's instructions for paint preparation and application. Use multiple thin coats rather than one thick coat to avoid runs and drips. Allow each coat to dry completely before applying the next. After the paint has dried, consider applying a clear coat for added protection and shine. Wet sanding and polishing the clear coat can further enhance the finish.
Tools You'll Need:
- Socket set and wrench set
- Screwdrivers (Phillips and flathead)
- Drill with various drill bits
- Sandpaper (180-220 grit)
- Wax and grease remover
- Plastic adhesion promoter (optional)
- High-quality polyurethane adhesive
- Clamps (padded)
- Masking tape
- Center punch
- Deburring tool
- Safety glasses
- Gloves
Approximate Costs:
- Xenon Polyurethane Front Air Dam: $150 - $300
- High-Quality Polyurethane Adhesive: $20 - $40
- Paint and Supplies (if DIY): $50 - $150
- Professional Paint and Installation: $300 - $600 (Varies significantly by shop)
Important Note: These are estimates. Prices can vary based on location and the specific products you choose. Always get quotes from multiple sources before committing to any repairs or modifications.
By following these tips and solutions, you can confidently install your Xenon polyurethane front air dam and give your Nissan 240SX the aggressive and stylish look you've been dreaming of. Remember, patience and attention to detail are key to a successful installation. Good luck, and enjoy the ride!