Integrating Air Conditioning Into An Ls-swapped Nissan 240sx
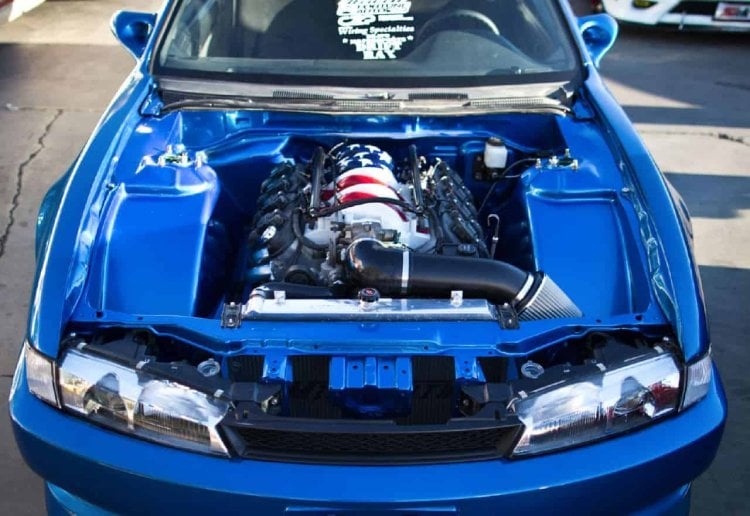
The Nissan 240SX, a lightweight, rear-wheel-drive platform, enjoys a near-legendary status among tuners and drifters. The LS engine, a readily available and powerful V8 from General Motors, offers a potent and relatively affordable path to significant horsepower gains. However, shoehorning a large V8 into a chassis designed for a four-cylinder presents numerous challenges. One often overlooked but crucial aspect of this swap is retaining or adding air conditioning. While raw power is appealing, driving a sweltering 240SX in the summer months quickly loses its charm. This guide explores the complexities of integrating air conditioning into an LS-swapped 240SX, detailing the components, challenges, and solutions involved.
Understanding the System: A Component Breakdown
Before diving into the specifics of integration, it's vital to understand the individual components of an automotive air conditioning system and their functions.
The Compressor: Heart of the System
The compressor is the workhorse, responsible for compressing the refrigerant vapor into a high-pressure, high-temperature gas. LS engines typically use a Sanden-style compressor, widely available in various configurations. Choosing the correct compressor is vital; it must be compatible with the refrigerant type (R134a is the most common) and provide sufficient cooling capacity for the interior volume of the 240SX.
The Condenser: Heat Exchanger
The condenser, located in front of the radiator, is a heat exchanger that cools the high-pressure refrigerant gas, causing it to condense into a high-pressure liquid. The stock 240SX condenser is generally insufficient for the increased heat load associated with the LS swap. Upgrading to a larger, more efficient condenser is almost always necessary. Universal condensers are available in various sizes and configurations, requiring careful selection to ensure proper fitment and cooling performance.
The Evaporator: Cooling Core
The evaporator resides inside the car's dashboard, within the HVAC (Heating, Ventilation, and Air Conditioning) box. The high-pressure liquid refrigerant expands into a low-pressure gas, absorbing heat from the air blowing across it. This cooled air is then directed into the cabin. While the stock 240SX evaporator *can* sometimes be retained, its capacity might be a limiting factor, especially in hotter climates. Upgrading to a higher-capacity evaporator core is an option, although it often requires significant modification to the HVAC box.
The Expansion Valve (or Orifice Tube): Metering Refrigerant
The expansion valve (or orifice tube in some systems) meters the flow of high-pressure liquid refrigerant into the evaporator. It's a crucial component for maintaining optimal cooling performance. The expansion valve regulates refrigerant flow based on temperature and pressure, ensuring the evaporator doesn't freeze up. When retaining stock 240SX HVAC components, it is important to know which type of metering device is used.
Refrigerant Lines and Hoses: The Plumbing
These lines and hoses connect all the components, carrying the refrigerant throughout the system. Fabricating custom lines is often necessary in an LS swap due to the different routing requirements. These lines must be compatible with the refrigerant being used and rated for the high pressures involved. Specialized crimping tools are required for creating reliable connections. Always use barrier-type hoses to minimize refrigerant permeation.
The Receiver Drier (or Accumulator): Filtering and Drying
The receiver drier (for systems using an expansion valve) or the accumulator (for systems using an orifice tube) filters out contaminants and absorbs moisture from the refrigerant. This is essential for preventing damage to the compressor and ensuring long-term system reliability. The receiver drier is located in the high-pressure side of the system (between the condenser and the expansion valve), while the accumulator is located in the low-pressure side (between the evaporator and the compressor). Always replace the receiver drier or accumulator whenever the system is opened for service.
Pressure Switches: Safety and Control
Pressure switches monitor the refrigerant pressure and provide crucial safety functions. A low-pressure switch protects the compressor from running without sufficient refrigerant, which can cause damage. A high-pressure switch shuts off the compressor if the pressure becomes too high, preventing system damage from over-pressurization. These switches are often integrated into the wiring harness and are essential for reliable operation.
Challenges of Integration: The Devil in the Details
Integrating air conditioning into an LS-swapped 240SX presents several key challenges:
Mounting the Compressor: Adapting the LS Bracketry
LS engines come in various configurations, and the accessory drive setup can vary significantly. The biggest challenge is finding or fabricating a compressor bracket that properly positions the compressor and aligns the pulley with the engine's crankshaft pulley. Several aftermarket brackets are available, but their fitment and compatibility can vary depending on the specific LS engine and chassis. Custom fabrication may be necessary for optimal results.
Condenser Fitment: Space Constraints
The 240SX engine bay is relatively compact. Fitting a larger, more efficient condenser can be problematic. Careful measurements are essential to ensure proper fitment without interfering with the radiator or other components. Slim-line fans may be necessary to maximize airflow through the condenser.
Refrigerant Line Routing: Clearance and Heat
Routing the refrigerant lines can be tricky, requiring careful consideration to avoid interference with exhaust components, steering shafts, and suspension parts. Lines should be routed away from excessive heat sources to prevent refrigerant breakdown. Proper support and clamping are essential to prevent chafing and leaks.
Wiring Integration: The Electrical Maze
Integrating the AC system's wiring into the 240SX's electrical system can be complex. The LS engine harness typically doesn't include wiring for the 240SX's specific AC controls. A standalone wiring harness or a modified LS harness is usually required. Understanding the wiring diagrams for both the 240SX and the LS engine is essential for successful integration. Retaining the factory 240sx AC amplifier (if equipped) will require research to be properly integrated and can control blower motor speed.
HVAC Control: Retaining Factory Functionality
Ideally, the goal is to retain the factory 240SX HVAC controls. This may require adapting the LS engine's ECU (Engine Control Unit) to receive the 240SX's AC request signal and activate the compressor. Standalone ECUs often have dedicated AC control outputs that can simplify this process.
Solutions and Strategies: Making it Work
Overcoming these challenges requires a strategic approach and careful planning:
Choosing the Right Components: Research and Compatibility
Thorough research is crucial. Identify the specific LS engine being used and its accessory drive configuration. Research aftermarket compressor brackets that are known to work with the 240SX chassis. Select a condenser with sufficient cooling capacity and dimensions that allow for proper fitment. Consider upgrading the evaporator core if necessary. Ensure all components are compatible with the chosen refrigerant.
Custom Fabrication: When Off-the-Shelf Isn't Enough
Custom fabrication may be required for the compressor bracket, refrigerant lines, and mounting points. Consider enlisting the help of a skilled fabricator who is experienced with LS swaps and air conditioning systems. Proper welding and brazing techniques are essential for creating reliable and leak-free connections.
Wiring Harness Integration: Careful Planning and Execution
Carefully analyze the wiring diagrams for both the 240SX and the LS engine. Identify the wires required for the AC system, including the compressor clutch signal, pressure switch signals, and fan control. Either modify the LS engine harness or create a standalone harness to integrate the AC system into the 240SX's electrical system. Use high-quality connectors and terminals to ensure reliable connections. Consider using a relay to power the compressor clutch to reduce the load on the factory wiring. If utilizing aftermarket ECU ensure that the AC request/activation input and compressor control outputs are correctly configured.
Proper Charging and Testing: Ensuring Optimal Performance
Once the system is installed, it must be properly evacuated, charged with the correct amount of refrigerant, and leak-tested. Use a vacuum pump to remove air and moisture from the system before charging. Refer to the manufacturer's specifications for the correct refrigerant charge. Use a leak detector to identify and repair any leaks. Monitoring the high and low side pressures will provide insight into the operation and potential issues with the system.
Integrating air conditioning into an LS-swapped 240SX is a challenging but rewarding project. With careful planning, thorough research, and skilled execution, you can enjoy the performance of an LS engine without sacrificing the comfort of a cool cabin.