Jdm S14 Silvia Front End Conversion Technical Requirements
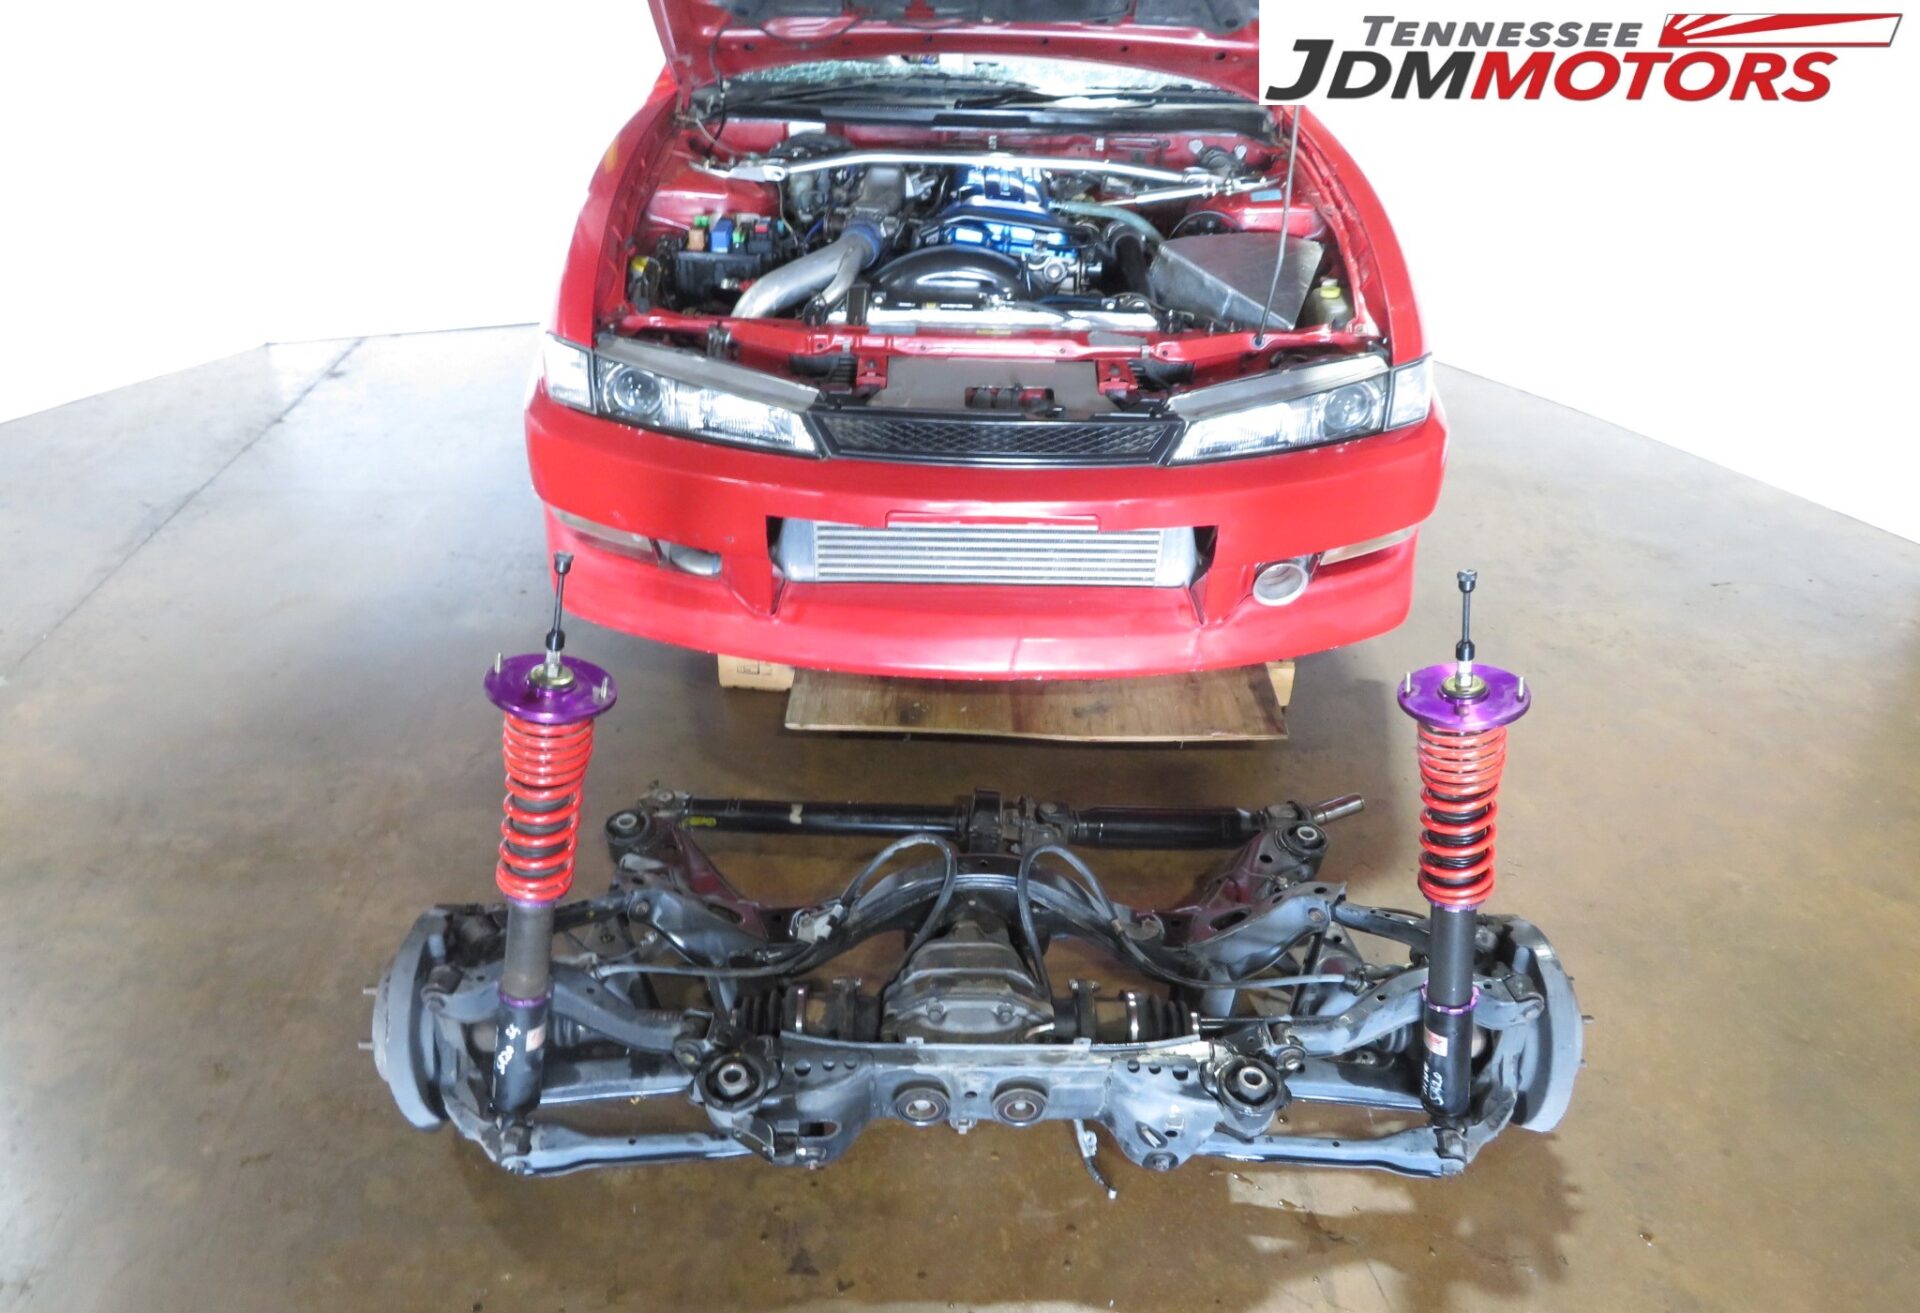
The Nissan Silvia S14, a darling of the drift and tuning scenes, is a car celebrated for its balanced chassis and potent engine potential. One of the most visually striking and sought-after modifications for the S14 is the JDM (Japanese Domestic Market) front end conversion. This swaps the USDM (United States Domestic Market) or EDM (European Domestic Market) front clip – characterized by its distinct split headlights – for the sleeker, more aggressive, and arguably more desirable single projector beam headlights found on the JDM models. This guide breaks down the technical requirements for a successful JDM S14 front end conversion, providing an in-depth look at the necessary parts, modifications, and potential pitfalls.
Understanding the Key Differences
Before diving into the intricacies, it’s crucial to understand the fundamental differences between the USDM/EDM and JDM S14 front ends. The core difference lies in the headlights and associated body panels. The USDM/EDM S14 (often referred to as the "Zenki" in some markets, although technically Zenki refers to the earlier S14, regardless of market) utilizes two separate headlight housings per side, whereas the JDM version, often called the "Kouki" (again, technically referring to the later S14 regardless of market) features a single projector beam headlight. This seemingly small change necessitates alterations across several components.
Headlight Assembly and Mounting Points
The JDM headlights aren't simply a direct bolt-on replacement. They require a different mounting system integrated into the core support. The core support, the structural panel located at the front of the vehicle, needs to be either replaced entirely with a JDM unit or modified to accommodate the JDM headlight mounting points. This is perhaps the most involved part of the conversion.
USDM/EDM core supports lack the necessary brackets and reinforcement for the JDM headlights. Simply drilling holes will not suffice, as the structural integrity and precise alignment are critical. A properly executed conversion involves either welding new brackets onto the existing core support (a task requiring skilled welding and fabrication) or replacing the entire core support with a JDM-spec one. A JDM core support ensures factory fitment and proper headlight alignment.
Hood and Fenders
The hood and fenders are also different between the USDM/EDM and JDM S14. The JDM fenders are subtly reshaped to match the contour of the single projector headlights. While it *is* possible to use USDM/EDM fenders with the JDM headlights, the fitment will be less than ideal, often resulting in gaps and an aesthetically displeasing appearance. Similarly, the hood has a slightly different profile at the front edge where it meets the headlights. Using a USDM/EDM hood with JDM headlights and fenders often results in a small but noticeable gap. For the cleanest and most accurate conversion, JDM fenders and hood are highly recommended.
Bumper and Turn Signals
The front bumper is another key component that must be considered. The USDM/EDM and JDM bumpers have different shapes and mounting points, primarily around the headlight and fender areas. While some have attempted to modify a USDM/EDM bumper to fit, the results are often compromised. Opting for a JDM bumper is the best approach for a seamless integration. Keep in mind that some aftermarket bumpers are designed to mimic the JDM style but might have slight variations in fitment and material quality. Investigate the brand and reviews before making a purchase.
The turn signals are integrated into the JDM headlights, eliminating the separate turn signal housings found on the USDM/EDM bumper. This simplifies the wiring and contributes to the cleaner look. Therefore, you will need to acquire the JDM turn signal bulbs and sockets to properly wire them into the existing harness.
Parts List and Sourcing
The following is a comprehensive list of parts required for a complete JDM S14 front end conversion:
- JDM Headlight Assemblies: This includes both the left and right headlight units. Ensure they are in good condition, with no cracks in the lenses or damage to the housings. Check for any corrosion or damage to the internal reflectors.
- JDM Core Support: The ideal solution for a perfect fit and proper headlight alignment. If you're skilled in welding and fabrication, modifying the existing core support is an option, but a JDM core support is much simpler.
- JDM Fenders: Acquire both left and right fenders in good condition. Check for rust, dents, and any signs of previous repairs.
- JDM Hood: Ensure the hood is free from dents and rust. Inspect the hinge mounting points for any damage.
- JDM Front Bumper: Obtain a JDM bumper in your desired style. Consider both OEM and aftermarket options, weighing the pros and cons of each.
- JDM Turn Signal Bulbs and Sockets: These are necessary to wire the turn signals integrated into the JDM headlights.
- Wiring Harness Adapters (Optional but Recommended): These simplify the wiring process by providing plug-and-play connections between the JDM headlights and the USDM/EDM wiring harness. Without adapters, you'll need to splice and connect wires manually, which can be time-consuming and prone to errors.
- Mounting Hardware: Ensure you have all the necessary bolts, clips, and fasteners to properly secure the new components.
Sourcing these parts can be challenging, especially if you are looking for genuine JDM components. Popular sources include:
- Japanese Auto Importers: These companies specialize in importing JDM parts and vehicles. They often have a wide selection of S14 front end components.
- Online Marketplaces: Sites like eBay and specialized car part forums can be good sources for finding used JDM parts. Exercise caution and thoroughly inspect the parts before purchasing.
- Local Salvage Yards: While less likely to find a complete JDM front end, you might be able to source individual components from imported vehicles.
- Aftermarket Suppliers: Some aftermarket companies offer JDM-style front end conversion kits, which include replicas of the JDM components. These can be a more affordable option, but be mindful of the fitment and quality.
Technical Considerations and Installation
The installation process involves removing the existing USDM/EDM front end components and replacing them with the JDM parts. Here's a step-by-step overview:
- Disassembly: Carefully remove the USDM/EDM headlights, bumper, fenders, and hood. Disconnect all wiring and hoses attached to these components.
- Core Support Preparation: If you're replacing the core support, unbolt the existing unit and install the JDM core support. If you're modifying the existing core support, carefully measure and weld the necessary brackets for the JDM headlight mounting points. Ensure proper alignment and structural integrity.
- Fender Installation: Install the JDM fenders, ensuring they are properly aligned with the doors and the core support.
- Hood Installation: Install the JDM hood, adjusting the hinges for proper alignment with the fenders and the windshield.
- Headlight Installation: Mount the JDM headlights onto the core support, ensuring they are securely fastened and properly aligned.
- Bumper Installation: Install the JDM bumper, aligning it with the fenders and the headlights.
- Wiring: Connect the JDM headlights to the existing wiring harness using the optional wiring harness adapters or by splicing and connecting the wires manually. Ensure proper wiring for the headlights, turn signals, and any other integrated features.
- Alignment: After completing the installation, have the headlights professionally aligned to ensure optimal visibility.
Wiring Considerations
The wiring is arguably the most intricate part. The pinouts for the JDM and USDM/EDM headlights will likely differ. Using a wiring harness adapter simplifies this process considerably. However, if you're opting for a manual wiring solution, you'll need a wiring diagram for both the JDM and USDM/EDM headlights. Use a multimeter to identify the functions of each wire and connect them accordingly. Double-check your connections before powering on the system to avoid short circuits or damage to the electrical system.
Potential Pitfalls and Troubleshooting
Despite careful planning, potential issues can arise during the conversion. Here are some common pitfalls and troubleshooting tips:
- Fitment Issues: Mismatched or incorrectly installed components can lead to fitment issues, such as gaps or misalignment. Double-check the part numbers and ensure all components are properly installed and aligned.
- Wiring Problems: Incorrect wiring can cause the headlights, turn signals, or other electrical components to malfunction. Carefully review the wiring diagrams and double-check all connections.
- Rust and Corrosion: Older JDM parts may have rust or corrosion. Inspect the components thoroughly before installation and address any rust or corrosion issues.
- Headlight Alignment: Incorrect headlight alignment can impair visibility and pose a safety hazard. Have the headlights professionally aligned after completing the installation.
Conclusion
The JDM S14 front end conversion is a significant undertaking that requires careful planning, technical knowledge, and attention to detail. While it can be a challenging project, the aesthetic transformation is undeniable. By understanding the technical requirements, sourcing the correct parts, and meticulously following the installation process, you can successfully convert your S14 and achieve the coveted JDM look. Remember to prioritize safety, and don't hesitate to seek professional assistance if you encounter any difficulties. The key to a successful conversion lies in preparation, patience, and a commitment to quality.