Ls Engine Mount Fabrication And Vibration Dampening
So, you're diving into the world of LS swaps, huh? Excellent choice! These engines are powerhouses. But getting that LS nestled properly into your project car requires more than just brute force; it's about precision, thoughtful design, and understanding how to manage vibrations. This guide walks you through the process of fabricating LS engine mounts and effectively dampening vibrations for a smooth, reliable ride.
Understanding the Challenges
Before we even touch metal, let's address the challenges. An LS engine, like any internal combustion engine, generates significant vibrations. These vibrations, if unchecked, can lead to:
- Fatigue failure: Metal components, especially welds, can crack and fail prematurely due to constant stress.
- Noise, Vibration, and Harshness (NVH): An unpleasant driving experience with rattling, buzzing, and overall discomfort.
- Damage to surrounding components: Vibrations can loosen bolts, damage wiring, and even affect the performance of other systems.
Therefore, engine mounts serve two crucial purposes: supporting the engine and isolating the chassis from engine vibrations. Accomplishing both requires careful consideration of material selection, mount design, and vibration damping techniques.
Step-by-Step Mount Fabrication
1. Assessment and Planning
This is where careful planning saves you headaches later. Consider these factors:
- Engine Placement: Determine the ideal engine position within the engine bay. Factors to consider include driveshaft alignment, header clearance, steering components, and weight distribution.
- Existing Frame Mounts: Evaluate if you can adapt existing frame mounts or if you need to fabricate new ones entirely.
- Desired Mount Style: Choose between solid mounts, polyurethane mounts, or rubber mounts. Each has its advantages and disadvantages, which we'll discuss later.
- Fabrication Tools and Skills: Assess your welding skills, metalworking equipment, and access to tools like a plasma cutter, band saw, and drill press. If you're uncomfortable with welding, consider outsourcing this crucial step.
2. Material Selection
The choice of materials is critical for both strength and vibration damping. Here's a breakdown:
- Mounting Plates: Typically, 1/4" to 3/8" thick mild steel plate is sufficient. Always use a high-quality steel like A36 for strength and weldability.
- Tubing/Box Steel: For mount arms, 1.5" to 2" diameter DOM (Drawn Over Mandrel) tubing or equivalent box steel provides excellent strength and rigidity. DOM tubing offers superior dimensional accuracy and a smoother surface finish compared to ERW (Electric Resistance Welded) tubing.
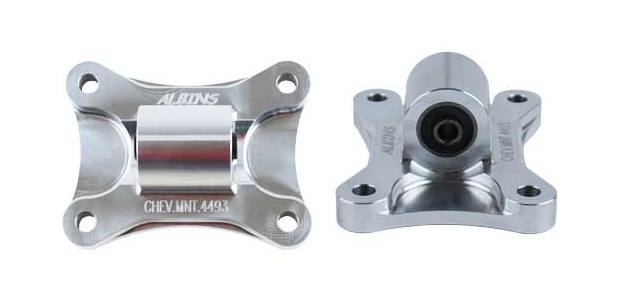
- Mount Bushings/Isolators: This is where you introduce vibration damping. We'll cover the options in detail later.
3. Mock-Up and Measurement
A precise mock-up is essential for accurate fabrication. Here's how:
- Engine Support: Use an engine hoist or engine stand to support the LS engine in its desired position within the engine bay.
- Cardboard Templates: Create cardboard templates of the mounting plates. This allows you to visualize the mount design and check for clearance issues before cutting metal.
- Measurements: Take precise measurements between the engine mounting points and the frame rails. Pay close attention to angles and offsets. Use a digital angle finder for accurate angle measurements.
- Test Fit: Test fit the cardboard templates in the engine bay to ensure proper clearance around exhaust, steering, and other components.
4. Fabrication
Now comes the fun part – cutting, welding, and shaping the metal:
- Cutting: Use a plasma cutter, band saw, or cutting torch to cut the mounting plates and tubing according to your templates. Wear appropriate safety gear, including eye protection and welding gloves.
- Welding: TIG (Tungsten Inert Gas) welding is generally preferred for its precision and clean welds, but MIG (Metal Inert Gas) welding is also acceptable if performed correctly. Ensure proper penetration and fusion of the weld metal to avoid future failures. Use a high-quality welding wire and shielding gas.
- Grinding and Finishing: Grind down any sharp edges or weld spatter for a clean and professional look.
- Test Fitting: Continuously test fit the fabricated mounts to the engine and frame during the fabrication process to ensure proper alignment and fitment.
5. Installation
Careful installation is as important as fabrication. Here's what to do:
- Bolt Selection: Use high-strength Grade 8 bolts for securing the engine mounts to the engine and frame. Always use new bolts; never reuse old hardware.
- Torque Specifications: Torque the bolts to the manufacturer's recommended specifications. Use a calibrated torque wrench to ensure accurate torque.
- Threadlocker: Apply a threadlocker like Loctite to prevent bolts from loosening due to vibration.
- Alignment: Double-check the engine alignment after installation. Ensure the driveshaft is properly aligned and there are no binding or clearance issues.
Vibration Dampening Techniques
Now, let's delve into the crucial aspect of vibration damping. Here are the common approaches:
1. Mount Bushings/Isolators
These are the primary vibration isolation components. Here's a comparison:
- Solid Mounts: These offer the most direct connection between the engine and chassis, resulting in minimal engine movement and improved throttle response. However, they transmit the most vibration and are generally not recommended for street-driven vehicles. They are best suited for racing applications where performance is paramount.
- Rubber Mounts: These provide excellent vibration isolation and are relatively inexpensive. However, they tend to be soft and can allow for excessive engine movement under hard acceleration or cornering. Over time, rubber can degrade and crack, requiring replacement.
- Polyurethane Mounts: These offer a good compromise between vibration isolation and engine stability. They are stiffer than rubber mounts, providing better throttle response and reduced engine movement. However, they transmit more vibration than rubber mounts but less than solid mounts. Polyurethane is also more durable than rubber and resistant to oil and chemicals. Polyurethane mounts are a popular choice for street/strip applications.
- Hydraulic Mounts: These are more sophisticated mounts that use fluid-filled chambers to dampen vibrations. They provide excellent vibration isolation and engine stability but are more expensive and complex than rubber or polyurethane mounts. Hydraulic mounts are often found in luxury vehicles.
2. Harmonic Balancer
The harmonic balancer (or crankshaft damper) is designed to absorb torsional vibrations of the crankshaft. Ensure you're using a balancer designed for your specific LS engine. An underperforming or damaged harmonic balancer can significantly increase vibrations.
3. Exhaust Hangers
Properly designed exhaust hangers are essential for preventing exhaust vibrations from transferring to the chassis. Use rubber isolators to decouple the exhaust system from the frame. Avoid rigid exhaust hangers that can transmit vibrations directly to the chassis.
4. Sound Deadening Materials
While not directly related to engine mount fabrication, sound deadening materials like Dynamat can significantly reduce NVH. Applying these materials to the floor pan, firewall, and doors can absorb vibrations and reduce noise levels in the cabin.
Choosing the Right Approach
The optimal approach for engine mount fabrication and vibration damping depends on your specific application and budget. For a dedicated race car, solid mounts might be acceptable. For a daily driver, polyurethane or rubber mounts are more suitable.
Ultimately, the key is to plan carefully, fabricate accurately, and choose the right components to achieve a balance between performance, comfort, and durability. Don't be afraid to research and experiment to find the best solution for your project.