Mass Air Flow Sensor 2019 Nissan Altima
Experiencing rough idling, poor acceleration, or a check engine light on your 2019 Nissan Altima? One potential culprit could be a faulty Mass Air Flow (MAF) sensor. Don't panic! This isn't always a disastrous problem, and often it's something you can diagnose and even potentially fix yourself. Let's dive into understanding the MAF sensor, its symptoms, and how to troubleshoot and potentially resolve the issue.
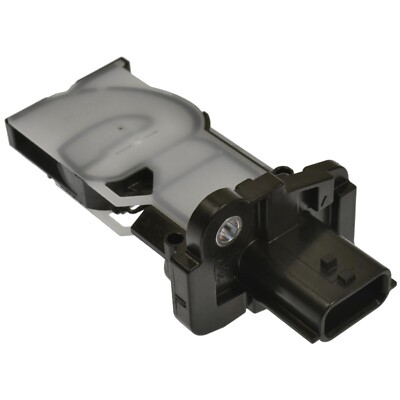
Understanding the Mass Air Flow (MAF) Sensor
The MAF sensor is a crucial component in your Altima's engine management system. Its primary function is to measure the amount of air entering the engine. This information is then relayed to the car's computer (ECU), which uses it to calculate the correct amount of fuel to inject for optimal combustion. Think of it as the engine's 'air intake' reporter, making sure the fuel/air mixture is just right.
Without a properly functioning MAF sensor, the engine won't receive the correct air/fuel mixture. This can lead to a range of performance problems.
Symptoms of a Failing MAF Sensor in a 2019 Nissan Altima
Here are some common warning signs indicating a potential MAF sensor issue in your 2019 Altima:
- Check Engine Light: This is often the first indication. The OBD-II diagnostic system will likely store codes related to the MAF sensor, such as P0100, P0101, P0102, or P0103. Getting the codes read at an auto parts store or with a scan tool is the first step.
- Rough Idling: The engine may idle erratically, stall, or feel shaky, especially when cold.
- Poor Acceleration: You might notice a significant decrease in power, especially when trying to accelerate quickly. The engine may hesitate or stumble.
- Reduced Fuel Economy: An incorrect air/fuel mixture can lead to wasted fuel, resulting in lower MPG.
- Stalling: The engine might stall unexpectedly, particularly at low speeds or when coming to a stop.
- Hesitation or Jerking: The car may hesitate or jerk during acceleration.
- Difficulty Starting: In some cases, a faulty MAF sensor can make it difficult to start the engine.
It's important to note that these symptoms can also be caused by other issues, so proper diagnosis is crucial.
Diagnosing the MAF Sensor
Before rushing to replace the MAF sensor, let's try to pinpoint if it's truly the problem.
Step 1: Read the Diagnostic Trouble Codes (DTCs)
Use an OBD-II scanner to retrieve any stored trouble codes. You can purchase a scanner relatively inexpensively, or many auto parts stores will read the codes for free. Record all the codes, but pay close attention to those related to the MAF sensor. Common codes include:
- P0100: Mass Air Flow Circuit Malfunction
- P0101: Mass Air Flow Circuit Range/Performance
- P0102: Mass Air Flow Circuit Low Input
- P0103: Mass Air Flow Circuit High Input
Important: Write down all codes and their descriptions. This information will be valuable for further troubleshooting.
Step 2: Visual Inspection
Carefully inspect the MAF sensor and its wiring. Look for:
- Loose or Damaged Wiring: Check for any frayed, cracked, or disconnected wires leading to the sensor.
- Corrosion: Examine the electrical connector for signs of corrosion.
- Contamination: Look for dirt, debris, or oil on the sensor element. A dirty sensor can provide inaccurate readings.
- Air Leaks: Inspect the air intake system for any leaks between the air filter and the throttle body. Leaks can disrupt the airflow and affect the MAF sensor's accuracy.
Step 3: Cleaning the MAF Sensor (If Applicable)
If the sensor element appears dirty, try cleaning it with a specialized MAF sensor cleaner. Do not use carburetor cleaner or other harsh chemicals, as these can damage the delicate sensor wires.
Tools Needed:
- MAF sensor cleaner
- Screwdriver (to remove the sensor)
Procedure:
- Disconnect the negative battery terminal.
- Locate the MAF sensor (usually near the air filter box).
- Disconnect the electrical connector from the sensor.
- Remove the sensor from the air intake tube (usually held in place by screws).
- Spray the sensor element liberally with MAF sensor cleaner, following the instructions on the can. Avoid touching the sensor wires with anything.
- Allow the sensor to air dry completely before reinstalling.
- Reinstall the sensor, reconnect the electrical connector, and reconnect the negative battery terminal.
Important: Be gentle when handling the MAF sensor, as the sensor wires are fragile. Always disconnect the battery before working on electrical components.
Step 4: Testing the MAF Sensor (Advanced)
For more advanced diagnosis, you can use a multimeter to test the MAF sensor's output voltage. This requires a bit of electrical knowledge and access to the wiring diagram for your specific 2019 Altima model. The typical voltage range should be between 0.5 and 1.5 volts at idle.
Caution: Incorrectly testing electrical components can damage them. If you're not comfortable with electrical testing, it's best to consult a qualified mechanic.
Possible Solutions
Based on your diagnosis, here are the possible solutions:
- MAF Sensor Cleaning: If the sensor was simply dirty, cleaning it may resolve the issue.
- MAF Sensor Replacement: If the sensor is damaged or faulty, it will need to be replaced.
- Wiring Repair: If there are damaged wires or a corroded connector, repairing or replacing them may fix the problem.
- Air Intake System Repair: If there are air leaks in the intake system, they need to be sealed to ensure accurate MAF sensor readings.
- ECU Reset: After cleaning or replacing the MAF sensor, it's a good idea to reset the ECU by disconnecting the negative battery terminal for about 15 minutes. This will allow the ECU to relearn the engine's parameters.
Replacing the MAF Sensor
If cleaning doesn't solve the problem, replacing the MAF sensor is often the next step. Here's a general guide (always refer to your vehicle's repair manual for specific instructions):
Tools Needed:
- New MAF sensor (be sure to get the correct part for your 2019 Nissan Altima)
- Screwdriver
- Socket set (may be required depending on the sensor mounting)
Procedure:
- Disconnect the negative battery terminal.
- Locate the MAF sensor.
- Disconnect the electrical connector.
- Remove the old MAF sensor from the air intake tube.
- Install the new MAF sensor, ensuring it's properly seated and secured.
- Reconnect the electrical connector.
- Reconnect the negative battery terminal.
- Start the engine and check for proper operation.
- Clear the Diagnostic Trouble Codes (DTCs) with your OBD-II scanner.
Important: Ensure you purchase a replacement MAF sensor from a reputable source to guarantee quality and compatibility. Aftermarket sensors can sometimes cause issues.
Estimated Repair Costs
Here's a rough estimate of the costs involved:
- MAF Sensor Cleaner: $10 - $20
- Replacement MAF Sensor: $80 - $250 (depending on brand and source)
- Professional Diagnosis and Repair: $100 - $400 (depending on labor rates)
Note: These are just estimates. Actual costs may vary depending on your location and the specific parts and labor rates.
When to Seek Professional Help
While cleaning or replacing the MAF sensor can be a DIY project, there are times when it's best to consult a qualified mechanic:
- If you're not comfortable working on your car's engine.
- If you're unable to diagnose the problem yourself.
- If the check engine light persists after cleaning or replacing the sensor.
- If you suspect a more complex issue with the engine management system.
A professional mechanic can perform a thorough diagnosis, identify the root cause of the problem, and recommend the appropriate repairs.
Preventative Maintenance
To help prevent future MAF sensor issues, consider the following:
- Regular Air Filter Replacement: A clean air filter helps prevent dirt and debris from entering the engine and contaminating the MAF sensor. Follow the manufacturer's recommended replacement intervals.
- Avoid Oiling Air Filters Excessively: If you use an oiled air filter, avoid over-oiling it, as excess oil can get onto the MAF sensor and cause problems.
By understanding the MAF sensor and its function, you can better diagnose and address potential issues with your 2019 Nissan Altima. Remember to always prioritize safety and consult a professional if you're unsure about any aspect of the repair process. Good luck!