Nissan 240sx Headlight Motor: Repair And Replacement
The Nissan 240SX, particularly the S13 (1989-1994) model, is beloved for its sleek design, rear-wheel drive, and tunability. A distinctive feature of the S13 is its pop-up headlights. However, these iconic headlights are prone to failure due to their reliance on electric motors and linkages that can wear out or break over time. This article will guide you through the process of diagnosing, repairing, and replacing the headlight motor in your 240SX.
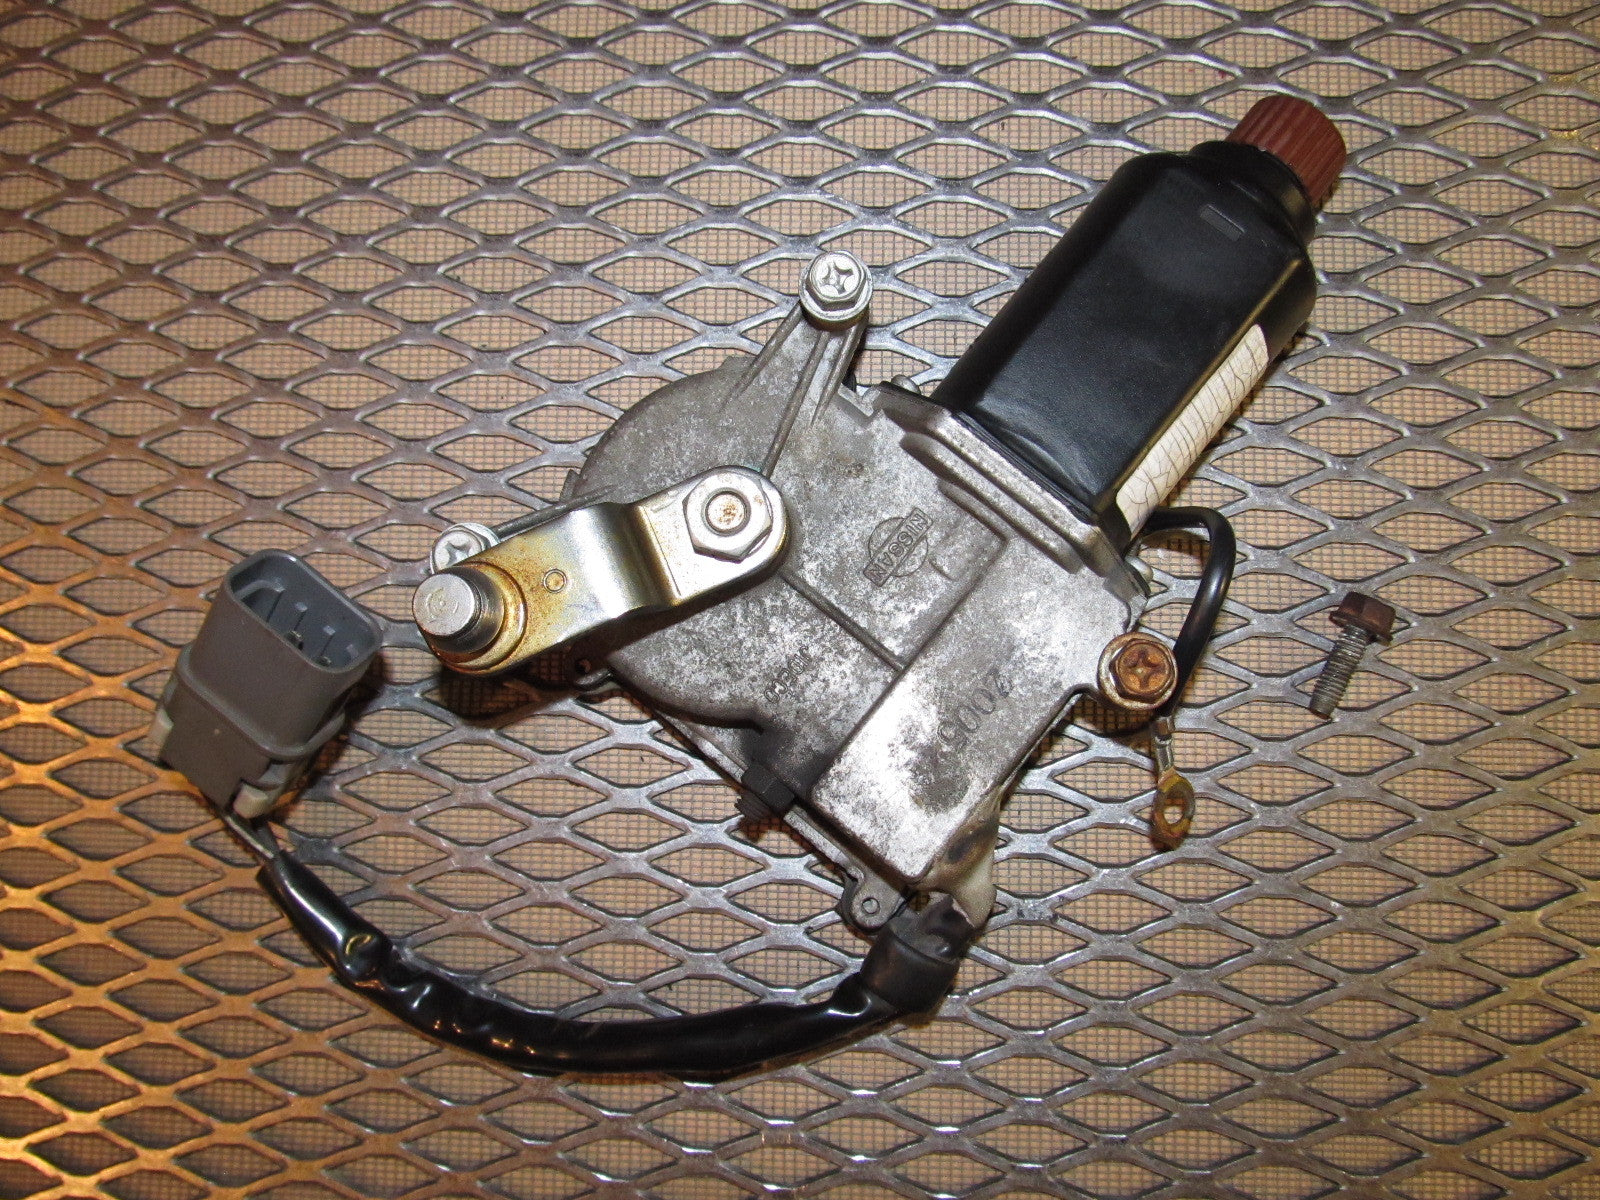
Understanding the 240SX Headlight System
Before diving into repairs, it's essential to understand how the headlight system works. Each headlight assembly has its own dedicated motor, gearbox, and linkage system. When you activate the headlights, the headlight switch sends power to both headlight motors simultaneously. These motors, through a worm gear and linkage, rotate the headlight bucket upwards, exposing the headlight. When you turn the headlights off, the motors reverse, retracting the headlights.
The system includes limit switches. These limit switches are crucial because they tell the motor when the headlight has reached its fully opened or fully closed position. Once either of these positions are reached, the switch cuts power to the motor, preventing it from over-rotating and damaging the mechanism. Failure of these limit switches can lead to the motor continuing to run, grinding gears, or burning out.
Diagnosing Headlight Motor Problems
Identifying the cause of a headlight malfunction is the first step. Here are common symptoms and potential causes:
Symptom: One Headlight Doesn't Pop Up/Down
- Possible Causes:
- Faulty Headlight Motor: The motor itself could be dead or have internal damage.
- Broken Linkage: The plastic or metal arms connecting the motor to the headlight bucket can break.
- Stuck Headlight Bucket: Debris or corrosion can prevent the headlight from moving freely.
- Wiring Issue: A break in the wiring harness supplying power to the motor.
- Blown Fuse: The headlight circuit fuse could be blown.
Symptom: Both Headlights Don't Pop Up/Down
- Possible Causes:
- Faulty Headlight Switch: The switch itself could be defective.
- Blown Fuse: The headlight circuit fuse could be blown.
- Wiring Issue: A break in the main power or ground wiring for the headlights.
- Both Headlight Motors Failed Simultaneously (Unlikely, but Possible): Especially if they were old.
Symptom: Headlight Motor Runs Continuously
- Possible Causes:
- Faulty Limit Switch: The limit switch isn't cutting power to the motor when the headlight is fully opened or closed.
- Wiring Short: A short in the wiring can cause the motor to run continuously.
Initial Diagnostic Steps:
- Check the Fuse: Locate the headlight fuse in the fuse box (usually under the dash or in the engine bay). Consult your owner's manual for the correct fuse location and amperage. If the fuse is blown, replace it with a new one of the same amperage. If the new fuse blows immediately, there's likely a short circuit in the wiring.
- Listen for the Motor: When you activate the headlights, listen closely near the headlight assembly. Can you hear the motor running? If you can hear it running but the headlight isn't moving, the linkage is likely broken. If you hear nothing, proceed to the next step.
- Check the Wiring: Use a multimeter to check for voltage at the headlight motor connector when the headlights are activated. If you don't have voltage, trace the wiring back towards the headlight switch, looking for breaks or corrosion. Use a wiring diagram (readily available online for the 240SX) to help you identify the correct wires.
- Manually Actuate the Headlight: With the headlights off, try to gently push the headlight bucket up and down. Does it move freely? If not, lubricate the hinges and pivot points with a silicone-based lubricant.
Headlight Motor Repair
If the diagnosis points to a faulty motor, you can attempt a repair before resorting to a full replacement. Often, the problem is related to the internal gears or the limit switches.
Disassembly and Inspection:
- Disconnect the Battery: Always disconnect the negative battery terminal before working on electrical components.
- Remove the Headlight Assembly: This usually involves removing a few bolts or screws that secure the assembly to the car. Refer to your service manual for specific instructions.
- Remove the Headlight Motor: Disconnect the electrical connector and remove the bolts holding the motor to the headlight assembly.
- Disassemble the Motor Housing: Carefully disassemble the motor housing. Pay attention to the orientation of the internal components. Take pictures as you go to help with reassembly.
- Inspect the Gears: Check the gears for wear or broken teeth. If the gears are damaged, you might be able to find replacement gears online or from a specialty parts supplier.
- Inspect the Limit Switches: Clean the limit switch contacts with electrical contact cleaner. Use a multimeter to test the continuity of the switches. They should be closed in one position and open in the other. If they are not functioning correctly, they need to be replaced. Finding direct replacements can be difficult. Sometimes you can adapt similar switches if you are savvy.
- Clean and Lubricate: Clean all the internal components with a solvent. Lubricate the gears with a high-quality grease suitable for plastic gears.
Reassembly and Testing:
- Reassemble the Motor Housing: Carefully reassemble the motor housing, ensuring all the components are in their correct positions.
- Test the Motor: Before reinstalling the motor in the car, connect it to a 12V power source and test its operation. Make sure it runs smoothly and stops when the limit switches are activated.
- Reinstall the Motor and Headlight Assembly: Reinstall the motor and headlight assembly in the car. Connect the electrical connector and secure the assembly with the bolts.
- Test the Headlights: Reconnect the battery and test the headlights. They should pop up and down smoothly and stop in the correct positions.
Headlight Motor Replacement
If repair is not possible or practical, replacing the headlight motor is the next option. You can purchase new or remanufactured headlight motors from auto parts stores or online retailers.
Replacement Procedure:
- Disconnect the Battery: As always, disconnect the negative battery terminal before starting.
- Remove the Old Headlight Motor: Follow the steps outlined in the "Disassembly and Inspection" section above to remove the old headlight motor.
- Install the New Headlight Motor: Install the new headlight motor in the reverse order of removal. Make sure the linkage is properly connected and the motor is securely bolted in place.
- Test the Headlights: Reconnect the battery and test the headlights. They should pop up and down smoothly and stop in the correct positions.
Important Note: When installing a new or remanufactured headlight motor, make sure to adjust the linkage if necessary. The linkage controls the travel of the headlight bucket, and improper adjustment can cause the headlight to not open or close fully. Typically, the linkage is adjusted by loosening a bolt or nut and rotating the linkage arm until the headlight is in the correct position.
Upgrades and Modifications
While you're working on your headlight system, you might consider some upgrades or modifications:
- HID or LED Conversion: Upgrade your headlights to HID (High-Intensity Discharge) or LED bulbs for improved visibility. Be sure to choose bulbs that are compatible with the 240SX's headlight housings.
- Headlight Motor Upgrade: Some aftermarket companies offer upgraded headlight motors that are more powerful and reliable than the OEM motors.
- Manual Headlight Conversion: Some owners opt to convert their pop-up headlights to manual operation, eliminating the need for the motors and linkages altogether. This is often done for weight reduction or aesthetic purposes.
Final Thoughts
Maintaining the pop-up headlights on your Nissan 240SX can be a rewarding experience. While the system can be prone to failure, with a bit of knowledge and patience, you can diagnose and repair most problems yourself. Remember to always prioritize safety and disconnect the battery before working on electrical components. By following the steps outlined in this article, you can keep your 240SX's headlights working properly and enjoy its iconic design for years to come.