Nissan 240sx Kouki Conversion Kit
The Nissan 240SX, particularly the S14 chassis, remains a darling of the drifting and modification scenes. Among the various modifications available, the "Kouki" conversion is particularly popular. Kouki, meaning "late model" in Japanese, refers specifically to the 1997-1998 model years of the S14. This article delves into the technical aspects of a Kouki conversion kit, explaining what it entails, the engineering considerations, and the potential challenges involved.
Understanding the Aesthetic and Functional Differences
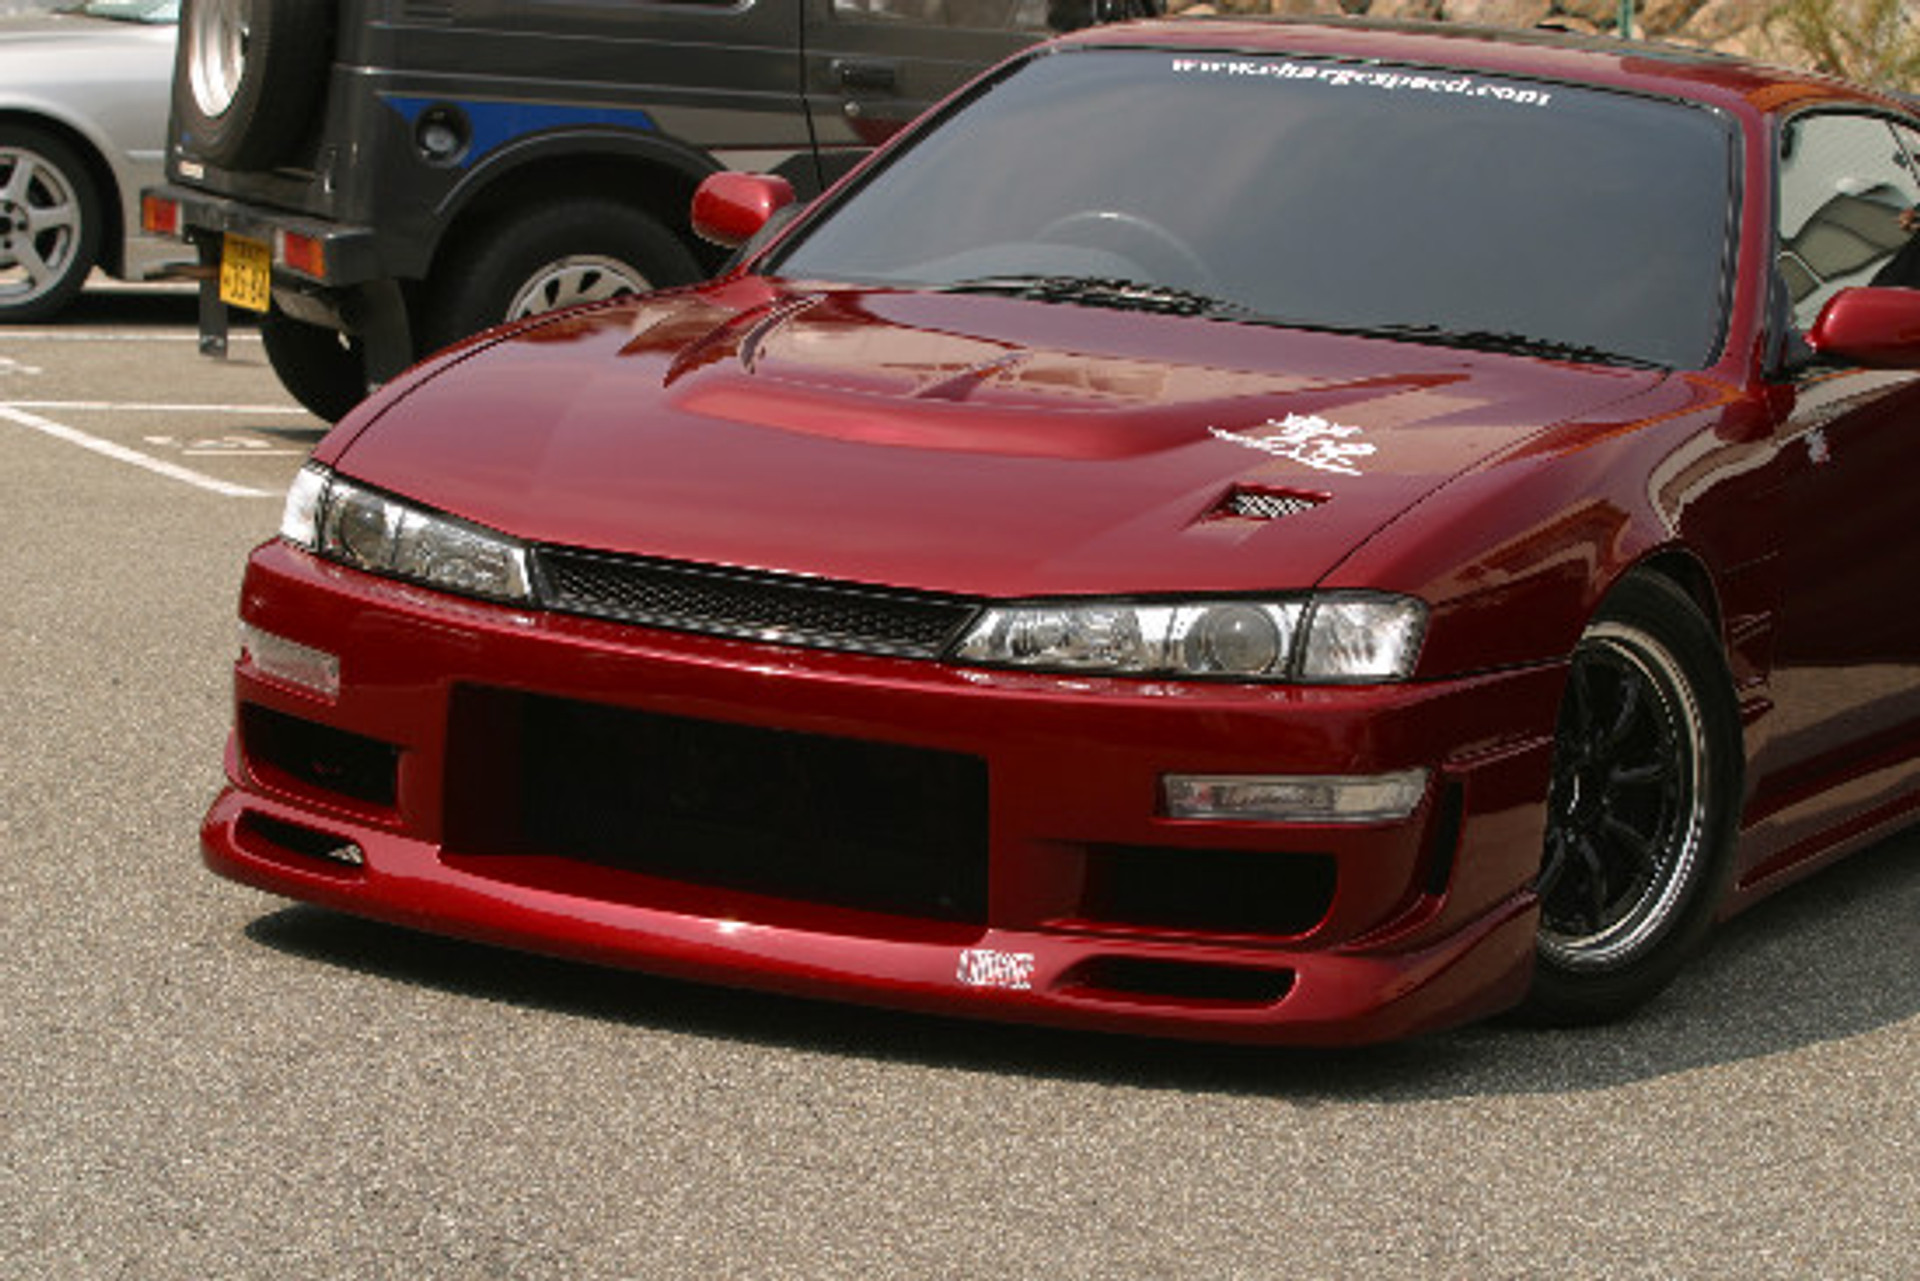
Before discussing the conversion process itself, it's crucial to understand what distinguishes a Kouki 240SX from its Zenki (early model, 1995-1996) counterpart. The most immediately noticeable difference lies in the front and rear end styling. The Kouki features a more aggressive and angular front bumper, headlights, and grille, along with redesigned taillights and a different rear bumper. These changes weren't purely aesthetic; they subtly improved aerodynamics and offered a more modern (for the time) appearance.
While the core mechanical components remained largely unchanged between the Zenki and Kouki, the visual differences are significant enough to warrant a full conversion if one desires the later model's look. However, it's vital to recognize that a Kouki conversion kit typically focuses on the exterior panels. Any mechanical upgrades associated with later 240SX models, like minor ECU revisions or interior changes, require separate and independent modifications.
The Kouki Conversion Kit: Components and Considerations
A typical Kouki conversion kit usually includes the following components:
- Front Bumper: The main aesthetic element. This is typically a fiberglass or polyurethane replica of the OEM Kouki bumper. Fitment and material quality are crucial considerations. Poorly made bumpers can suffer from warping, cracking, and inconsistent mounting points.
- Headlights: Kouki headlights have a distinct projector beam design, compared to the Zenki's reflector-based lights. The kit may or may not include the necessary bulbs and wiring harness adapters.
- Grille: A small but important detail that complements the front bumper and headlights.
- Turn Signals/Corner Lights: These are typically integrated into the Kouki headlights or the bumper itself and are designed specifically for the Kouki style.
- Rear Bumper: Similar to the front bumper, this is a fiberglass or polyurethane replica that replaces the Zenki rear bumper.
- Taillights: The Kouki taillights feature a different internal layout and lens design than the Zenki lights. These are generally direct bolt-on replacements.
- Mounting Hardware: While some kits include mounting hardware, it's often recommended to source high-quality bolts, nuts, and clips separately to ensure a secure and durable installation.
When selecting a Kouki conversion kit, several factors should be carefully considered:
Material Quality and Fitment
As mentioned previously, the material quality and fitment of the bumper components are paramount. Fiberglass is a common material due to its relatively low cost, but it's also brittle and prone to cracking. Polyurethane is more flexible and durable but generally more expensive. Pay close attention to reviews and reputation when choosing a manufacturer. Poor fitment can lead to significant alignment issues, requiring extensive bodywork to correct.
Headlight Wiring
The Kouki headlights use a different wiring configuration than the Zenki lights. Most kits require the use of wiring harness adapters to ensure proper functionality. It is essential to use the correct adapters to avoid damaging the electrical system.
Paint and Finish
Conversion kits typically arrive unpainted and require professional painting to match the car's existing color. Factor in the cost of painting when budgeting for the conversion. Proper surface preparation is crucial for a long-lasting and aesthetically pleasing finish. Consider using a reputable body shop with experience painting aftermarket body kits.
OEM vs. Aftermarket
Original equipment manufacturer (OEM) Kouki parts are often preferred for their superior fitment and quality. However, they are significantly more expensive and difficult to find compared to aftermarket replicas. Aftermarket options offer a more cost-effective alternative, but it's crucial to do thorough research to ensure the quality meets your standards.
The Installation Process: A Step-by-Step Overview
The Kouki conversion process involves several steps, requiring patience, mechanical aptitude, and attention to detail. While a professional body shop is recommended for optimal results, a competent DIYer can perform the conversion with the proper tools and guidance.
- Disassembly: Begin by carefully removing the existing Zenki front and rear bumpers, headlights, grille, and taillights. Take note of the mounting points and hardware used, as you'll need them for reassembly. Store the removed parts safely.
- Test Fitting: Before painting, test fit all the new Kouki components to ensure proper alignment and identify any potential fitment issues. This step is critical. Address any problems before proceeding to the next stage. Minor adjustments may be necessary.
- Bodywork (If Necessary): If the fitment is less than ideal, bodywork may be required to modify the mounting points or reshape the bumper to achieve proper alignment. This may involve sanding, filling, and shaping the fiberglass or polyurethane.
- Painting: Once the fitment is satisfactory, prepare the Kouki components for painting. This involves cleaning, sanding, and priming the surfaces. Apply multiple coats of paint, followed by a clear coat for protection and shine.
- Headlight Wiring: Install the headlight wiring harness adapters according to the manufacturer's instructions. Ensure all connections are secure and properly insulated.
- Reassembly: Reinstall the Kouki front bumper, headlights, grille, rear bumper, and taillights. Use the original mounting hardware or replace it with new hardware if necessary. Ensure all components are securely fastened.
- Alignment and Adjustments: After reassembly, check the alignment of the headlights and bumpers. Make any necessary adjustments to ensure proper fitment and functionality.
Potential Challenges and Solutions
The Kouki conversion process is not without its potential challenges. Here are some common issues and possible solutions:
- Poor Fitment: As mentioned earlier, poor fitment is a common issue with aftermarket body kits. Solutions include bodywork to modify the mounting points, using heat guns to reshape the bumper, or opting for a higher-quality kit from a reputable manufacturer.
- Headlight Wiring Issues: Incorrect wiring can lead to non-functional headlights or damage to the electrical system. Double-check the wiring diagrams and use the correct adapters. If unsure, consult a qualified electrician.
- Bumper Sagging: Over time, the fiberglass or polyurethane bumper can sag, especially if it's not properly supported. Consider adding additional support brackets or using a more rigid material for the bumper.
- Color Matching Issues: Achieving a perfect color match can be challenging, especially with older vehicles where the paint may have faded. Work with a skilled painter who can blend the new paint seamlessly with the existing paint.
Conclusion
A Kouki conversion can dramatically transform the appearance of a Zenki 240SX, giving it a more modern and aggressive look. However, it's a project that requires careful planning, attention to detail, and a willingness to address potential challenges. By understanding the components involved, the installation process, and the potential pitfalls, enthusiasts can successfully complete a Kouki conversion and enjoy the updated aesthetics of their beloved 240SX. Remember to prioritize quality over cost, and don't hesitate to seek professional assistance when needed. A well-executed Kouki conversion will not only enhance the visual appeal of your car but also increase its value and desirability within the 240SX community.