Nissan 240sx S13 Headlight Options: Upgrade Guide
So, you're looking at upgrading or replacing the headlights on your Nissan 240SX S13? You've come to the right place. The S13, with its iconic pop-up headlights or the fixed headlight conversions, has always been a favorite for customization. But let's face it, those original headlights are getting old, dim, and sometimes just plain broken. This guide will walk you through the various options, common problems, and how to tackle them.
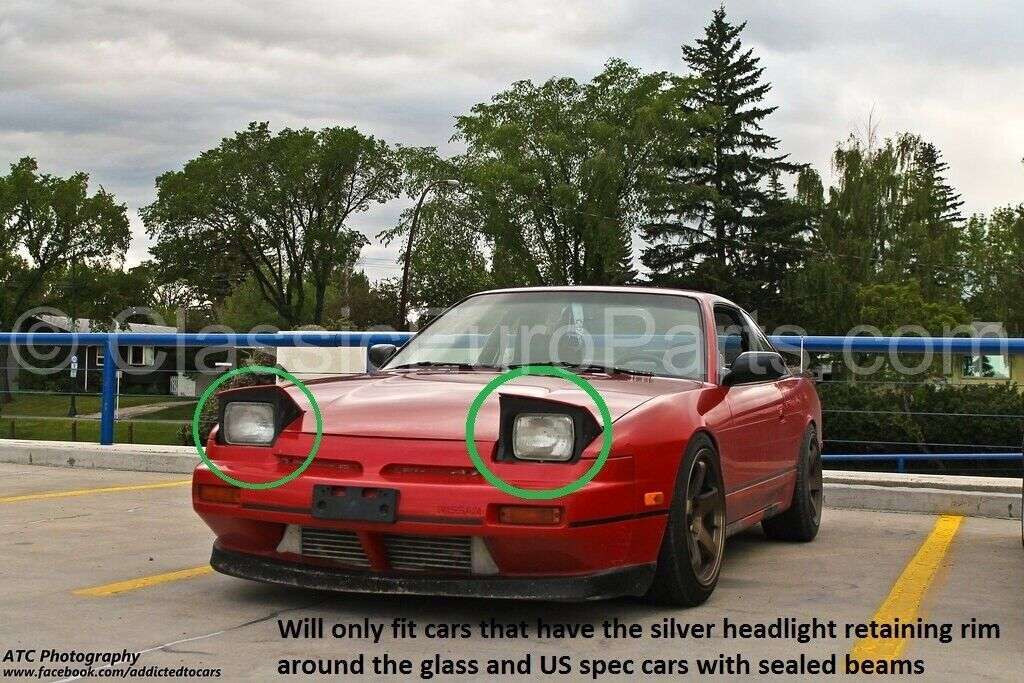
Understanding Your S13 Headlight Situation
First, let's identify what you're dealing with. There are generally three categories:
- Original Pop-Up Headlights: These are the factory-installed, retractable headlights. They look cool, but the mechanisms can be finicky, and the light output isn't great by modern standards.
- Fixed Headlight Conversions: These kits replace the pop-up headlights with fixed units, usually offering a more modern look and potentially better performance.
- Existing Aftermarket Headlights: Perhaps you already have an aftermarket setup, but it's malfunctioning or you're simply looking for something better.
Regardless of your starting point, the goal is the same: better visibility and a more reliable lighting system.
Common S13 Headlight Problems (and Solutions)
Pop-Up Headlight Motor Failure
This is probably the most frequent headache for S13 owners with the original pop-up headlights. One or both headlights refuse to open or close properly. Here's the breakdown:
Symptoms:
- Headlight doesn't pop up or down.
- Headlight moves slowly or erratically.
- Grinding noises coming from the headlight motor.
Solutions:
- Check the Fuses: Start with the basics. A blown fuse is a simple fix. Consult your owner's manual for the headlight fuse location.
- Inspect the Wiring: Look for damaged, corroded, or disconnected wires near the headlight motor. Repair or replace as needed. Use dielectric grease on connections to prevent future corrosion.
- Rebuild the Motor: The headlight motor contains plastic gears that are prone to wear and breakage. Repair kits containing replacement gears are available. This is a DIY-friendly option if you're comfortable with basic mechanical work. Expect to spend around $30-$50 for a gear kit.
- Replace the Motor: If the motor itself is shot, replacement is the only option. You can find used motors (proceed with caution) or new aftermarket units. New aftermarket motors range from $80-$150 each.
Tools Needed: Screwdrivers (Phillips and flathead), socket set, wire stripper/crimper (if wiring repairs are necessary), multimeter (for testing wiring), pliers.
Dim or Yellowed Headlights
Even if your headlights are functioning correctly, the lenses can become cloudy or yellowed over time, significantly reducing light output. This is caused by UV damage and oxidation.
Symptoms:
- Reduced visibility at night.
- Headlights appear cloudy or yellowed.
Solutions:
- Headlight Restoration Kit: These kits contain abrasive compounds and polishing pads to remove the damaged outer layer of the lens. They're relatively inexpensive and can produce impressive results. Expect to spend $20-$40 for a decent kit. Remember to apply a UV protectant after polishing to prevent the yellowing from returning quickly.
- Professional Headlight Restoration: If you're not comfortable doing it yourself, a professional detailer can restore your headlights. This typically costs around $50-$100 per headlight.
- Headlight Replacement: If the damage is severe or you're simply looking for an upgrade, consider replacing the entire headlight assembly.
Tools Needed: (For DIY restoration) Sandpaper (various grits), polishing compound, polishing pads, drill (optional), masking tape, microfiber cloths.
Poor Light Output
Even with clear lenses, the original S13 headlights often suffer from poor light output due to outdated bulb technology.
Symptoms:
- Difficulty seeing at night.
- Weak or dim headlight beams.
Solutions:
- Upgrade to LED Bulbs: LED bulbs offer significantly brighter and more efficient light output compared to halogen bulbs. Make sure to choose bulbs that are compatible with your headlight housing and designed for automotive use. Important: Ensure the LED bulbs have a proper beam pattern to avoid blinding oncoming traffic. Projector headlights generally work best with LED upgrades. LED bulb sets typically range from $50-$150.
- Upgrade to HID (High-Intensity Discharge) Bulbs: HID bulbs are another option for improved light output. However, they require a ballast and proper wiring, making the installation more complex. Also important: HID bulbs should ideally be used with projector headlights to avoid glare. HID kits can range from $80-$200.
- Check and Upgrade Wiring: Older wiring can suffer from voltage drop, reducing the power reaching your headlights. Consider upgrading the wiring with thicker gauge wire and relays to ensure optimal power delivery. This is especially important when upgrading to higher-wattage bulbs.
Tools Needed: Screwdrivers, socket set, wire stripper/crimper, multimeter, headlight alignment tool (optional).
Fixed Headlight Conversion Options
If you're tired of dealing with pop-up headlight issues or simply want a more modern look, a fixed headlight conversion kit might be the right choice. Here's a rundown of the common options:
- Projector Headlights: These kits use projector lenses for focused and controlled light output, offering excellent visibility. They often have a sleek and modern aesthetic.
- Crystal Headlights: These headlights feature a clear lens and a multi-reflector design, providing a brighter and more even light distribution.
- "Brick" Headlights: A popular retro choice, these offer a rectangular, often larger, headlight assembly for a unique look.
Considerations When Choosing a Kit:
- Quality: Research the brand and read reviews to ensure the kit is well-made and uses quality components. Cheaper kits may have poor fitment, low-quality wiring, and subpar light output.
- Ease of Installation: Some kits are designed for straightforward bolt-on installation, while others require more extensive modifications. Consider your skill level and the tools you have available.
- Light Output: Check the specifications and reviews to ensure the kit provides adequate light output for your needs. Look for kits that use DOT-approved lenses and bulbs.
- Aesthetics: Choose a kit that complements the overall style of your S13.
Installation Tips:
- Read the Instructions Carefully: Before you start, thoroughly read the installation instructions provided with the kit.
- Test Fit: Before permanently installing any components, test fit them to ensure they fit properly.
- Use Dielectric Grease: Apply dielectric grease to all electrical connections to prevent corrosion.
- Properly Aim Your Headlights: After installation, properly aim your headlights to ensure optimal visibility and avoid blinding oncoming traffic. A headlight aiming tool can be helpful for this.
Approximate Cost: Fixed headlight conversion kits can range from $200-$800 or more, depending on the style, quality, and features.
Dealing with Aftermarket Headlight Issues
If you already have aftermarket headlights installed, you might encounter issues like:
- Condensation Inside the Lens: This is a common problem, especially with cheaper aftermarket headlights. Try resealing the lens with silicone sealant.
- Flickering Lights: This can be caused by loose wiring, a faulty ballast (if you have HID lights), or a bad ground connection.
- Burned-Out Bulbs: Replace the bulbs with compatible replacements.
Troubleshooting Tips:
- Check All Connections: Make sure all wiring connections are secure and free of corrosion.
- Test the Ground Connection: A bad ground connection can cause a variety of electrical problems. Clean and tighten the ground connection.
- Inspect the Wiring Harness: Look for damaged or frayed wires.
- Replace the Ballast (If Applicable): If you have HID lights, a faulty ballast can cause flickering or failure to illuminate.
Final Thoughts
Upgrading or repairing the headlights on your Nissan 240SX S13 can significantly improve your driving experience and the overall look of your car. Whether you're dealing with failing pop-up motors, dim lenses, or simply want a more modern aesthetic, there are plenty of options available. Take your time, do your research, and choose the solution that best fits your needs and budget. Remember, proper lighting is essential for safety, so don't neglect this important aspect of your S13. Good luck, and happy driving!