Nissan 240sx S13 Seat Mounting Bracket Specifications
So, you're looking to swap out the seats in your Nissan 240SX S13? Excellent choice! Upgrading your seats can significantly improve comfort, support, and even aesthetics. But before you dive in, understanding the seat mounting bracket specifications is absolutely crucial. Using the correct brackets ensures a safe, secure, and properly positioned seat. This article will walk you through the ins and outs of S13 seat mounting brackets, covering everything from OEM specs to aftermarket options and potential pitfalls.
Understanding the OEM S13 Seat Mounting System
Let's start with the factory setup. The S13's seats are mounted to the chassis using four bolts per seat. These bolts attach to a seat rail assembly. The seat rail assembly consists of two main components: the upper rails, which are directly bolted to the seat, and the lower rails, which are bolted to the car's floor pan. This design allows for fore-aft (front to back) seat adjustment.
OEM Dimensions and Bolt Pattern
The OEM bolt pattern on the floor pan is relatively unique to the S13. It's not a simple square or rectangle. The distance between the mounting points varies, and there's a specific offset. The bolt pattern looks something like this (imagine looking down at the floor pan with the seat removed):
(Front of car)
O-----A | | | | B-----C
(Rear of car)
Here's a breakdown of approximate distances (measurements are approximate and may vary slightly from car to car due to manufacturing tolerances):
- Distance A-C: ~400mm (15.75 inches)
- Distance B-D: ~420mm (16.5 inches)
- Distance A-B: ~360mm (14.17 inches)
- Distance C-D: ~380mm (15 inches)
The bolts themselves are typically M8 x 1.25 pitch. Always use grade 8.8 or higher hardware. Don't skimp on bolt quality when it comes to safety!
Potential Issues with OEM Brackets
While the OEM brackets are generally robust, they can suffer from a few common issues:
- Rust: Especially in regions with salted roads, the floor pan and bracket mounting points can rust. Inspect these areas carefully and treat any rust before installing new brackets. Wire brushing, rust converter, and potentially welding in new metal are all options depending on the severity.
- Bent Rails: Accidents or even just aggressive driving over time can bend the seat rails, making smooth seat adjustment difficult.
- Worn Seat Adjusters: The sliding mechanism on the rails can wear out, causing the seat to wobble or not lock securely.
Aftermarket Seat Mounting Options
If you're installing aftermarket seats, you'll almost certainly need aftermarket seat mounting brackets. These brackets adapt the universal mounting points on most aftermarket seats to the specific bolt pattern on the S13 floor pan. There are two main types of aftermarket solutions:
Universal Seat Brackets with Adapter Plates
This is often the most budget-friendly option. It involves using a universal seat bracket that bolts to the aftermarket seat. This universal bracket typically has a grid of holes, allowing it to fit various seat widths. Then, adapter plates are used to connect the universal bracket to the S13's floor pan. These adapter plates are specifically designed with the correct S13 bolt pattern.
Pros: Relatively inexpensive, versatile (can be reused with different seats). Cons: Can be less rigid than direct-fit brackets, requires more assembly and adjustment, may sit higher than direct-fit options, potentially more difficult to achieve perfect seat centering.
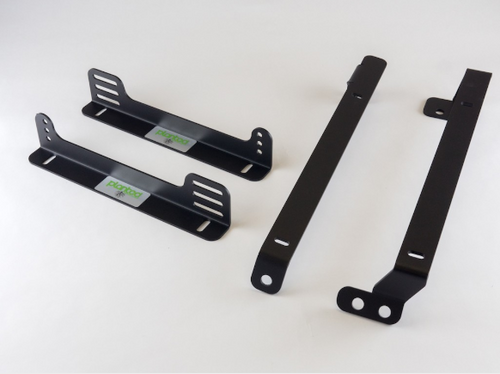
Direct-Fit Seat Brackets
These brackets are designed specifically for the S13 and often for a particular brand or style of aftermarket seat. They bolt directly to the S13 floor pan and provide a mounting surface that matches the seat's bolt pattern (or allows for some adjustment). They generally offer a lower seating position and increased rigidity.
Pros: Stronger and more rigid, lower seating position, easier installation, better fit and finish. Cons: More expensive, less versatile (designed for a specific seat style), can still require minor adjustments.
Key Considerations When Choosing Aftermarket Brackets
- Seat Compatibility: Ensure the bracket is compatible with your specific seat. Some brackets are designed for side-mount seats, while others are for bottom-mount seats. Pay attention to the seat's dimensions and bolt pattern.
- Seating Position: Consider the desired seating position. Some brackets offer a lower seating position than others. This is especially important if you're tall or wear a helmet while driving. Also consider if the brackets move the seat closer to the steering wheel or further away than your liking.
- Material and Construction: Look for brackets made from high-strength steel, such as 3/16" or thicker. Avoid brackets made from flimsy materials or with poor welds. Brackets are NOT the place to save money.
- Sliding Mechanism: If you want the ability to adjust the seat forward and backward, make sure the bracket includes a sliding mechanism. Some fixed brackets are available, but these are generally only used in racing applications. Verify the slide travel is adequate for your needs.
- Safety Certification: While not always mandatory, look for brackets that have been tested or certified by a reputable organization. This indicates that the bracket meets certain safety standards.
- Brand Reputation: Research the manufacturer. Are they known for quality and safety? Read reviews and see what other S13 owners have to say.
Installation Tips and Best Practices
Regardless of whether you're using OEM or aftermarket brackets, here are some important installation tips:
- Preparation is Key: Clean the floor pan thoroughly. Remove any rust, dirt, or debris. If there's significant rust, address it before installing the brackets.
- Test Fit: Before tightening any bolts, test fit the entire assembly. Make sure the seat sits properly and that the sliding mechanism (if applicable) works smoothly.
- Torque Specifications: Use a torque wrench to tighten the bolts to the manufacturer's specified torque. Overtightening can damage the threads or warp the brackets. Undertightening can lead to loose seats and potential safety issues. Refer to the factory service manual for OEM torque specs. Aftermarket bracket manufacturers will typically provide their own torque recommendations. If in doubt, err on the side of caution and slightly over-tighten to a safe level that is slightly above "snug".
- Use Lock Washers: Always use lock washers to prevent the bolts from loosening over time.
- Check Clearance: Ensure the seat has adequate clearance from the steering wheel, pedals, and other interior components. The last thing you want is for the seat to interfere with your driving.
- Harness Compatibility: If you're planning to use a racing harness, make sure the seat and brackets are compatible. Some seats and brackets have built-in harness slots.
- Seat Centering: Take your time to ensure the seat is properly centered in the car. An off-center seat can be uncomfortable and even affect your driving performance.
- Professional Installation: If you're not comfortable installing seat brackets yourself, seek the assistance of a qualified mechanic. Seat installation directly impacts your safety, so it's worth having it done correctly.
Common Problems and Troubleshooting
Even with careful planning, you might encounter some issues during seat bracket installation:
- Bolt Holes Don't Align: This is a common problem, especially with universal brackets. Double-check that you have the correct adapter plates for your S13. You may need to enlarge the bolt holes slightly (within reason) or use spacers to achieve proper alignment. But, if the holes are significantly off, that might be a sign you have the wrong brackets.
- Seat Sits Too High: This is often due to using thick universal brackets or adapter plates. Look for low-profile brackets or consider modifying the floor pan (if you're comfortable with welding) to lower the seat.
- Seat Slides Too Easily: If the seat slides too easily, the sliding mechanism may be worn or damaged. Try lubricating the mechanism or replacing it. If the slider is brand new, ensure there's no debris preventing it from locking correctly.
- Seat Wobbles: This could be caused by loose bolts, bent rails, or a worn sliding mechanism. Tighten all bolts and inspect the rails for damage. Replace any worn parts.
- Airbag Light: If your S13 is equipped with airbags in the seats (very rare, mostly JDM models), disconnecting the seat can trigger the airbag light. You may need to install resistors to simulate the airbag's presence. Consult with a professional if you're unsure how to do this safely. Airbag systems are NOT something to experiment with, as improper procedures can cause them to deploy unexpectedly.
By understanding the OEM specifications, carefully selecting aftermarket brackets, and following proper installation procedures, you can safely and effectively upgrade the seats in your Nissan 240SX S13. Remember that safety is paramount, so don't hesitate to seek professional help if needed. Happy driving!