Nissan 240sx S14 Rocket Bunny Kit
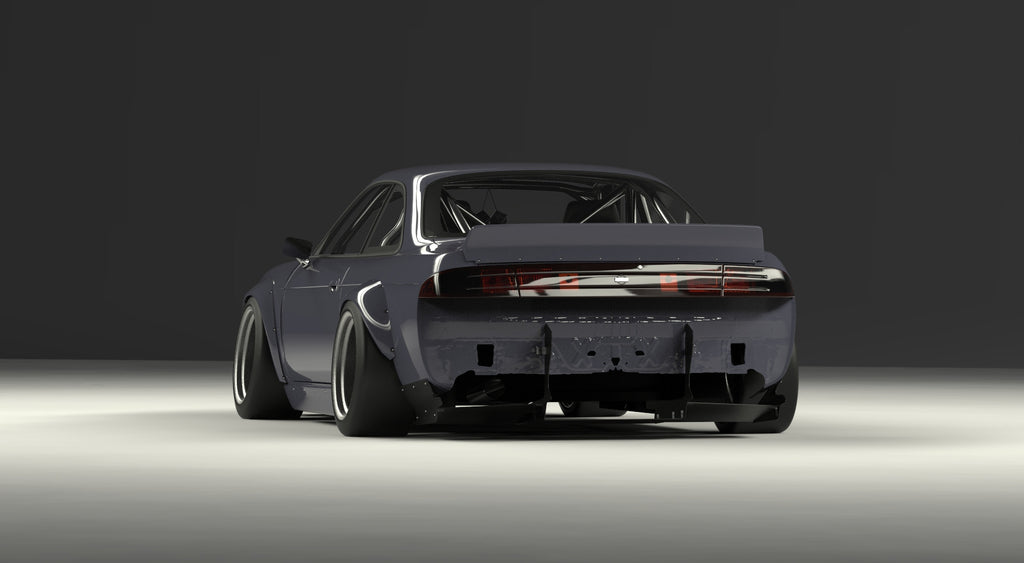
So, you've got yourself a Nissan 240SX S14 with a Rocket Bunny kit. Awesome choice! It's a head-turning look, no doubt. But let's be honest, installing and maintaining a widebody kit like the Rocket Bunny isn't always a walk in the park. This article is here to address some of the common challenges you might face and offer practical solutions to keep your 240 looking its best.
Problem 1: Fitment Issues During Installation
This is probably the most frequent headache. The Rocket Bunny kit, while visually stunning, isn't always a perfect "bolt-on" affair. Expect to do some adjustments. These kits are often hand-laid fiberglass and variations occur.
Solution: Preparation, Patience, and Professional Help
Preparation is key! Before you even think about bolting anything on, lay all the pieces out and inspect them thoroughly. Look for any obvious imperfections, warps, or inconsistencies. This is also a good time to mock-fit the pieces to the car before painting.
Mock Fitting: This involves temporarily attaching the Rocket Bunny pieces to your 240SX using clamps, tape, or even self-tapping screws in hidden areas. This will give you a clear idea of where modifications need to be made.
Common Fitment Trouble Spots and Solutions:
- Fender Gap: The gap between the Rocket Bunny fender and the door or quarter panel might be inconsistent. This usually requires sanding or adding fiberglass to the kit itself. Body filler (Bondo) can be your friend, but use it sparingly and properly!
- Bumper Alignment: The front and rear bumpers may not align perfectly with the existing body lines. Similar to fender gaps, this might require sanding, fiberglass work, or shimming with washers.
- Wheel Well Clearance: Even with wider fenders, you might experience tire rubbing. This is especially true if you're running aggressive wheel and tire setups. Consider rolling your fenders further, using adjustable suspension components, or choosing a less aggressive tire size.
- Panel Gaps: The overall panel gaps can be inconsistent. This often requires shimming the panels with washers or even custom-fabricated brackets.
Tools Needed:
- Safety Glasses and Dust Mask (Crucial when sanding fiberglass!)
- Sanding Blocks and Sandpaper (Various grits, from coarse to fine)
- Body Filler (Bondo) and Applicator
- Clamps (Various sizes)
- Tape (Masking and Duct Tape)
- Self-Tapping Screws
- Drill
- Angle Grinder (For minor trimming)
- Measuring Tape
- Level
- Socket Set and Wrenches
When to Call a Professional: If you're uncomfortable with fiberglass work or body modification, don't hesitate to seek professional help. A body shop experienced with widebody kits can save you a lot of time and frustration (and potentially money in the long run if you mess something up!).
Approximate Repair Cost: Professional fitment and bodywork can range from $500 to $2000+, depending on the extent of the modifications needed and the shop's hourly rate.
Problem 2: Maintaining the Fiberglass Finish
Fiberglass, while durable, is also susceptible to damage from UV rays, impacts, and improper cleaning. Fading, cracking, and chipping are common issues.
Solution: Proper Paint and Regular Maintenance
Quality Paint Job: Invest in a high-quality paint job with a UV-resistant clear coat. This will help protect the fiberglass from the sun's harmful rays and prevent fading.
Regular Cleaning: Wash your Rocket Bunny kit regularly with a mild soap and water solution. Avoid harsh chemicals or abrasive cleaners that can damage the paint.
Waxing and Polishing: Applying a wax or sealant every few months will help protect the paint and keep it looking shiny. Polishing can remove minor scratches and imperfections.
Protecting from Impacts: Be mindful of bumps, curbs, and other obstacles that could potentially damage the kit. Consider installing mud flaps to protect the rear fenders from rock chips.
Repairing Minor Damage: Small chips and cracks can be repaired with fiberglass repair kits. These kits typically include resin, hardener, and fiberglass cloth. Follow the instructions carefully and take your time to achieve a smooth, seamless repair.
Tools Needed:
- Mild Soap and Water
- Microfiber Wash Mitt
- Microfiber Drying Towels
- Wax or Sealant
- Polishing Compound
- Applicator Pads
- Buffing Machine (Optional)
- Fiberglass Repair Kit (Resin, Hardener, Fiberglass Cloth)
- Sandpaper (Various Grits)
Approximate Repair Cost: A quality paint job can cost anywhere from $1000 to $5000+, depending on the size of the kit and the quality of the paint. Fiberglass repair kits typically cost around $50-$100. Professional fiberglass repair can range from $100 to $500+ per panel, depending on the extent of the damage.
Problem 3: Suspension and Alignment Issues
Installing a Rocket Bunny kit often requires significant suspension modifications to accommodate the wider wheels and tires. Improper suspension setup can lead to poor handling, tire wear, and even damage to the kit itself.
Solution: Upgraded Suspension and Professional Alignment
Upgraded Suspension: Consider upgrading your suspension with coilovers or adjustable shocks and springs. This will allow you to fine-tune the ride height and damping to achieve the desired look and handling characteristics. Adjustable suspension arms are also highly recommended to correct the geometry after lowering the car. Incorrect geometry can cause bump steer and excessive tire wear.
Proper Wheel and Tire Fitment: Choose wheels and tires that are properly sized for the Rocket Bunny kit. Pay attention to offset, width, and tire aspect ratio to ensure that the tires clear the fenders and suspension components. Research what other owners are running. This is crucial.
Professional Alignment: After installing the suspension and wheels, get a professional alignment. A qualified alignment technician will be able to set the camber, caster, and toe to optimize handling and tire wear. Be sure to specify that you have a widebody kit, as the alignment settings may need to be adjusted accordingly.
Addressing Rubbing Issues: Even with proper suspension and alignment, you might still experience tire rubbing. Rolling or pulling the fenders further can provide additional clearance. Some owners even choose to trim the inner fender liners. If you are not comfortable rolling fenders, seek the help of a professional. Improperly rolling fenders can damage the paint!
Tools Needed:
- Jack and Jack Stands
- Socket Set and Wrenches
- Torque Wrench
- Coilovers or Adjustable Shocks and Springs
- Adjustable Suspension Arms (Camber, Toe)
- Fender Roller (Optional)
Approximate Repair Cost: Coilovers or adjustable shocks and springs can range from $500 to $3000+, depending on the brand and features. Adjustable suspension arms typically cost around $200-$500 per set. A professional alignment usually costs around $100-$200. Fender rolling can cost around $50-$100 per fender.
Problem 4: Maintaining the Kit's Integrity Over Time
Widebody kits, especially fiberglass ones, can be prone to cracking and damage over time due to stress, vibrations, and environmental factors.
Solution: Reinforcement and Regular Inspection
Reinforcement: Consider reinforcing the stress points of the kit, such as around the mounting points and edges, with additional fiberglass or carbon fiber. This will help prevent cracking and increase the kit's overall durability.
Regular Inspection: Inspect the kit regularly for any signs of damage, such as cracks, chips, or loose mounting hardware. Addressing these issues early can prevent them from becoming more serious problems.
Proper Storage: If you're storing your 240SX for an extended period, cover the Rocket Bunny kit to protect it from the elements. Consider using a car cover with a soft lining to prevent scratching the paint.
Avoiding Extreme Temperatures: Extreme temperatures can also damage fiberglass. Avoid leaving your car in direct sunlight for extended periods, especially in hot climates.
Tools Needed:
- Fiberglass or Carbon Fiber Repair Kit
- Sandpaper (Various Grits)
- Resin and Hardener
- Reinforcement Mesh
- Inspection Mirror
- Socket Set and Wrenches
Approximate Repair Cost: Reinforcing the kit can cost anywhere from $200 to $1000+, depending on the extent of the work. Addressing minor damage can typically be done with a fiberglass repair kit costing around $50-$100. Extensive damage requiring professional repair can range from $100 to $500+ per panel.
By addressing these common issues and taking proactive measures, you can keep your Nissan 240SX S14 with the Rocket Bunny kit looking its best for years to come. Remember, patience, attention to detail, and knowing when to seek professional help are crucial for a successful and enjoyable experience. Happy building!